Can You Stain MDF? (Step by Step Guide)
MDF, or medium density fiberboard, is one of the more popular manufactured woods on the market for a variety of reasons. It’s affordable, lightweight, and relatively strong for the price. So what’s not to love?
But can you stain MDF to get the look you desire?
I’ll answer that question and much more. Let’s dig in!
What Exactly is Medium Density Fiberboard?
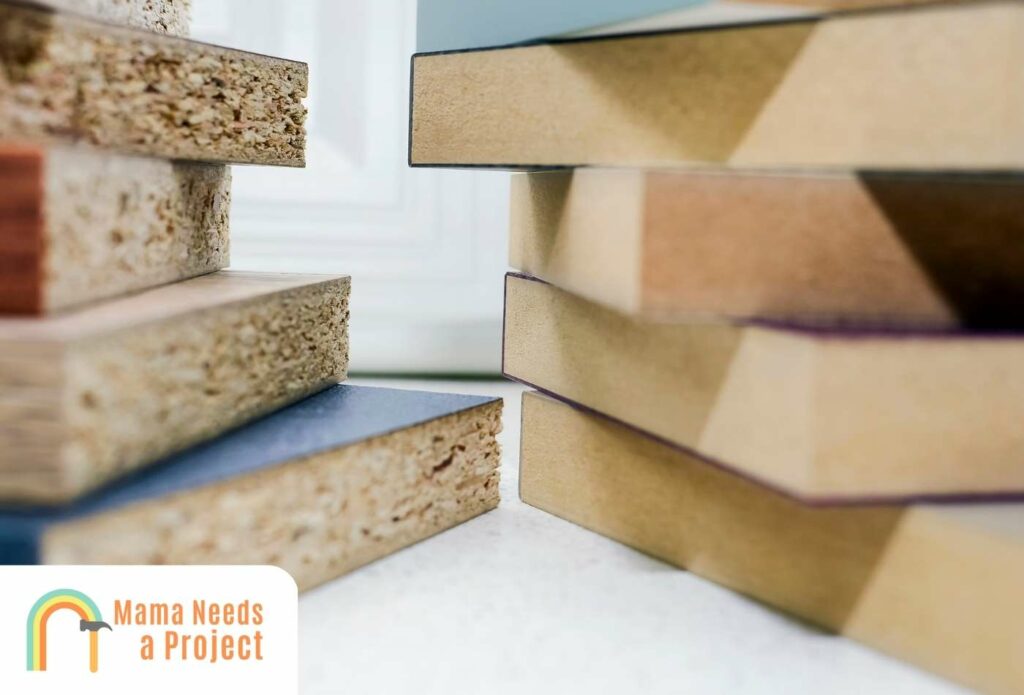
Medium density fiberboard is made by pressing together boards made of wood fibers with extreme heat so they bond together in a variety of sizes.
It’s relatively strong given that it’s made of wood fibers, but it’s no match for natural wood.
You can purchase MDF board at your local store and it’s very affordable – which is why so many people and manufacturers use it.
Can You Stain MFD Boards?
Yes, MDF can be stained if you follow the correct method and techniques. While it’s difficult to get your MDF to resemble natural wood because the lack of a wood grain, there’s no doubt you can give it a better appearance by staining. However, you’ll need to follow the right technique to get the best result. Because it’s different than natural wood, there are a few added steps you’ll need to complete.
Can You Stain MDF Doors?
Yes! Just as you can stain normal MDF boards, you can stain MDF doors too. Once again, you’ll need to follow the proper technique to ensure your stain stays on the surface, but it’s pretty simple.
Can You Stain MDF Cabinets?
Yes! You can stain MDF cabinets just like other MDF surfaces. You’ll need the same supplies as other MDF surfaces.
Be sure to stain evenly and allow it to dry between coats for the best finish. Check out the video below for more help!
Can You Stain MDF Furniture?
Absolutely! You can paint or stain MDF furniture similar to other wood surfaces. When you stain on MDF, be sure to follow the right technique to ensure an even finish. Because some parts of MDF boards absorb stain easier than others, it’s vital to use the right method.
Staining MDF furniture can be an awesome way to match decor in your room as well as giving it some additional protection
How to Stain MDF (Step by Step)
1. Prep the Area & Gather Tools
The first step to stain MDF wood is to clear out the area and gather the tools and supplies you’ll need.
Here’s what you’ll need:
- Gloves, goggles, and other safety gear
- Stain
- Polyurethane or varnish
- Sander
- Chemical Wood Stripper
- Paint brush, a dry cloth, or sponge for applying wood stain
- Rags and clothes
I like to put my supplies on a sturdy side table aside from my work area so they’re easily accessible but won’t get in the way.
It’s also a good idea to put down a drop cloth, especially if you’re working indoors. Because you’ll be sanding the surface and working with stripper– you’ll want to have proper ventilation so you don’t inhale dangerous sanding dust or fumes.
I highly recommend working in a garage or outdoors for this task to stay safe. If you can’t, just make sure you have some fans in the room to keep you safe.
2. Strip the Surface
The first actual step in staining MDF is stripping the surface of it.
If you’ve never used a wood stripper before, it’s important that you use safety gear to avoid harmful fumes that it can produce.
This step is even more critical if your MDF board was previously stained.
Once applying the stripper and giving it time to sink in, you can use a scraper tool to remove it from the stripped surface.
It usually takes around 10 to 15 minutes for strippers to work before you can start removing the surface, but it’s important to check the label of the product you’re using just in case.
Once you’ve removed the stripper, allow the surface to dry.
3. Apply Filler
If there are any areas on your MDF surface that has cracks, holes, or other perforations, you can use a wood filler or wood putty to patch them to get a smooth surface.
4. Sand
Next, you’ll need to sand the surface of the MDF.
You can use an electric sander like and orbital or belt sander or you can use smaller sanding blocks, depending on how large the surface is.
If you’re staining a large MDF board like a door or large piece of furniture, go with a power sander. It’ll make your just so much easier, trust me.
You can use a medium grit sandpaper like 120 grit for this project.
5. Clean
Once you’ve sanded, you’ll need to clean the area again. You don’t want any sand left on the surface when you stain, otherwise you’ll be left with a gritty finish that nobody wants.
You can use a shop vacuum or a damp rag to remove the remaining dust.
6. Stain the Surface
Finally, it’s time to pull out your wood stain so you can apply it.
I’d recommend using an oil based wood stain for this project because of the nature of MDF wood. While sanding it will make it more porous, it’s still not quite as receptive to stain as natural wood is.
You can use a rag, sponge, or a brush for applying stain. You want to aim for thin layers with even coverage.
Don’t be afraid to give it several thin coats of stain to get a darker finish.
As far as the actual technique goes when staining MDF, you’ll want to brush or apply the wood stain with long strokes.
If you’re using a rag to apply your stain, you might want to go over the surface a few times as the cloth can’t get into the small cracks quite as well as a bristle brush would.
7. Allow it to Dry
Once you’ve applied the wood stain, give it time to dry. How long it takes stain to dry will depend on the type of stain you use and how thick it’s applied.
For example, oil based paints or stains will take longer to dry than water based options.
8. Apply Polyurethane Coat
Want to give your MDF surface some added protection or a nice glossy finish?
Applying a polyurethane coat or varnish can be an excellent choice to seal MDF surfaces.
Just like with applying your stain, you’ll want to apply your finish evenly with smooth strokes.
Depending on how you want your finish to look, it’ll likely require a few polyurethane coats, but this is up to you.
9. Clean Up
Finally, you’ll want to clean up your area, and clean any supplies (like brushes) that you used.
It’s essential to clean polyurethane off your brush immediately after using it to get the maximum life out of your brush. You’ll also want to remove polyurethane from your hands or body if any of it splattered while applying.
Tips When Staining MDF
1. Think About the Edges
Because the edge of medium density fiberboard are more porous than the surface, staining them won’t give you the same protection or coverage as a paint would.
This means you might want to use a coat of primer and paint if the edges are exposed on your project.
Need more help? Check out the video below!
2. Test First
I can’t tell you how many times I’ve applied a paint or stain only to be disappointed with the color once dried.
I highly recommend testing your stain on the MDF boards in a small area before applying it over the entire surface.
I always try to bring a scrap piece of wood when picking up stains and test it on my piece before purchasing.
3. Use the Right Applicator
What you use to apply stain on your MDF furniture, cabinets, or other surfaces can have an impact on the final results.
And this is one thing people have strong opinions on!
Some people prefer to use a bristle brush, others prefer a foam brush, and some people prefer a lint free rag.
Ultimately, I recommend using what you’re comfortable with.
Each method has some benefits and drawbacks you’ll need to consider. For example, using a foam brush can be much faster than using a rag. But I’ve found that it can leave more uneven coverage because of how thick is applies stain.
On the other hand, a lint free rag can give you perfect coverage, but it will take longer to apply because of how thin it applies. You’ll often need several coats when using a rag.
How to Remove Stains from MDF
If you MDF board is stained, you might be wondering how you can remove them.
First, you can use a damp rag to remove any surface stains that exists.
If this doesn’t remove the stain, you’re going to need something more powerful. A rubbing alcohol should get the job done in many cases. Just rub it on the stain until it is removed.
Finally, you can sand the surface to remove any additional debris on your MDF board.
FAQs
Is it better to paint or stain MDF?
Painting or staining MDF will depend on the look you’re going after. If you’re looking for a more vibrant color, it’s probably better to paint MDF. However, if you’re looking for something darker and natural, staining MDF might be a better choice. One thing to keep in mind is that the edges of MDF are more porous, which means a stain might not give you the coverage or protection you need.
How do you prep MDF for staining?
To prep an MDF surface for wood stain, there are a few critical steps. First, you’ll need to sand the surface to remove the MDF coating. Next, you can use a wood filler to patch the holes in your boards and sand again once dry. Finally, you can apply a thin layer of wood stain on your boards.
What is the best finish for MDF?
If you’re looking to finish your MDF board, there are several options. You can use shellac, polyurethane, or varnish MDF and each has their own benefits. Many people prefer to shellac for a more natural finish that’s great at sealing the surface and edges of the wood.
Can You Paint MDF?
Yes! You can paint MDF just like you can stain it. However, just like staining, you’ll need to prep the surface by sanding and removing any existing finish on the surface. It’s also to prime the surface before painting to get a stronger bond with the surface.
How Much Paint Should Be Used When Staining MDF?
The amount of paint you use when staining your MDF board will depend on the surface area you’re staining and how dark you want the result. If you’re using a light colored wood stain and want a darker finish, you may need several coats of stain. If you’re using a darker stain, you might be able to get away with just a single coat.
Final Thoughts on Staining MDF
Staining MDF surfaces can be a great way to make your furniture, cabinets, or woodworking project look better without having to spend a fortune.
You can both paint and stain MDF board by using the right methods to get the look you desire.
It’ll take a few hours from start to finish (including drying time) but it’s well worth it.


