How to Cut a Straight Line with a Circular Saw (4 Simple Ways!)
Over the years I’ve used circular saws for many different projects. It’s a great and affordable tool to have in your workshop! If you’re just starting to build up your tool set, a circular saw can be a great substitute for a more expensive table saw.
You can use your circular saw to get precise cuts and today I’m sharing 4 ways to cut a straight line with a circular saw.
This post came about because I recently started a woodworking project that uses super heavy 2x8x8 boards. I needed to cut one of the 2x8s into 4 smaller pieces and instead of trying to balance the board on my miter saw cart I decided to cut them using my cordless circular saw – we just got a cordless one and I LOVE IT!
While setting up the board to cut with my circular saw I realized there was a time when I would have had no idea how to do this! (And it wasn’t that long ago.)
Power tools can be overwhelming, especially when you’re just starting out – they definitely were for me. In this post, I’ll explain how to cut straight with a circle saw and much more. Let’s get started!
4 Ways to Cut a Straight Line with a Circular Saw

1. Cut a straight line without a guide
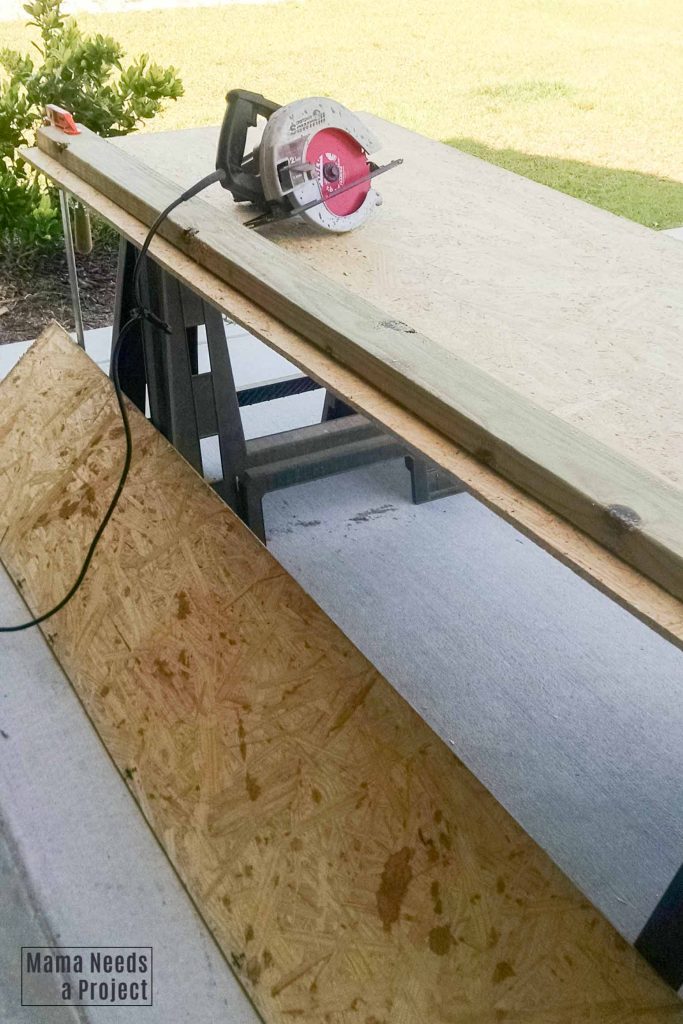
For a recent project I used my circular saw to cut a straight line on a 2×8 without a guide. If the board you’re cutting is any wider than 8” I recommend cutting with a guide. I have instructions on how to set up a guide for your circular saw below.
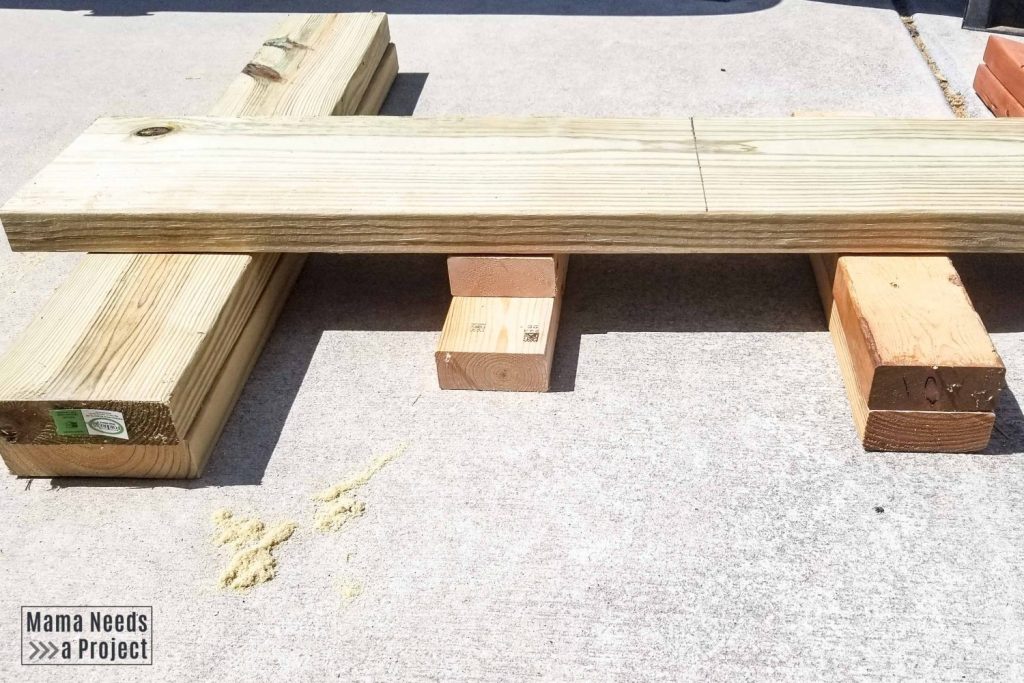
Prop your board up
Set the board you want to cut on some sawhorses or, set it on some scrap wood. I stacked 2 scrap 2x4s underneath my board at a few spots to support it. If you are cutting on the ground you want to make sure that the board is high enough that your circular saw blade will not hit the ground when you are cutting. Two stacked 2×4’s is plenty of height.
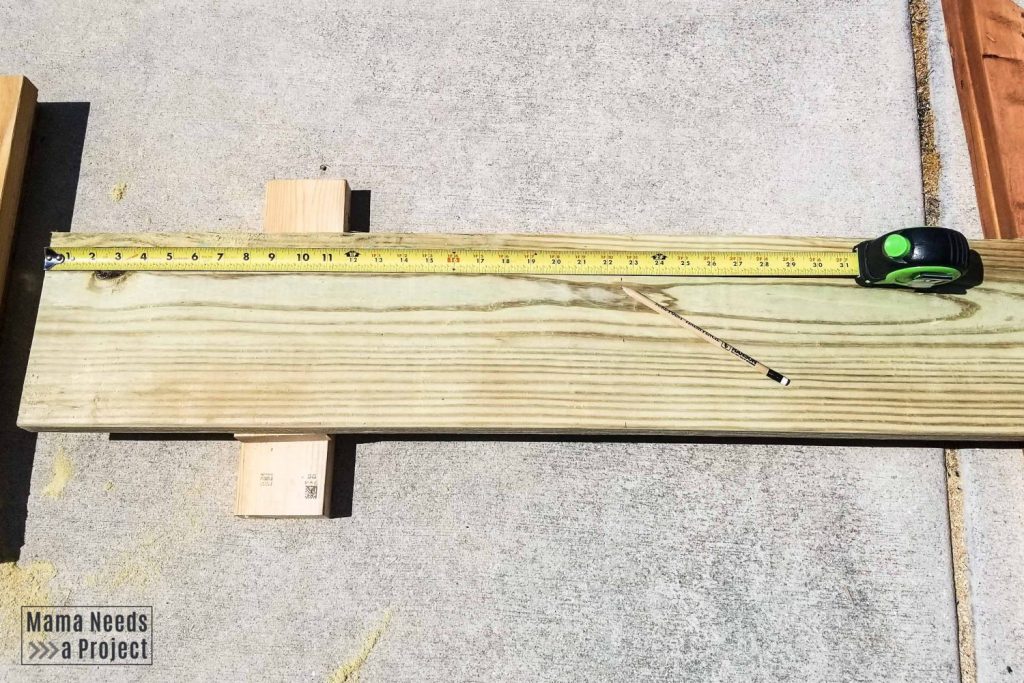
Mark your Cut
Measure your board and mark a line where you want to cut. Take the measurement at 3-4 points and mark a few dashes. Then, use a straight edge to draw a line connecting the dashes.
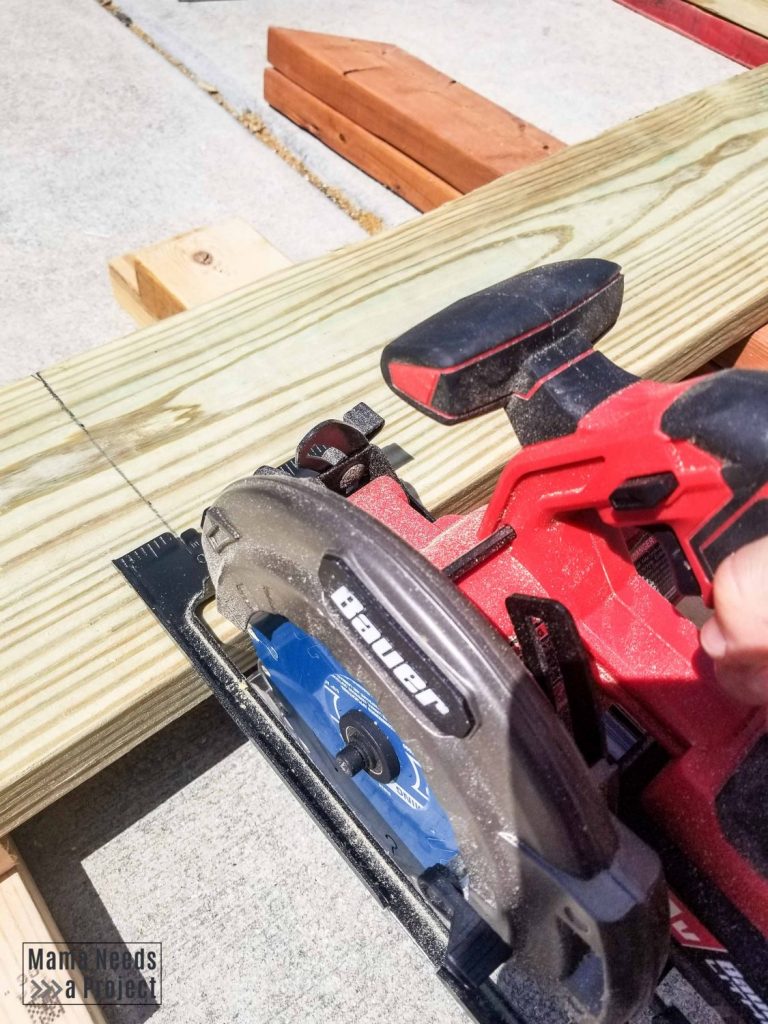
Make the Cut
Line your circular saw up with the line you drew. When you turn your circular saw on, make sure that the blade is not touching the board. You don’t want the blade touching anything when you start it. Follow the line with the guide on your circular saw to make your cut. Keep the saw level on the board while you are cutting. Release the power button of the saw when you have cut through the entire board.
Using a guide to cut with your circular saw is a great way to ensure a straight cut and it’s quick to set up. I recommend using a guide for making longer cuts and for cutting thinner wood like plywood.
2. Make a DIY guide to cut a straight line
You can easily make your own cutting guide to use with your circular saw. To do this you will need a straight board that is at least as long as the piece of wood you are planning to cut. You can also use a long level as a guide – I often do this because I know my level is straight. You will also need a couple wood clamps.
First, measure the distance you want to cut. Mark your measurement in several places with a dash and then connect to the dashes to create a straight line to cut across the wood.
Next, measure the distance between the left edge of the bottom guard on your circular saw and the blade. Mine is 1 1/4”. Yours should be something similar. The measurement might be marked on the guard, but I recommended measuring yourself to get a more accurate distance.
Then, mark a dash on the edge of your board parallel to the line you already drew at the distance of the guard from the blade. Hold your circular saw up to the edge to confirm the blade and edge of the guard line up to the lines. If the measurement is correct, go ahead and mark another dash the same distance on the other end of your board.
Last, take your straight edge (a straight board or level) and clamp it to your board so that it lines up with the dashes. This board is your cutting guide.
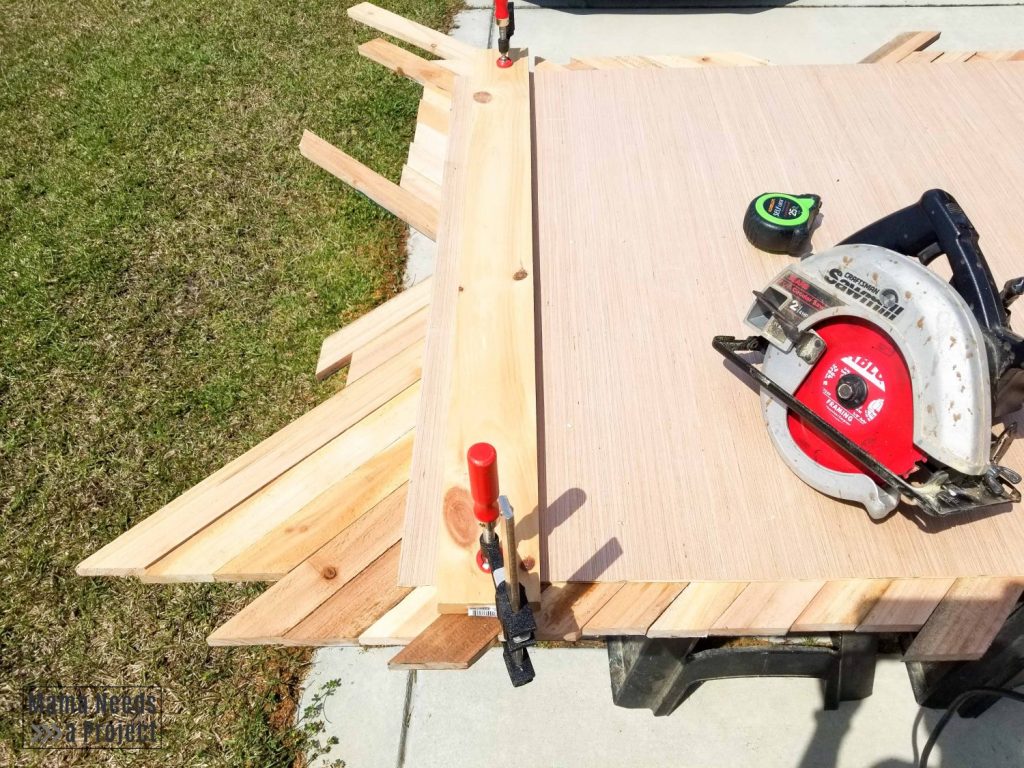
This is the method I used for my Big X Wood Quilt and my DIY Geometric Wall Art.
When you’re ready to cut, hold your circular saw so that the edge of the guard is against your cutting guide as you’re cutting. Make sure that the board you’re cutting is well supported so that it doesn’t fall or fold in on itself while you are using the circular saw. If you can, clamp the board to your sawhorses to prevent it from moving while you cut.
3. Cut Straight Lines with a Kreg Rip-Cut
I also own a Kreg Rip-Cut Circular Saw Guide that makes it super easy to cut straight lines with a circular saw without having to make a DIY guide. This has been the way for me to get the most precise cuts with my circular saw.
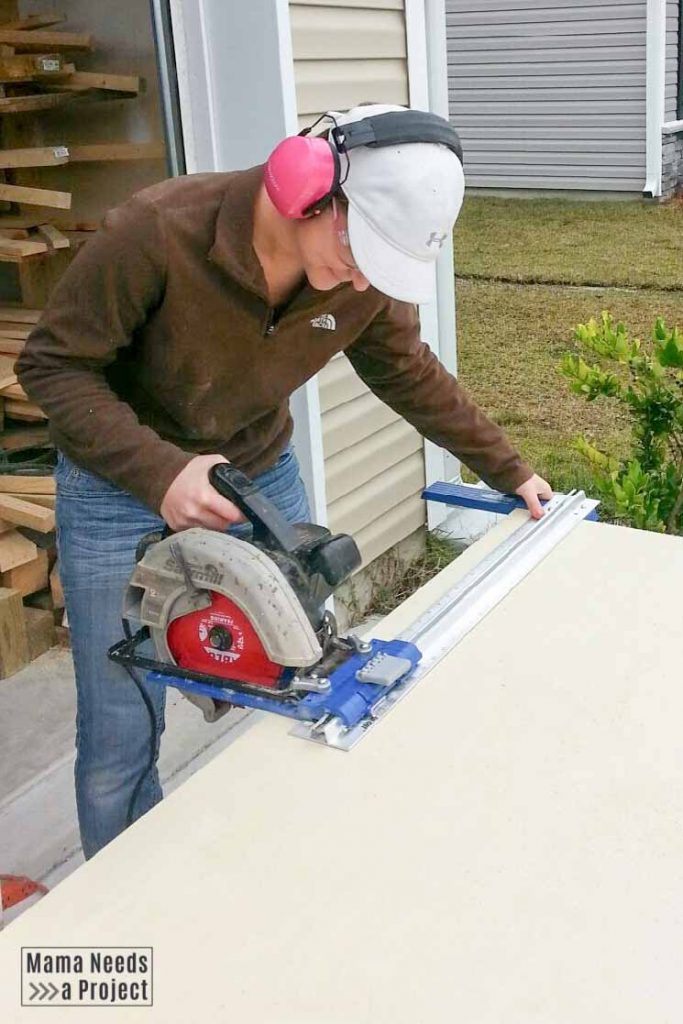
This tool is great if you’re going to making several cuts because you don’t have to measure out and mark your wood each time. Instead, you just set the guide to the measurement you need and line it up with the straight edge of your board. It’s much easier!
The Rip-Cut can cut up to 24” wide and is a great way to use your circular saw as a substitute for a table saw when you’re just starting to build up the tools in your workshop.
If you need to make a straight line, a table saw could be a better option. Check out my circle saw vs table saw comparison for more info!
4. Use a Speed Square
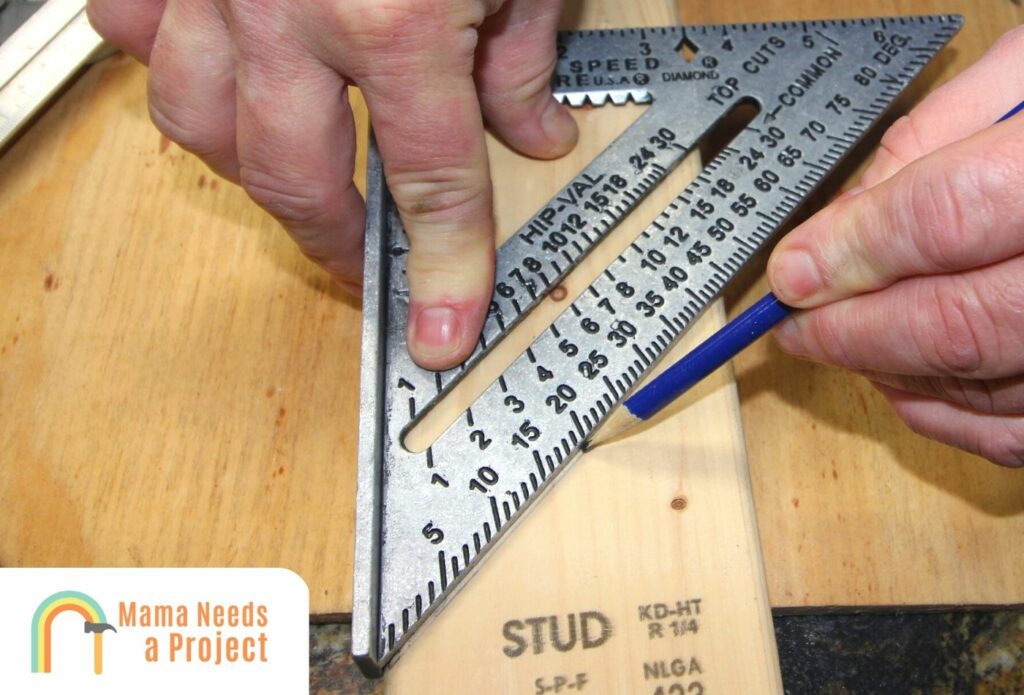
If you’re looking for an easy way to cut straight with a circular saw, using a speed square is a wonderful idea.
With this method, you’ll just need to use the square as a guide for your cut. You can mark the line ahead of time, or you can just maneuver the saw with the edge of the square to create a perfectly straight cut.
The chances are you already have a square laying around, making it a great option for anyone. You can also check out some of my favorite squares for woodworking.
Final Thoughts on Cutting a Straight Line with a Circular Saw
Circular saws can certainly be tricky, especially when making straight cuts – so hopefully you’ll be more confident than ever on your next cut.
There are four easy ways to make straight cuts with circle saws: making a cut without a guide, making a DIY guide, and using a Kreg Rip-Cut, or using a speed square.
I hope these quick circular saw tips are helpful to you! If you have any questions, leave them in the comments below!
And, if you like articles with tool tips like this one, let me know! I’d love to create more content that will help you get started with woodworking.