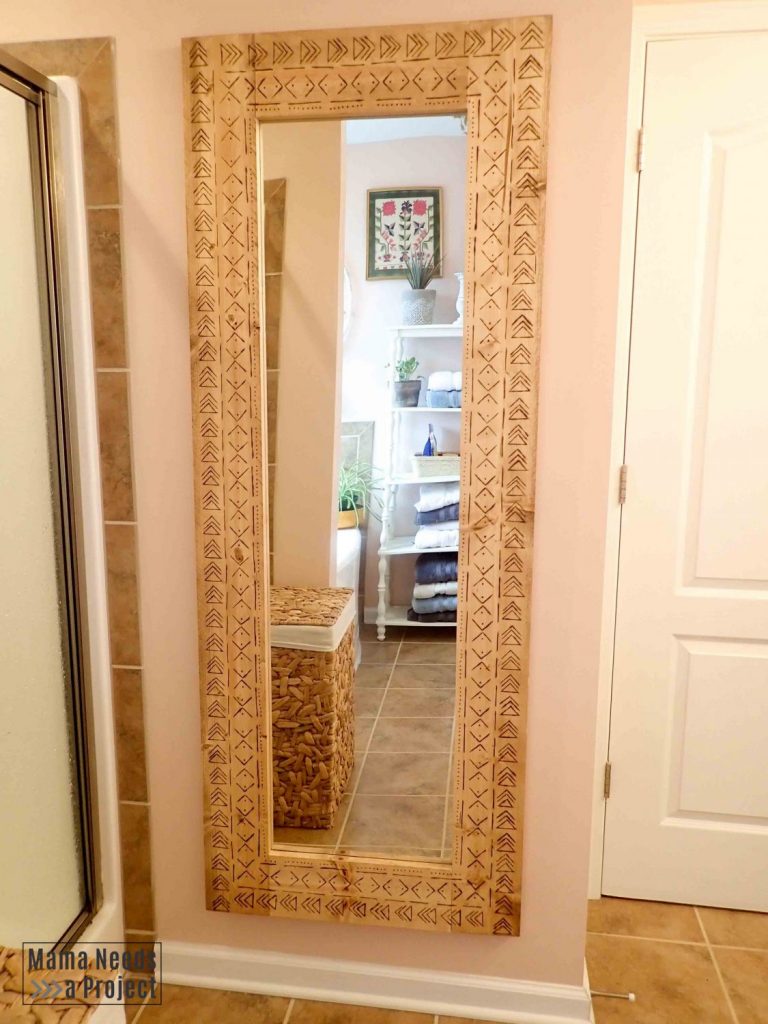
DIY Boho Full Lenth Mirror
Enjoy a quick tutorial, printable woodworking plans and printable mudcloth pattern template for this DIY Boho Full Length Mirror.
Earlier this month I decided it was finally time to upgrade my very old over-the-door bathroom mirror. I’ve been staring at this cheap thing for years while dreaming of a big, thick framed full length mirror instead.
Pretty quickly after I started searching for a mirror online I realized that they were way more expensive than I expected.
So I thought, why not DIY it?
My first attempt did not go well. If you follow me on social media you may have seen the video where I totally cracked the mirror I was working on! Yep, 7 years of bad luck for this lady.
So, it was back to the drawing board. And, after some thought I came up with a new plan and, you guys, it’s so good!
Pin for later!
This DIY boho mirror is seriously beautiful!
DIY Boho Mirror Design
I have been seeing a lot of mudcloth designs in boho decor lately and wanted to find a way to bring a mudcloth inspired pattern to this project.
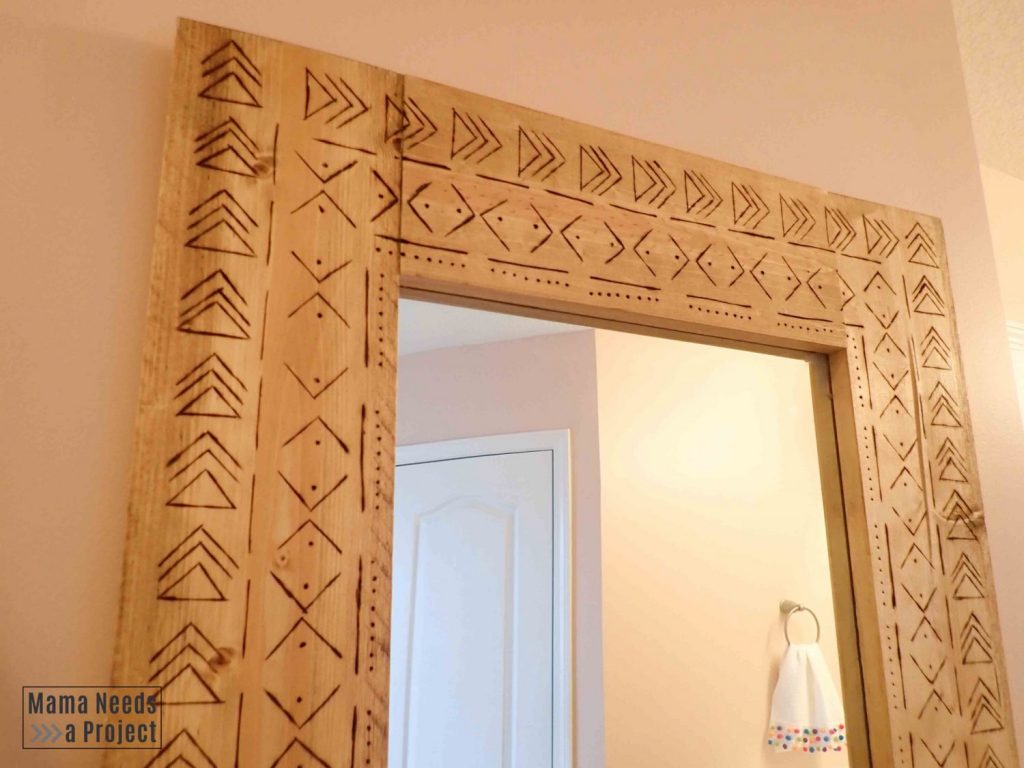
If you’re not familiar with the term mudcloth, it is a traditional African fabric dyed with fermented mud to create patterns. The patterns often include a lot of lines, arrows and dots.
I absolutely love the unique handmade look of mudcloth, and I think it transferred really well over to wood burning.
This post contains affiliate links.
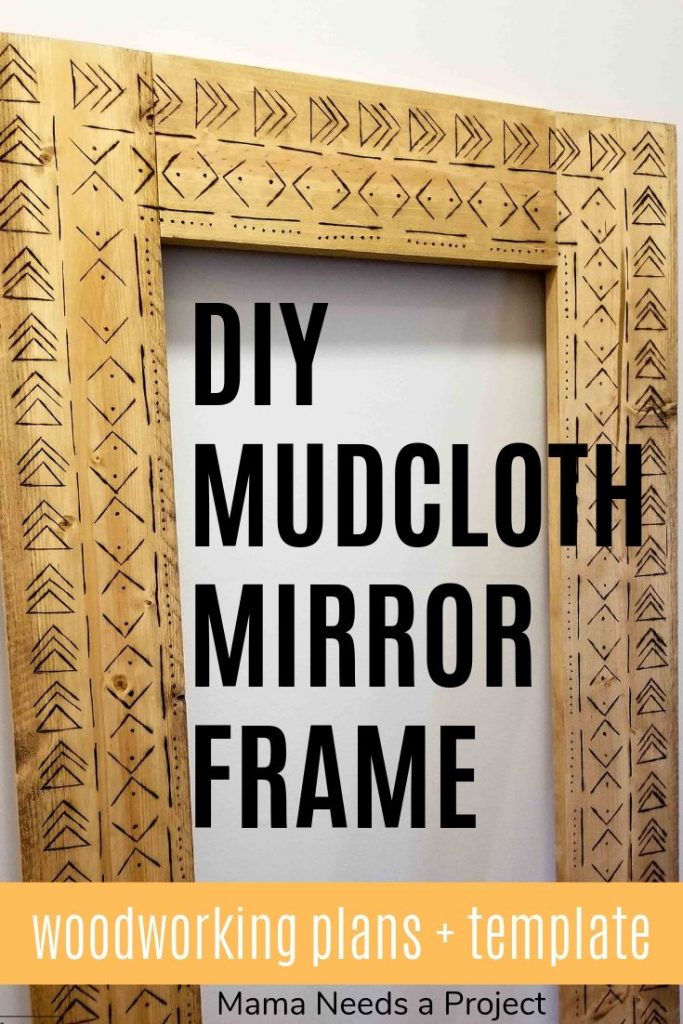
DIY Boho Mirror Woodworking Plans
All of the woodworking plans in my shop include a lumber list, cut list and supply list. They also feature digitally rendered images and detailed instructions that walk you through each step of the build. I use easy-to-understand language that’s perfect for beginners.
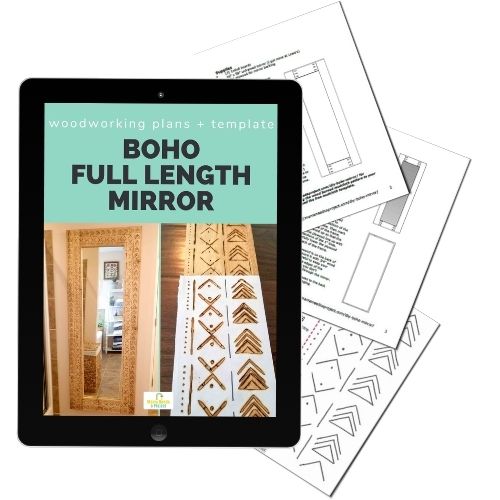
I’ll go over some of the details of this project here. You can grab the full instructions in the printable woodworking plans in my woodworking plans shop.
Supplies
- Printable DIY Boho Full Length Mirror Woodworking Plans + template
- (3) 1x6x8 boards
- 16” x 58” unframed mirror (I got mine at Lowe’s)
- 1/2″ plywood for mirror backing
- miter saw
- Kreg Jig
- 1 1/4″ pocket hole screws
- 3/4” wood screws
- Liquid Nails glue
- wood glue
- wood stain
- wood burning pen
- d-ring hooks
Cut List
- (2) 1×6 @ 15”
- (2) 1×6 @ 68”
- Plywood 66” x 24”
Completed Dimensions
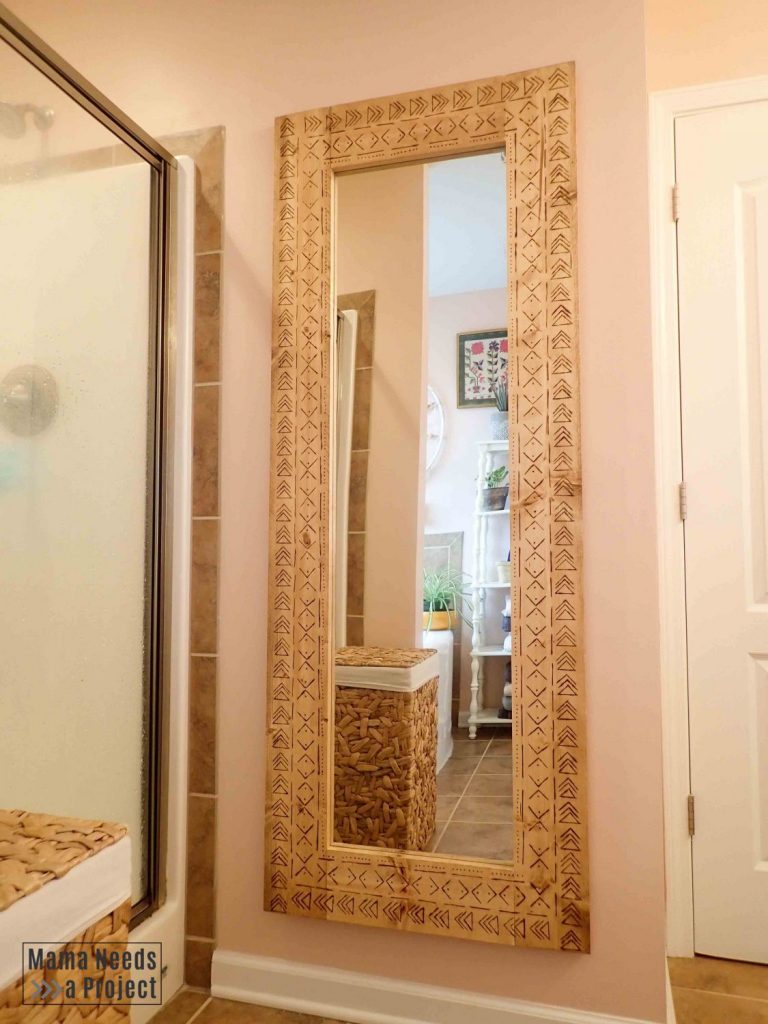
The completed mirror measure 26” inches wide and 68” tall. It is about 1.25″ thick.
Build a DIY Boho Mirror
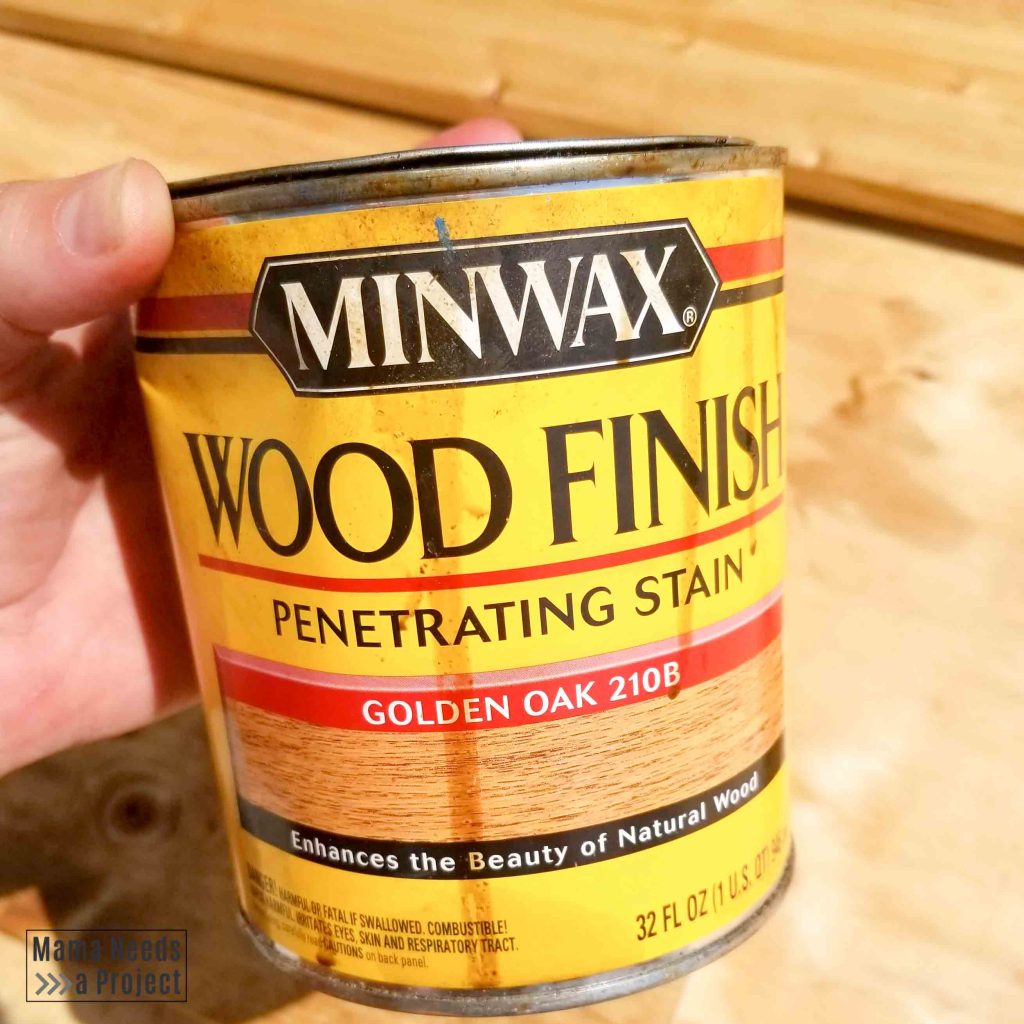
1. Sand & Stain
It is easiest to sand and stain the mirror frame before assembly. After cutting the 1×6 boards to size, use a medium/light grit sand paper to sand the boards until smooth.
Then, stain both sides of the wood. You will want to stain both sides because the mirror will reflect the back of the frame. I used Minwax Golden Oak and applied it to the wood with a rag.
Learn the best way to choose and apply wood stain.
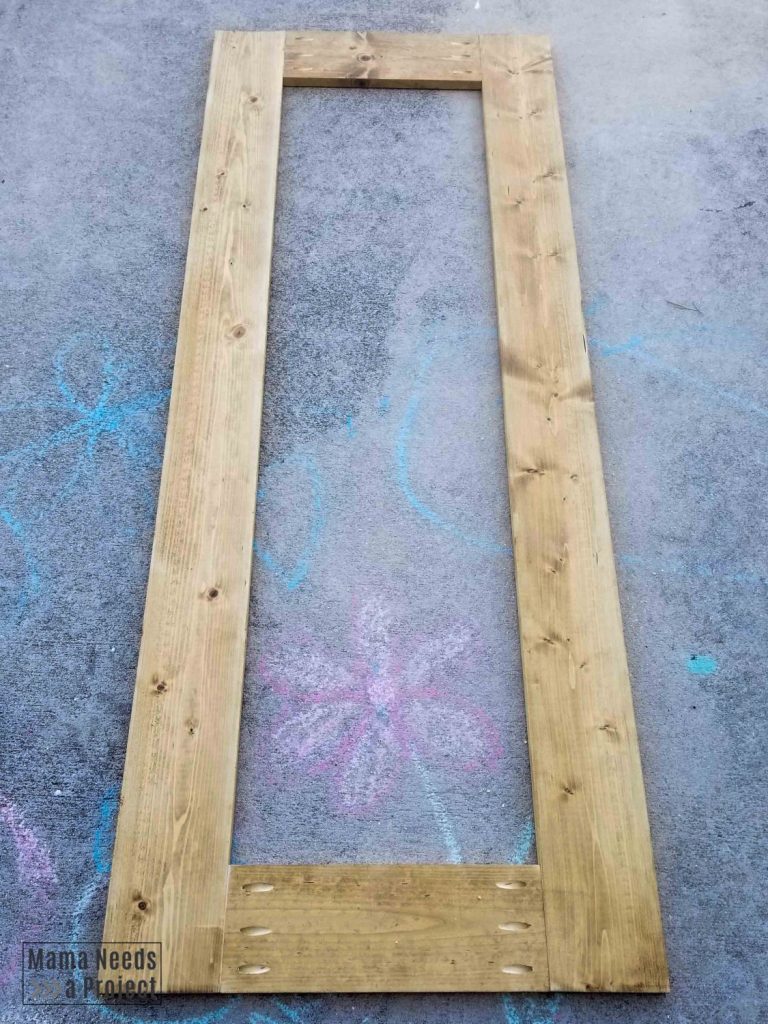
2. Assemble Frame
The frame assembly is quick and simple. Drill 3 pocket holes in each of the short sides of the 1x6x15” boards using a Kreg Jig. Be sure to adjust the settings on your Kreg Jig for a 3/4″ thick board before starting.
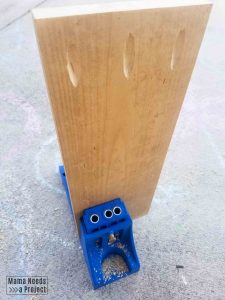
Then, connect the 1x6x15” boards to the 1x6x68” boards to create the rectangle frame. Use wood glue and 1 1/4” pocket hole screws.
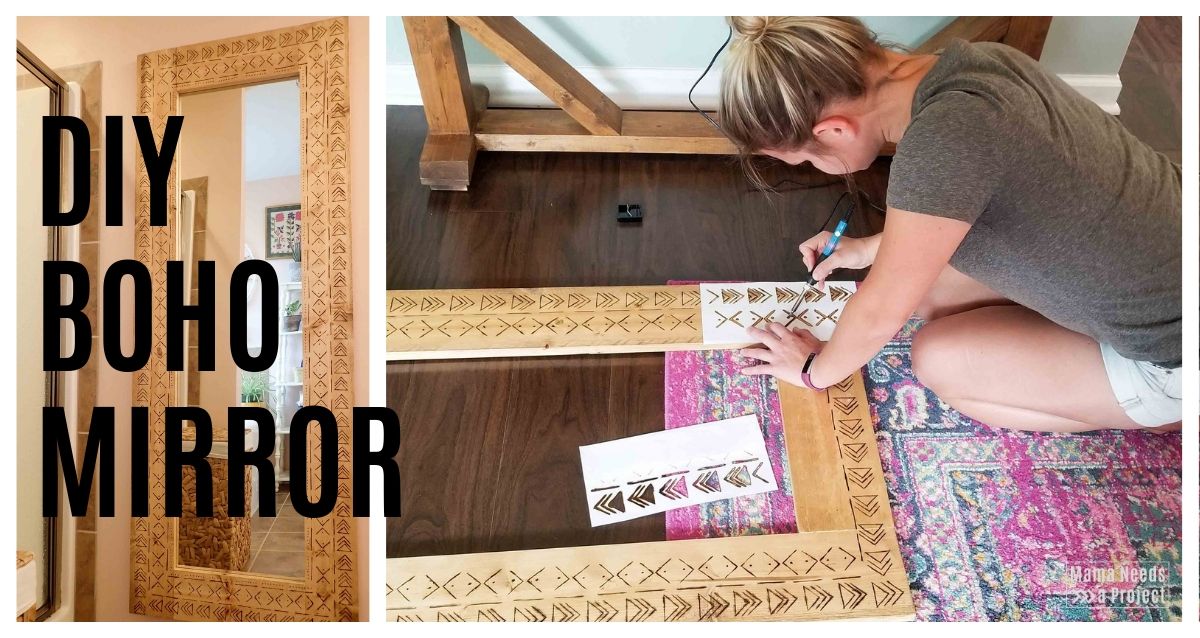
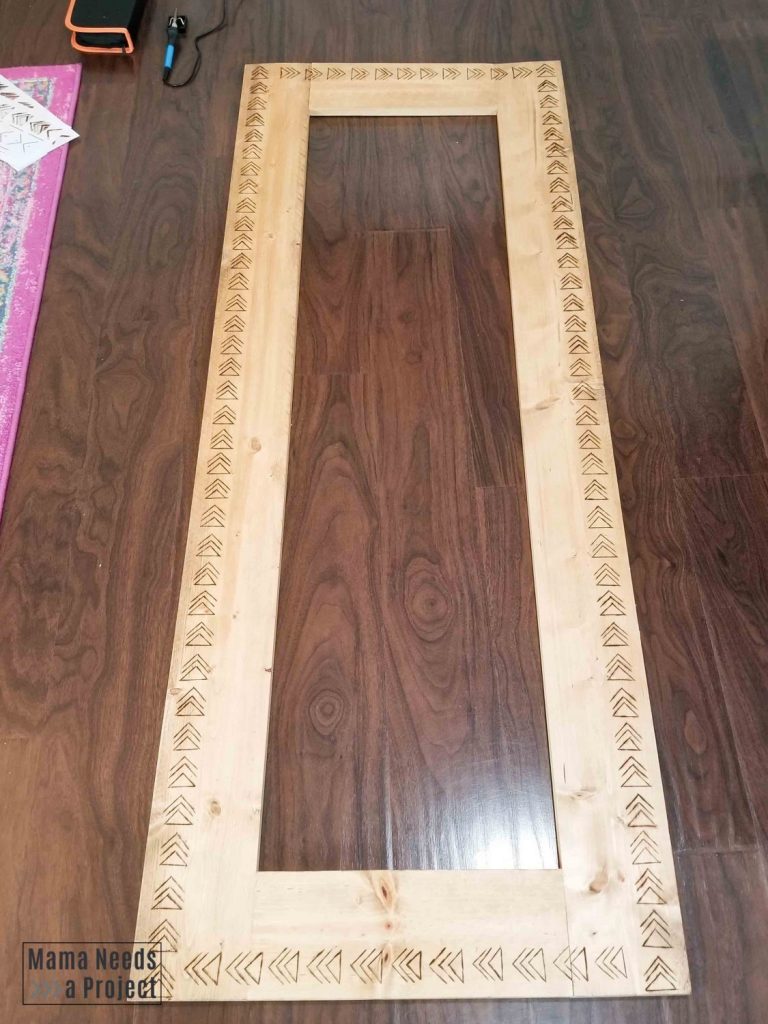
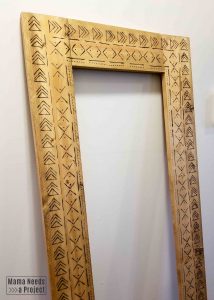
3. Wood burn Mudcloth Design
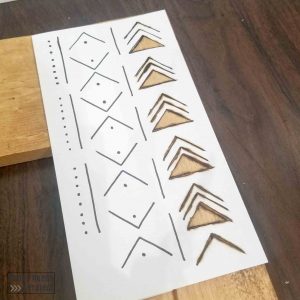
Once the frame is complete it’s time to add the mudcloth design. I created a mudcloth template to use for my DIY Boho Mirror that is included in the woodworking plans!
Keep in mind that the template is hand drawn and a bit imperfect. That variation and slight imperfection is my favorite feature of mudcloth so it’s just right for my design aesthetic. However, if you’re looking for perfectly straight geometric lines, this template might not be for you.
Using the Mudcloth Template
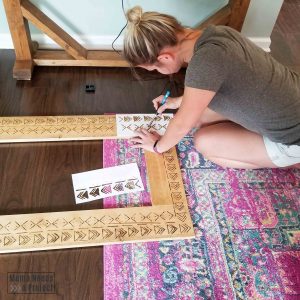
First, print out the mudcloth template and cut along the indicated line.
Then, line the printed pattern up with the top right corner of the frame. Use a wood burning pen to burn the outer column of the design into the wood (the upward arrows & triangle). Continue with the outer design all the way around the frame.
I found that the best way to transfer the pattern onto the frame was to do one column at a time. By doing one column at a time I could make the pattern flow better around the corners like one big connected loop instead of a separate pattern set on each board. That might sound confusing, but once you start transferring the pattern it will make sense.
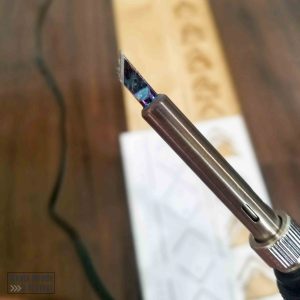
This is the wood burning pen and kit that I used.
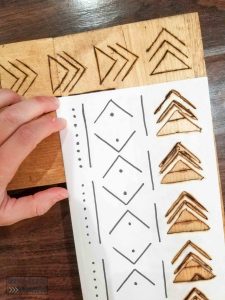
After finishing the outer column of the pattern, move on to the next column in (the short straight line). Line up the template so that it is flush against the outer edge of the frame and the bottom of the first triangle in the outer column. Burn the next column all the way around the frame.
Continue the same way until you’ve completed all of the columns of the pattern around the mirror frame.

Notes for Wood burning
Making this DIY Boho Full Length Mirror was my first time using a wood burning pen and I learned a few things along the way. Here are a few notes for any other beginners:
- Keep in mind that the wood burning pen is super hot and the pattern template is paper. That paper can totally catch fire! Keep a cup of water near you just in case you need to sprinkle some water on your paper. (Don’t sprinkle water on your wood burning pen. It’s plugged in.)
- Use a chiseled tip like this one in the photo. I tried a couple tips and found this one easiest to use for this project.
- Print multiple copies of the mudcloth pattern template. I went through 3-4 copies while making my mirror frame.
- If you use the same wood burning pen that I did be aware this sucker heats up fast and takes a while to cool down. I needed to let mine cool down for 15-20 minutes before putting it away.
- After completing the wood burn design on the mirror frame, wipe the wood down with a damp rag to clean off any ashes.
4. Attach Mirror to the Frame
After you’ve completed the design on the frame, it’s time to put the whole thing together!
Lay the frame down with the wood burned side on the ground. Center the mirror on the back of the frame. The edges of the mirror will be 5” from each side of the frame.
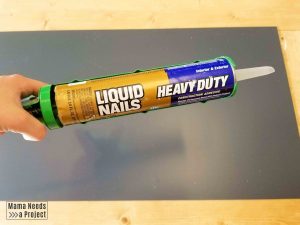
Next, add Liquid Nails glue to the back of the mirror and the frame. Keep the glue about 2″ away from the edges of the frame.

After the mirror is in place and the glue is on, it’s time to add the plywood backing. Place the plywood backing on top of the mirror, 1” from each side of the frame. Try not to move the plywood once you have placed it onto the frame. Moving the plywood will make the mirror move off center and get glue on the mirror front. (I know this because that’s what I did.)
A trick to getting the plywood centered the first time is to measure 1” from the bottom of the frame and mark a line. Then mark 1” from each side of the frame. Stand the plywood up so that the corners of the plywood line up with the intersections of the 1” lines. Then carefully lower the plywood onto the back of the frame.
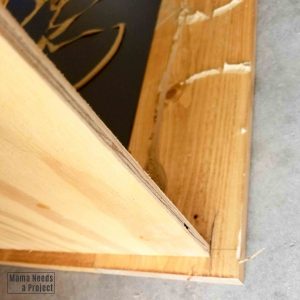
Once the plywood is on the back of the frame, secure it with 3/4” wood screws. Be careful to keep your screws near the edges of the plywood so that you don’t accidentally drill through the mirror.
Let the glue dry before hanging up your mirror. I placed some heavy items onto the back of the plywood and let it dry overnight.
How to remove glue from your mirror front
If, like me, you got some glue on the front of your mirror don’t fret. It can be removed. I wiped as much glue as I could off of the front of the mirror while it was wet. Then, after the glue had dried I was able to remove all of the leftover glue spots with a cheap razor. Good as new!
5. Add Hanging Hardware
The last thing to do is add hanging hardware. I used D-ring hooks on the back of my mirror for hanging. This mirror is HEAVY, but so far the hooks are strong enough to hold it up without issue. (These hooks are super cheap and rated for up to 75 lbs.)
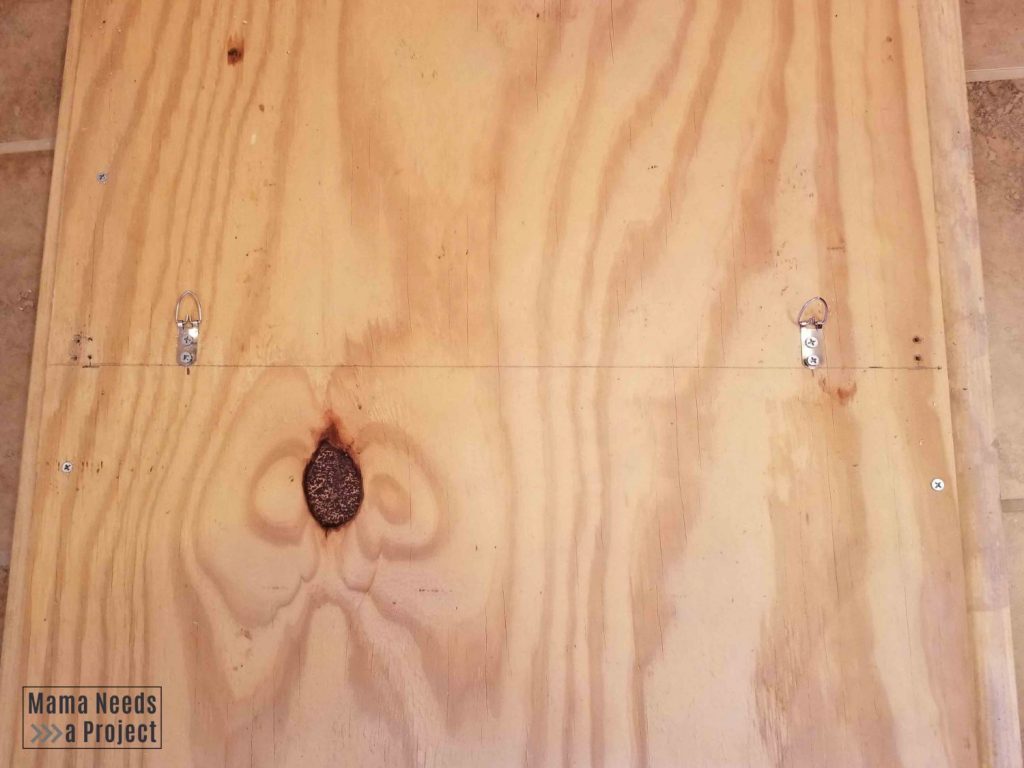
I distanced my hooks 16” apart because this is the common distance between wall studs. Then I drilled wood screws into the wall studs and hung my pretty new mirror up.
Looking for more inspiration? Check out these painted china cabinet ideas!
DIY Boho Full Length Mirror
I love my new mirror so much! It is the perfect statement piece for my little master bathroom refresh and it totally fit within my budget.
I can see this design being used on all kinds of frames and I’d love to see your take on it! If you create a project from this tutorial, will you please share it with me? It will seriously make my whole day! You can find me on Instagram as @mamaneedsaproject or, more frequently, on Facebook at Mama Needs a Project. I can’t wait to see what you come up with!