
DIY Christmas Village | Quick Scrap Wood Project
I’m excited to add this Scrap Wood Christmas Village to my DIY Colorful Christmas collection! This is a quick and colorful scrap wood project and I love how it turned out.
Scrap Wood Christmas Village
I’m definitely not the first person to turn a pile of scrap wood into a Christmas village. I’ve seen a few of these projects floating around Pinterest and they looked so cute and easy I just had to try for myself.
For my Scrap Wood Christmas Village, I used scrap 2x6s that have been gathering dust in our garage since we built a deck a few years ago. I also used some scrap 2x4s because I just have a never ending supply of those.
Save to Pinterest!

This colorful little project didn’t make much a dent in my scrap wood pile, but it sure looks cute with my other colorful holiday decorations.
If you decided to whip together this little project – pretty please share it with me on social media? You find me as @MamaNeedsaProject on Instagram and Facebook. I’d love to see what you’re working on!
Make a Scrap Wood Christmas Village

*This post contains affiliate links.
Supplies
- 2×6 scrap wood
- 2×4 scrap wood
- paint
- foam paint brushes
- miter saw
- jig saw
- clamps
- drill and a 1/2″ drill bit (I use one from this set)
- sander
- speed square
Make the Houses
The houses in my Scrap Wood Christmas Village are made with 2×6 and 2×4 boards. They’re super simple and a great way to practice angle cuts on your miter saw.
First, set your miter saw to make a 45 degree cut and cut off the top of your scrap 2×6.
Next, flip the board over and use a speed square to draw a line across the board where your first 45 degree cut starts.
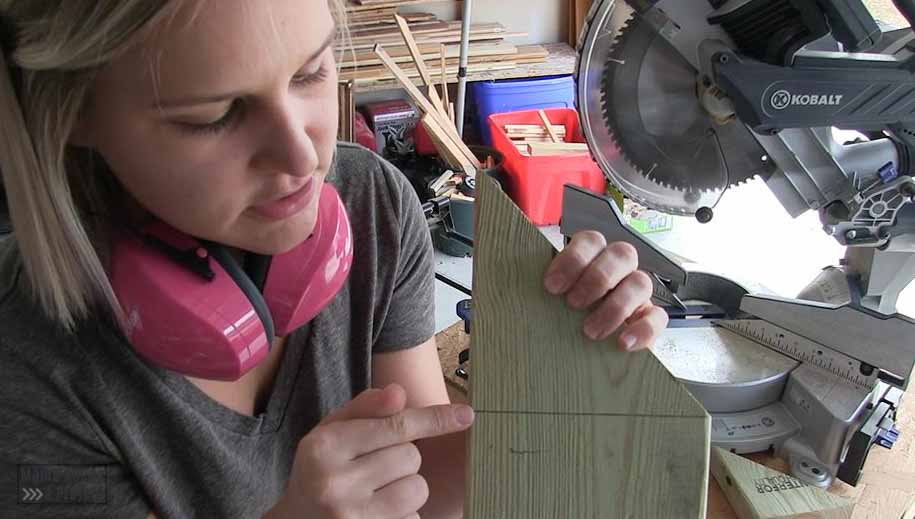
Head back to your miter saw and line your board up so that the blade will intersect the line you just drew with another 45 degree angle. Cut the board and you have a pointy little house.
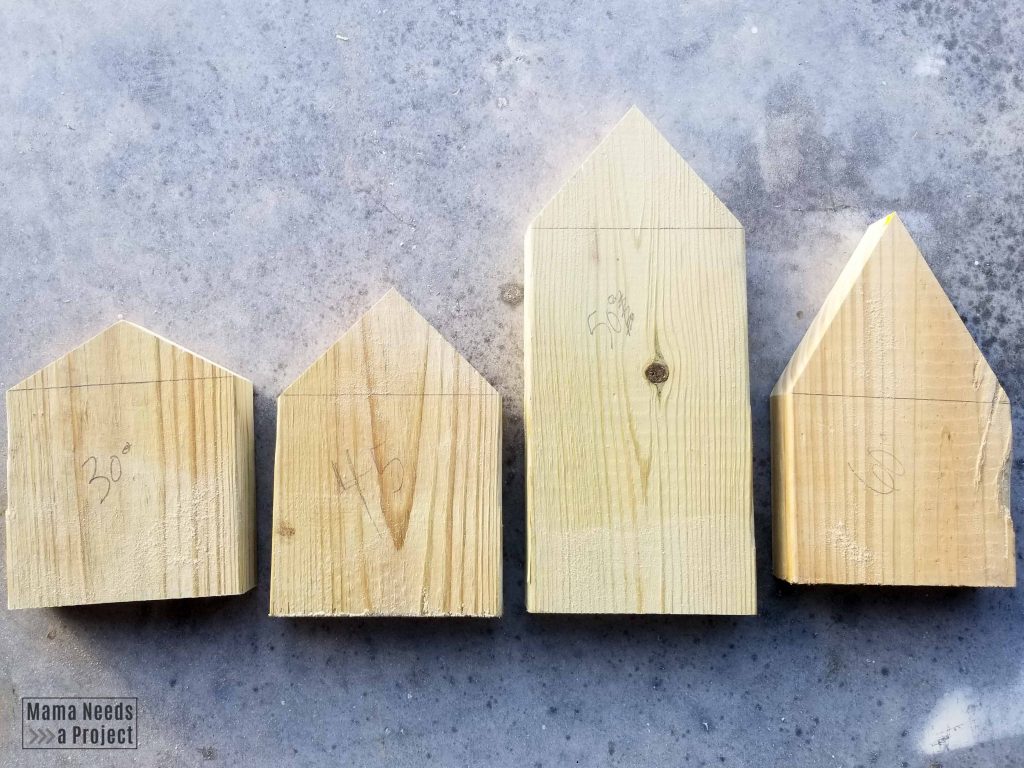
I experimented with using different angles for the roofs of my houses. You can see I tested out 30 degrees, 45 degrees, 50 degrees and 60 degrees. The extra pointy 60 degree roof is my favorite.
Make the Christmas Trees
In addition to the little houses, I also made a few Christmas trees for my Scrap Wood Christmas Village. For the trees, I drew a Christmas tree outline and then cut it out with my jigsaw. For my larger trees I drilled a few holes in them to look like ornaments.
Draw Christmas Tree Outline
I started out by drawing a Christmas tree outline onto my scrap wood. I’m not a great freehand drawer so I used my speed square as a straight edge to try to make my tree look even on both sides.
First, I drew a dot where I wanted the top of my tree to be. Then, used my woodworking square to draw a straight line from the dot down to the bottom corner of my board.
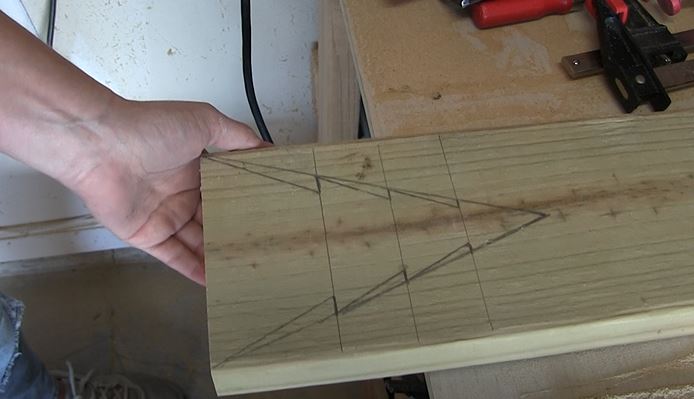
Next, I drew 2-3 horizontal lines across the triangle. On these horizontal lines I made another little mark a little bit inside of the triangle. Then, I used my straight edge to connect the mark with the spot where the horizontal line below intersected the edge of the triangle.
Since I’m not great at drawing, this method gave me a tree that was pretty even on both sides. Much better than if I had tried to freehand!
Cut out with the jigsaw
Once the trees were drawn, I cut them out with my jigsaw. I go into depth about using a jigsaw cut out shapes in this article.
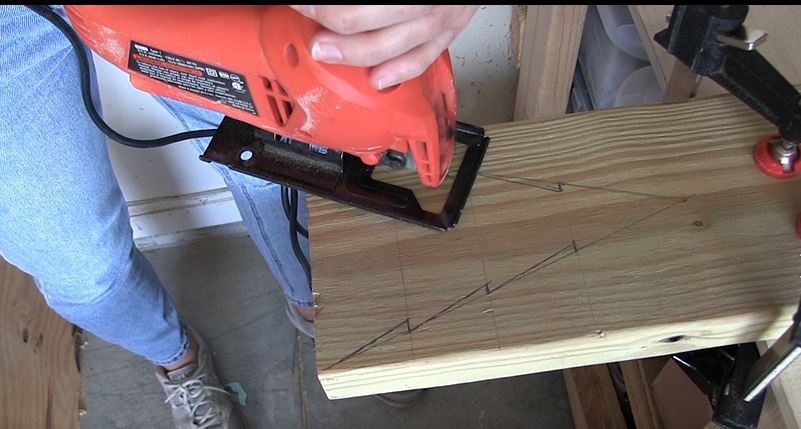
Jigsaws are a great entry-level power tool. The blade is small and not intimidating. It is hand-held and super easy to start and stop the blade. They’re very inexpensive. If you’re at the very beginning of your woodworking journey I definitely recommend starting out with a jigsaw to build up your confidence with power tools.
Add “ornaments”
The last little detail I added to the Christmas trees was a few holes drilled into the trees to look like ornaments. I only did this with my larger trees.
To make the ornament holes, I used a 1/2″ drill bit from this set.
When drilling the holes, place a piece of scrap wood underneath your Christmas tree. This will let you drill straight through your Christmas tree without drilling a hole in your work surface.
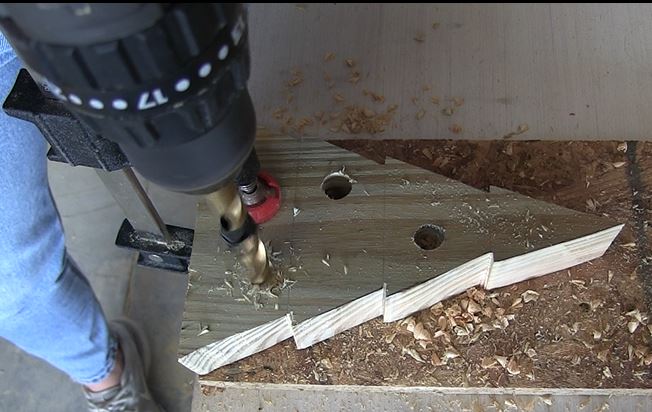
I also recommend clamping the Christmas tree down before your start drilling. I clamped one of my trees and I didn’t clamp the other. The holes that I drilled into my clamped tree were much smoother and had less tear out.
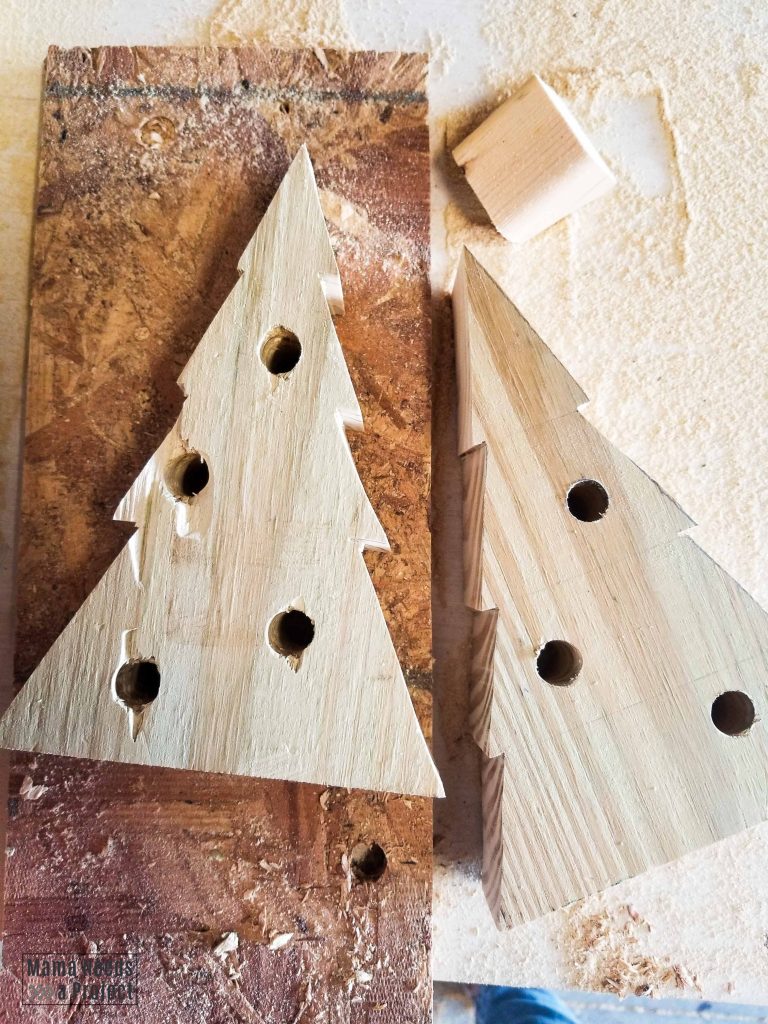
Lastly, don’t drill your holes too close to the edge of your tree. I did this on one of my trees and had a lot of tear out on the edge of the tree – bummer!
Finish everything up!
After I finished making all of the houses and trees for my Scrap Wood Christmas Village, I gave everything a quick sand. My goal for sanding was just to smooth out the edges and blend in areas that had tear out from my drilling mistakes. I didn’t worry about getting things silky smooth – just smooth enough that no one would get a splinter.

And last was painting. I chose a few bright colors and got to work. I painted the edges a contrasting color and I really like how that turned out! I tried using both foam brushes and bristle brushes, but found that foam brushes were much easier to control on the edges.
Scrap Wood Christmas Village

This fun little village is nice and cheery against my DIY Watercolor Wall Circle. I’m so happy that I decided to tackle this quick scrap wood project!
This pretty little set up lasted about 30 seconds until my son decided he needed to rearrange and then take all the houses and trees to the living room to build a city for his cars. You can spy my not-so-sneaky guy at the end of the video tutorial – he’s pretty cute!
I want to hear from you!
Let me know you what you think about this colorful scrap wood project! And, if you love color don’t forget to check out all of my DIY Colorful Christmas projects.
If you decide to make your own Scrap Wood Christmas Village, please oh please share it with me! You can find me on social media @MamaNeedsaProject on Facebook and Instagram.