DIY Watercolor Wall Paint Technique
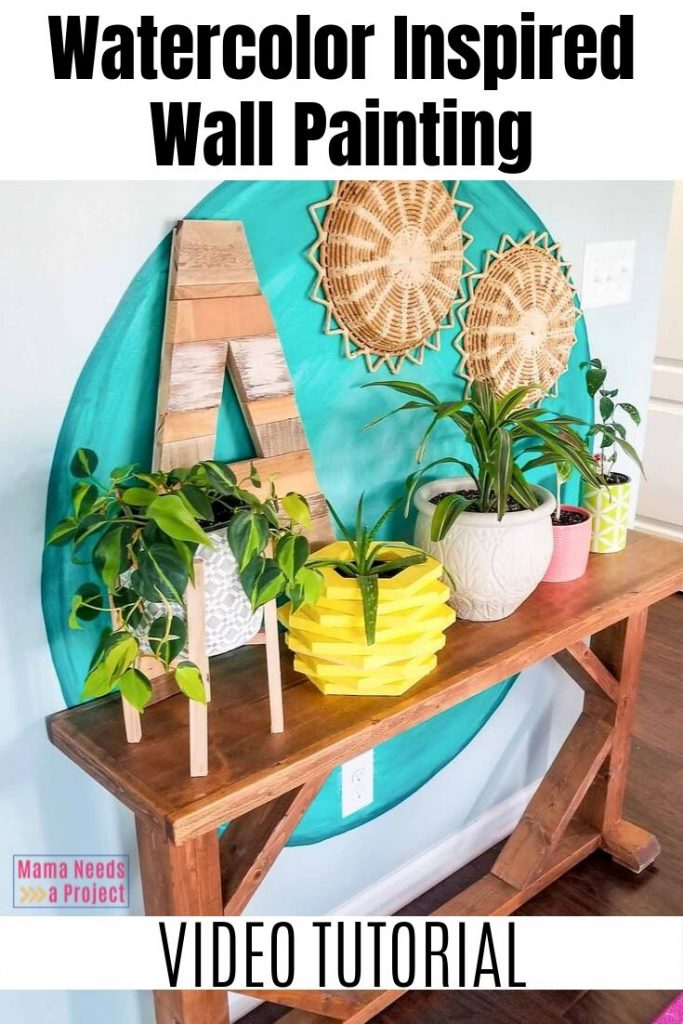
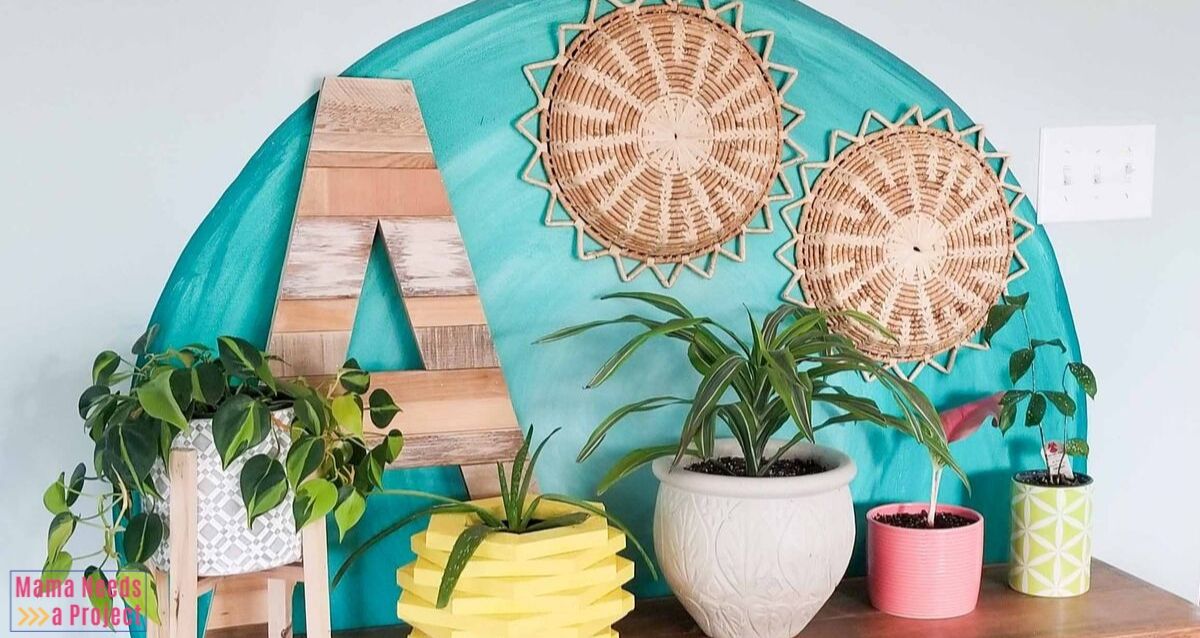
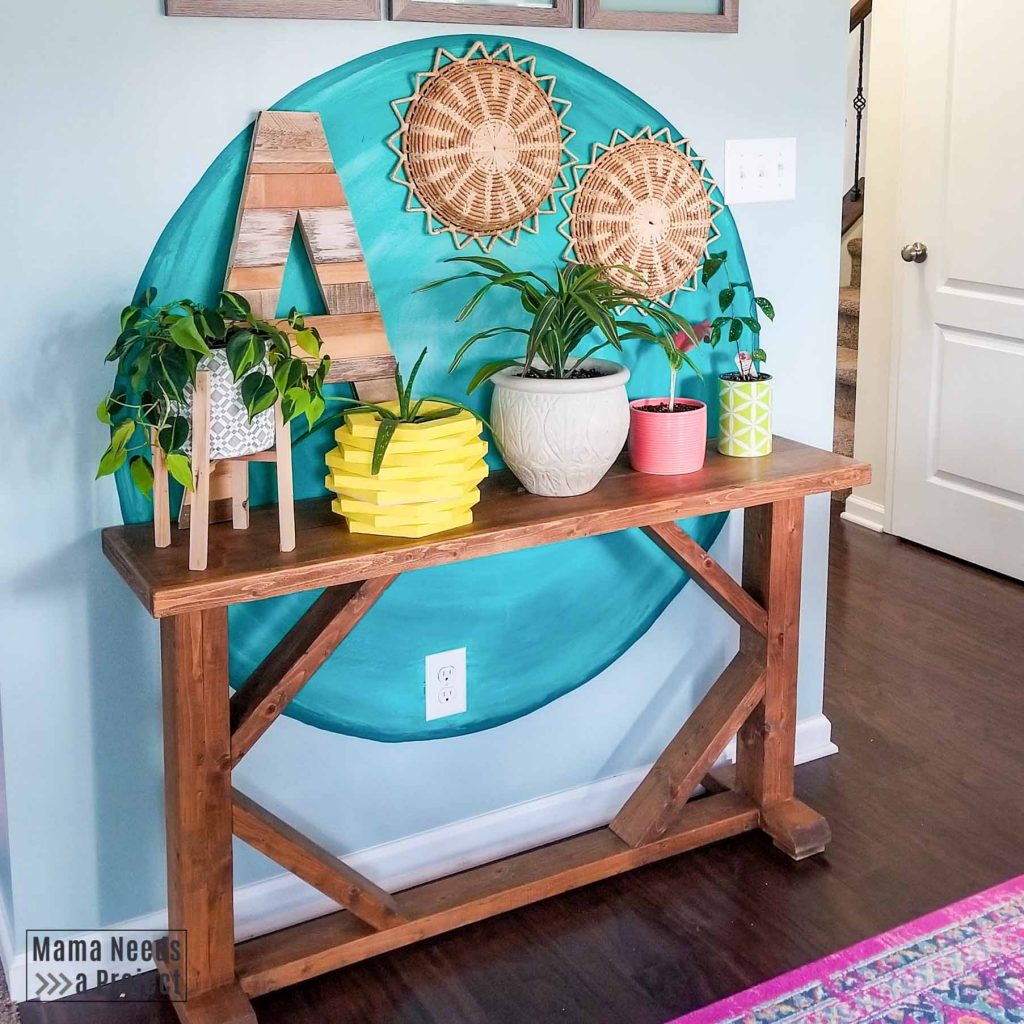
My new DIY Watercolor Wall is now my favorite spot in my house. I love the rich, bold teal against my light blue walls. And all the different shades all within that one circle 😍 – I am seriously obsessed with it!

And, my friends, IT WAS SO EASY! I’m going to show you just how to re-create this DIY Watercolor Wall in your own home.
Pin for later!
I’m in a few home decor groups on Facebook and recently saw a post where a woman had painted her entire wall with a rag instead of rollers or a brush. The effect was beautiful! The color flowed from dark to light and totally reminded me of a watercolor painting. I knew I had to try it!
I’ve also been feeling super inspired by pictures of homes with bold color blocked walls. I’ve been scrolling through picture after picture of bright bold shapes painted onto walls on Pinterest. And after drooling over endless colorful designs, my walls suddenly felt way too boring.
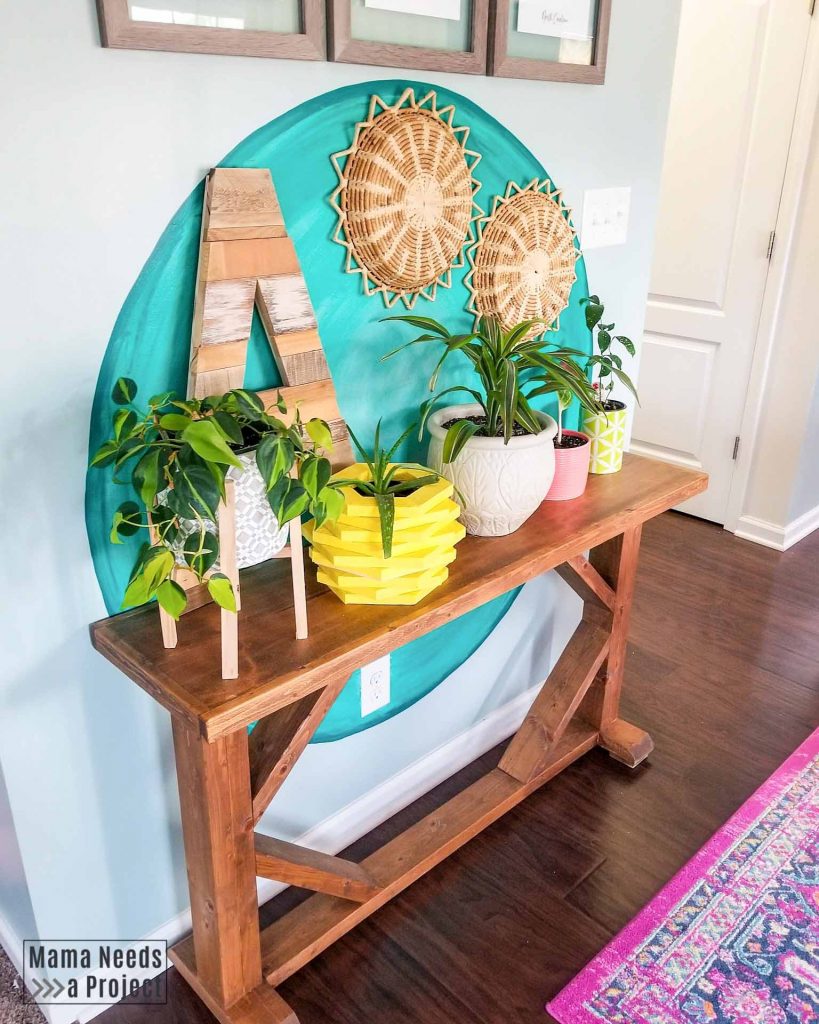
These two inspirations are what led to the bright teal watercolor-inspired circle on my wall. AND I LOVE IT! Can you believe all of those shades of teal came from one little paint sample? I seriously can’t stop staring.
Supplies
- 1-2 Rags
- Water
- Sample size paint (you will use very little)
- Angled paint brush
- Pencil
- String
- Small trim nail
- Tape measure
Time & Skill Level
My DIY Watercolor Wall took me about an hour from start to finish. I went into it not knowing at all what I was doing and it magically worked out. So I’d say there are no special skills required for this quick project.
Paint a DIY Watercolor Wall
Clean Wall
Before starting on your DIY Watercolor Wall, clean the wall with water or cleaners. I didn’t clean mine first and ended up with a spot that the paint just wouldn’t stick. I realized that there was clear wax stuck to the wall in that spot from when I had spilled a wax warmer a long time ago. I had to scrape the wax off and try to blend some paint into that area. It would have been much easier to just wash the wall first.
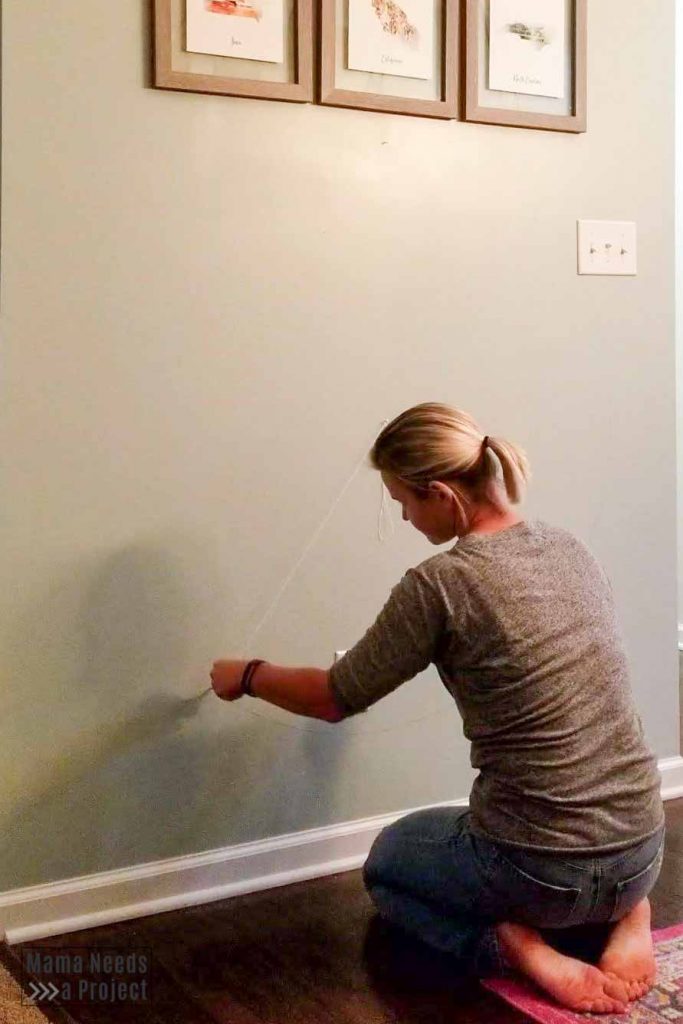
Draw Circle
Use a tape measure to find the center of the wall and mark a little dot. This dot will be the center of your circle. Then, take a small trim nail and nail it into the dot.
Take a string and tie one end to the nail and the other end to a pencil. Hold the pencil so that the string is tight and draw your circle. Keep the string tight the whole way around and try to keep the pencil straight.
It’s a bit hard to see this part in the video and in the picture below. Now I know next time that I need to use better lighting and a better camera angle. If you need more information on how to draw your circle outline, just leave a quick comment and I’ll get right back with you!
This is the same technique I used to create the rainbow for my Toddler Rainbow Garden.
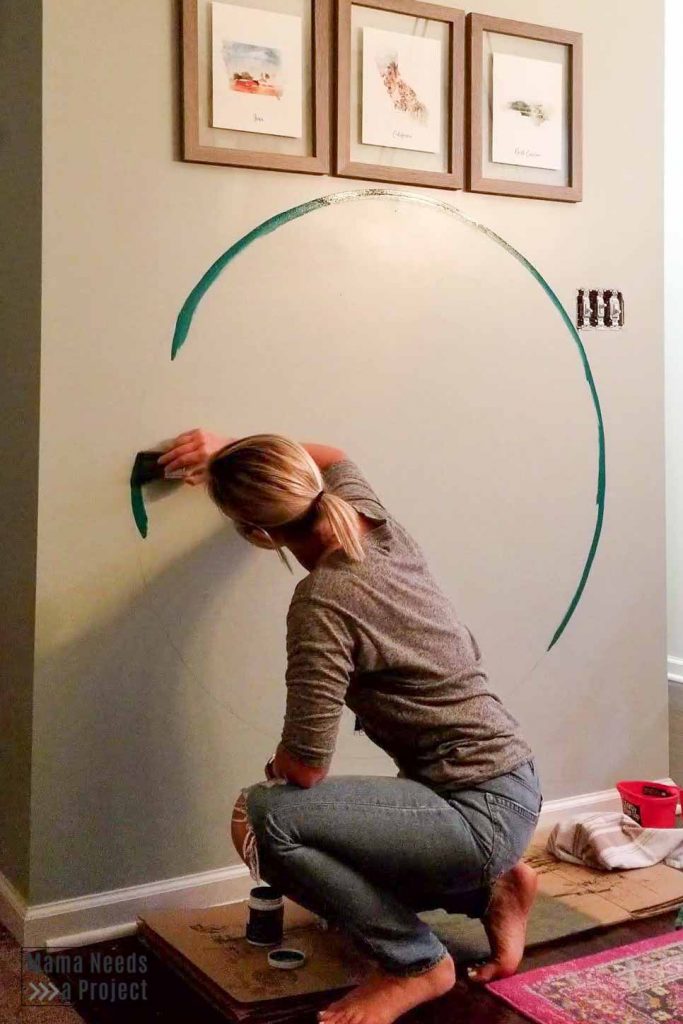
Paint Circle Outline
After you have drawn your circle it’s time to outline the circle in paint. Use an angled brush to go over the line you drew with paint. I find an angled brush easiest to paint in a straight line with. I recommend using a good quality brush with medium-stiff bristles.
DIY Watercolor Wall Circle
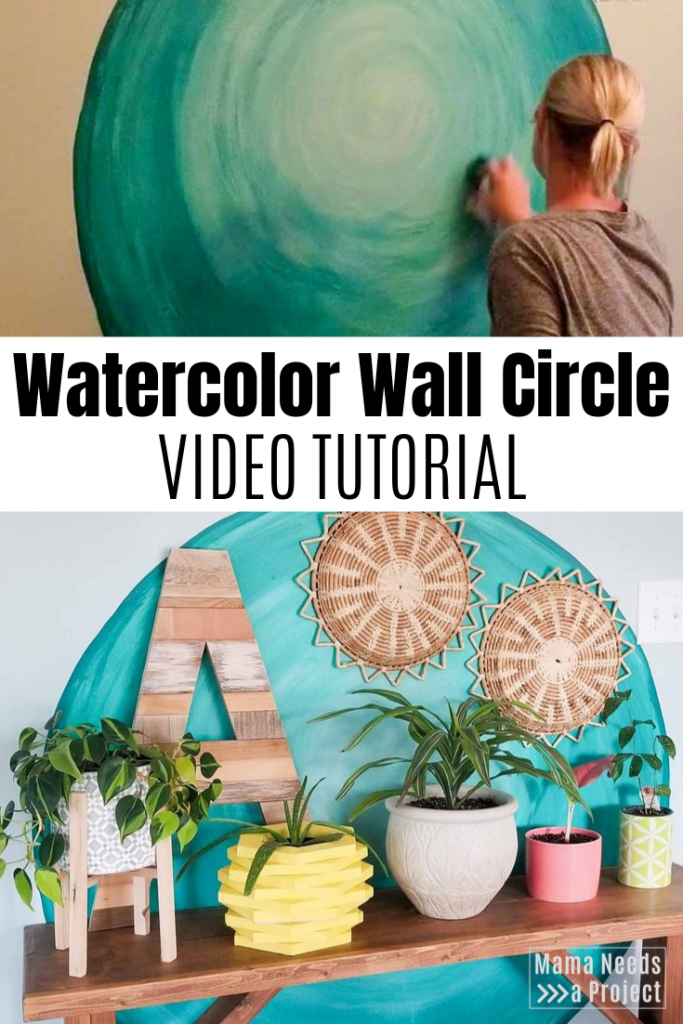
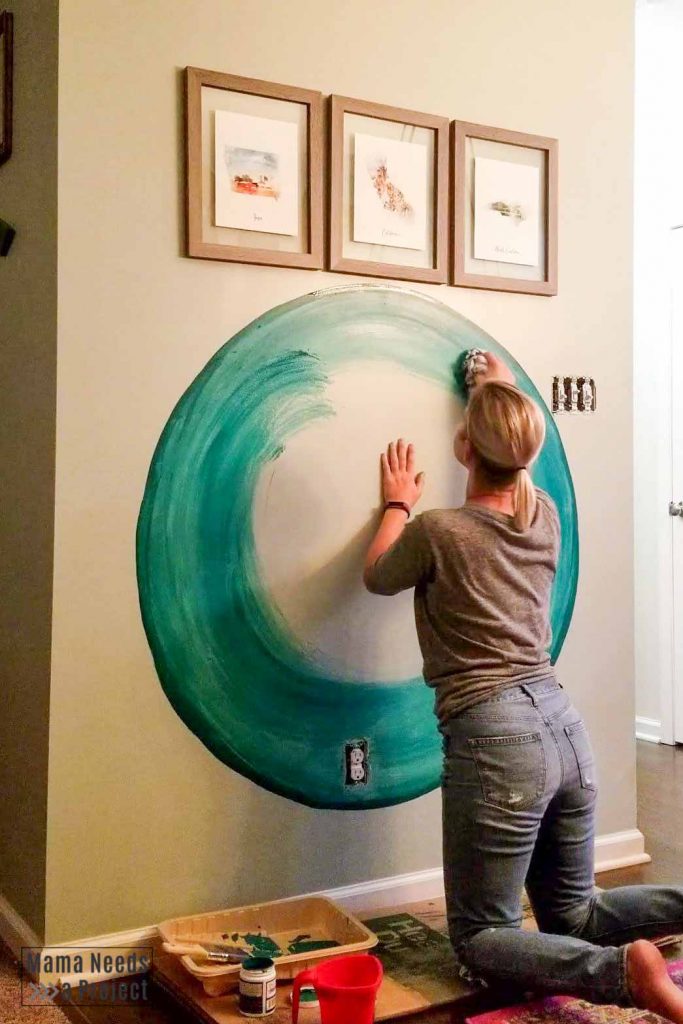
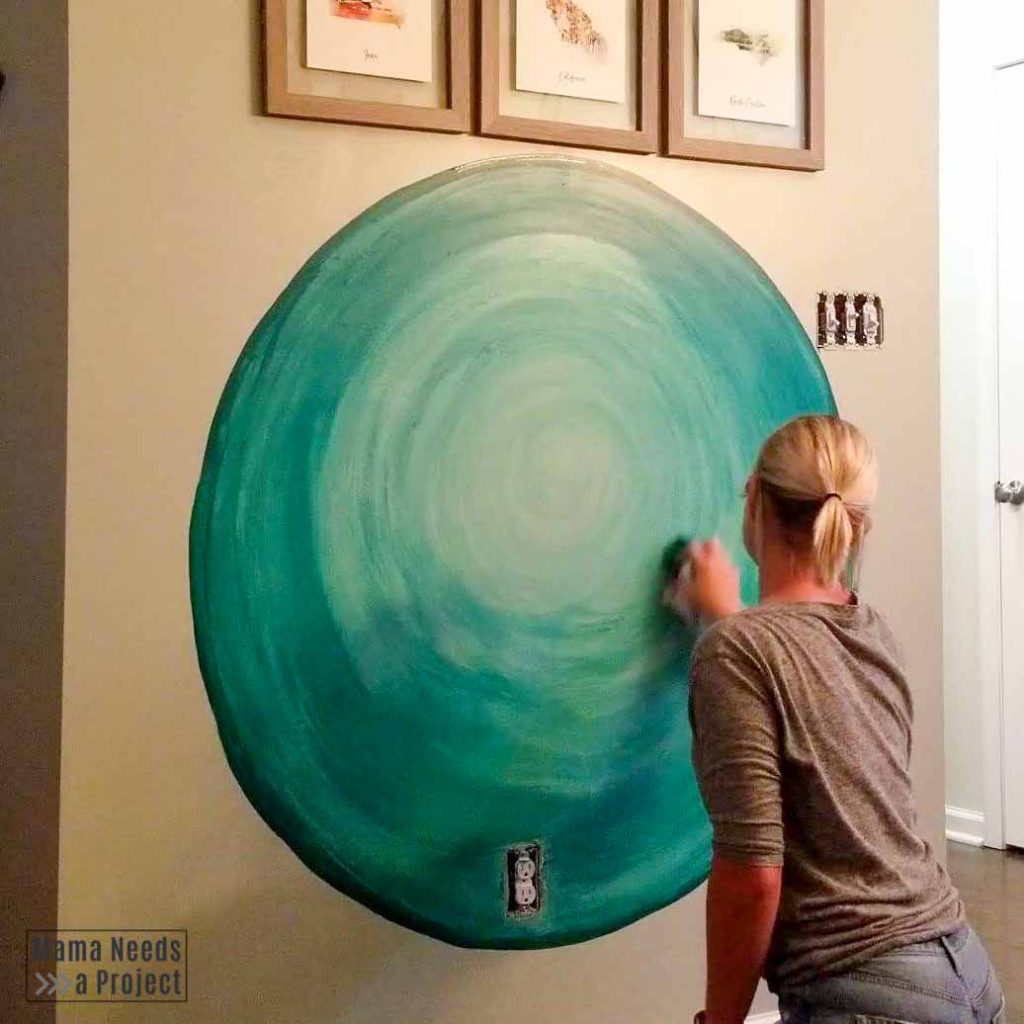
After you’ve painted the outline, it’s time to start filling it. Dip your rag into your paint and then into the water. You may want to wear gloves for this part. Use the rag to apply the paint inside the circle in a circular motion. For darker color, use less water and more paint. For lighter color use more paint and less water. You can continue to blend the paint after it has been applied to the wall.
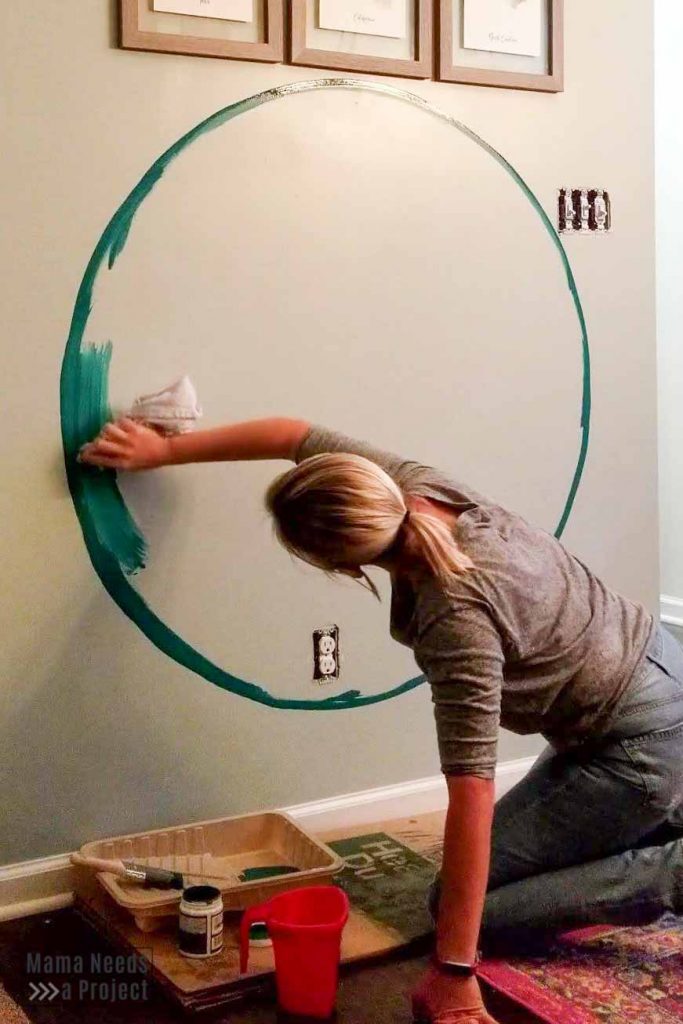
I wanted my watercolor circle to be dark on the outside and gradually get lighter as it got closer to the middle. So I used more paint on the outsides of the circle and less paint as I got closer to the middle. This process was actually really fun! Be sure to watch the video linked above to get a better idea of how I blended using the rag.
The paint on the outside of the circle dried quickly so I was unable to blend it with the rag. This made a clear outline of the circle which I don’t mind, but I had pictured a more gradual change in color.
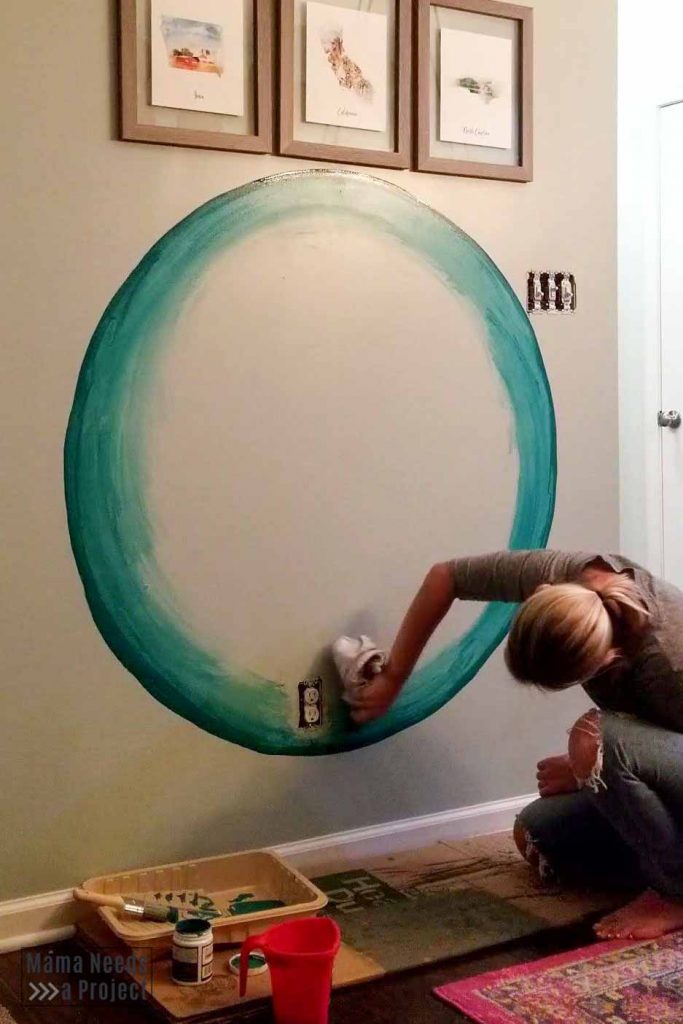
Cleaning Up Mistakes
At one point I got really into my painting and didn’t realize that my paint soaked rag was brushing against the wall outside of my circle. I got some paint on the wall and messed up the edge of my circle.
To fix this, I took a clean wet rag and scrubbed the wet paint off of the wall. Then, I took my angled brush and made the edge of the circle a little thicker to cover up the random paint marks along the edges.
If you splatter a little paint – don’t fret! If you quickly wipe it with a wet rag, it should come right off of your wall.
DIY Watercolor Wall
I am already planning for a few more variations of this DIY Watercolor Wall circle. I can’t believe how easy it was to create! I absolutely love it and I would love to hear your thoughts as well! Let me know what you think in the comments.
Pin for later!