Essential Woodworking Tools
Woodworking is an amazing hobby and can even turn into a money-making side business if you work hard enough. While building your own furniture will save you money and maybe make you money in the long run, purchasing all of the necessary equipment can give you some pretty serious sticker shock. At least it did for me!
When I started woodworking I was lucky to have access to a large wood hobby shop that was equipped with every tool I could possibly need. Because it was on the military base where we were stationed at the time, I don’t even think I had to pay a usage fee! Talk about an amazing resource!
When we moved away from that duty station I lost access to that great shop so my husband and I decided to start putting together our own workshop. We did it over the course of a few years, spreading out our big purchases.
Having our own tools right in our garage is amazing! I am able to sneak away to the garage during nap times or after bedtime to get a little building in and feed that constant pull to create.
Check out all of the posts in the Woodworking Basics Series! This is a series of posts that cover basic woodworking topics to help you get started building.
Pin for later!

Today I’m going to share with you the tools I use the most in my workshop to give you an idea of where to start investing in your woodworking journey.
Remember, you don’t need to buy everything at once. A lot of these tools just make things easier (a lot easier). If there is a cheaper alternative to a tool, I’ll be sure to note it in my descriptions.
Also, all of the photos are links to tools that either I own or are very similar to what I own. Some of these are affiliate links, meaning that I receive a small commission if you make a purchase after clicking my link. This doesn’t add any extra cost for you and it helps me to offset the cost of running Mama Needs a Project. Please know that I only promote products that I trust!
This post contains affiliate links.
Basic Tools
These are the very basic things you’ll need to get started woodworking. There isn’t really a way around these tools. They’re the basis of every building project.
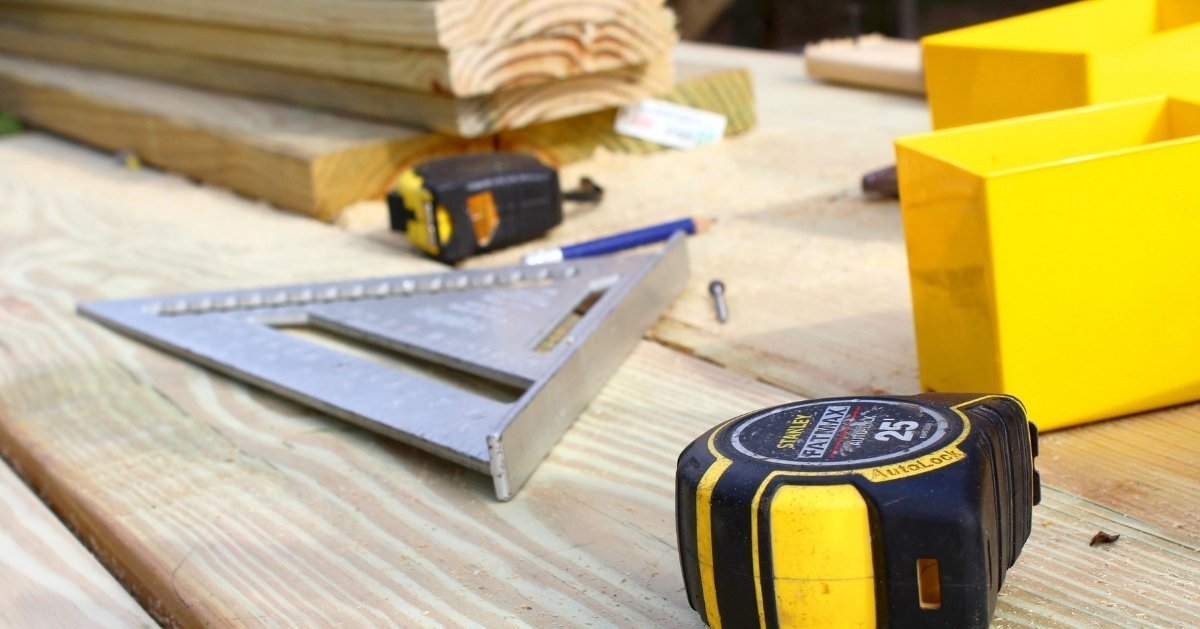
Tape Measure
You can find a tape measure for incredibly cheap. Did you know they carry little ones at the Dollar Store? I have a few cheap ones and some nicer ones. The nicer ones definitely give a more accurate measurement.
Level
There are different size levels you can get. I recommend getting both a small one and a longer one. I have a few levels that are less than 12 inches and one that is 48 inches. At least one of them gets used on every single project.
Speed Square
This little thing is so handy! I didn’t have one for a long time, and I didn’t know what I was missing out on. It is so easy to check for square quickly with this so that you can make adjustments to your projects. It’s the main reason my projects turn out level and not wobbly.
Hammer
It doesn’t get much more basic than this! You don’t need anything fancy, just a basic hammer with the claw on the back.
Rubber Mallet
My husband laughed when I bought a rubber mallet, but I use it so much! It’s great for when you’re trying to nudge a piece of wood into a tight place. You can use it like a hammer without worrying about damaging your wood with dents like a hammer would leave. This probably isn’t essential for everyone, but I use mine all the time.
Awl
An awl is another simple tool that every woodworker should have in their shop. It’s inexpensive and extremely useful to create scribe lines and punch holes.
Clamps
We didn’t purchase clamps right away when we started woodworking from home, but we learned pretty quickly that we needed them for almost every project. Clamps are ideal for holding wood in place while you secure it with screws or nails. They are also necessary for holding pieces together while wood glue dries to create super strong adherence.
There are a few different types of clamps. My favorite are bar clamps that are tightened by turning the bottom handle to screw the pieces of wood tighter together. This style clamp is pictured with a link to Amazon, but if you live near a Harbor Freight you can find them for MUCH cheaper.
I’m telling you this even though I receive an affiliate payment if you purchase through my Amazon link, because you really don’t need to pay that much for them!
I also often use pipe style clamps. For these you purchase metal piping and the clamps are accessories that attach to the pipe. They’re a great option because you can choose the size of your clamps by cutting the pipe to whatever length you want. We purchased galvanized pipes at Lowe’s and had them cut in the store. You just need to verify that your pipe is the same circumference as your clamp attachments.
Ideally, you want a variety of clamp sizes. The bigger (and more) clamps you have the larger projects you can complete.
Saw Horses
You’ll need some sawhorses unless you want to be constantly working on the ground. I have a scrap piece of plywood that I put across my 2 saw horses when I need an extra work station. This makes a great spot for sanding outside of the garage or assembling small projects. You can certainly get away without saw horses, but they make my life easier and my back less sore.
Apron
As a woodworker, having a great woodworking apron is essential in my books. They offer great protection for your body and clothes and a quality apron will last a lifetime.
Small Power Tools
Drill
A cheap corded drill with an extension cord works just as well as a more expensive cordless drill for most projects. I almost exclusively use an inexpensive Black & Decker corded drill for my projects and have no problems with it.
I also have a set of cordless drills with rechargeable batteries. I don’t prefer these because the batteries make the drill too heavy to be comfortable to use for an extended period of time. Also, the batteries don’t have a very long life before they need charging again.
Jigsaw
My jigsaw is also an inexpensive Black & Decker one. I have used this thing A LOT. Especially in the beginning when we hadn’t purchased our larger saws yet. It has held up great for the last 5+ years, and I expect to get a lot more life out of it.
Buying the inexpensive version of woodworking tools doesn’t always leave you with great results, but in this case I’m doing just fine with my cheap jigsaw. In my opinion, this is totally a tool that you can skip the fancy stuff on.
Sander
We have gone through a few sanders. When we first started putting together our woodworking shop, I used a small mouse sander that was a hand-me-down from my dad’s workshop. It worked great! But it’s so small that sanding larger projects took a long time. Also, the mouse sanders require you to buy special sandpaper which can get expensive.
Now I used a small Dewalt 1/4 sheet sander for all of my projects. I love it! It’s the perfect size so that I don’t get hand cramps from holding it for a long time. It also uses regular sheets of sandpaper cut into fourths so it’s much more economical.
There are cheaper brands for sanders so buy whatever fits your budget! I definitely recommend a sander that takes regular sandpaper. It will save you money in the long run.
If a sander isn’t your budget right now…
You get around having a sander by just sanding by hand. You’ll get a killer arm workout, but it’s totally doable if a sander isn’t your budget right now. You can purchase sanding blocks like these or just wrap sandpaper around a scrap piece of 2×4 to create your own sanding blocks.
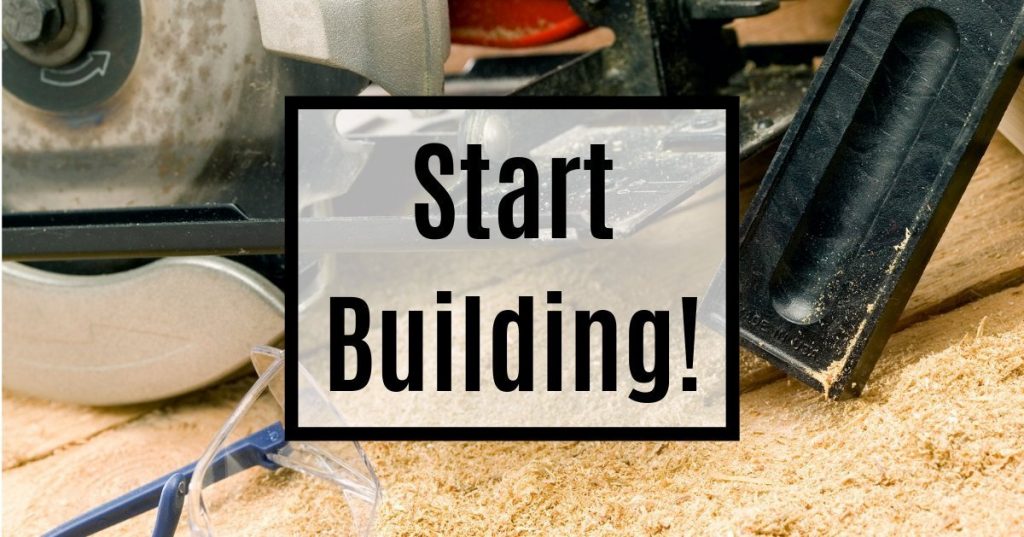
Saws
Table Saw
A table saw was one of the first things we purchased for our home workshop. We purchased the cheapest one we could find at Home Depot and it died within a year. It was under warranty so we replaced it with the same model which then died a little over a year later when it was out of warranty.
The lesson? Don’t buy the cheapest table saw if you really want it to last. I’ve learned that for larger tools it’s better to wait to purchase until you can afford at least a mid-level one. Otherwise you’ll probably end up spending more by purchasing lower level items and needing to replace them.
Our current saw is a Kobalt 10″ folding table saw from Lowe’s and it’s awesome! We’ve had it for about 3 years and have not had any issues with it. It’s perfect for a garage workshop because the stand not only has wheels so you can easily move it, but it also folds up so it’s super compact! It’s easy to move around and isn’t very heavy. I love it and recommend it to anyone who asks me about it.
Cheaper Option
Table saws are for cutting long lengths of wood and depending on the types of projects you’re planning you might not need one. I make a lot of smaller projects that don’t require a table saw and even some of my bigger projects like my indoor and outdoor tables didn’t need a table saw. So, depending on your woodworking goals, you can probably get by without a table saw for a while.
If you need to cut a long length of board and you’re not ready to invest in a table saw don’t worry! You can still get the job done. The best choice is to use a circular saw with a guard set up to keep you cutting in a straight line. You can set up a guard by clamping a 2×4 to the piece of wood you want to cut and using it as a guide for your saw. You can also purchase a Kreg Rip Cut to guide your circular saw. I have one of these and it works great.
If you’re really a pinch, set up a guard and use your jigsaw, but know that the vibrations from the jigsaw might make your board jump around a little bit.
Compound Miter Saw
I love my miter saw. Like really, really love it. I have a Kobalt 12″ compound miter saw from Lowe’s and it is by far the most used tool in my garage. I use it on every single woodworking project I do. It is probably the most essential tool you will have in your workshop – it definitely is for me!
My miter saw is a mid-level saw and it does everything I need it to do. I haven’t had any issues with quality or accuracy.
Cheaper Option
A handsaw with a miter guide works perfectly fine if you aren’t ready to purchase a miter saw. You can get a hand saw with a miter box that allows for guided 45 degree cuts as well as 90 degree cuts. These are super cheap, often under $15. It’s going to be another arm work out, but it’s a great option for getting started right away on a budget!
We started with a small chop saw that my husband bought at a garage sale for less than $20. I could tell it was old when he showed it to me. Then I looked at the box he pulled it out of. It was the original box, with the receipt taped to it from 1985! It was older than both of us! We had a good laugh about it, but that little saw is still working like a champ. We use it to this day for small cuts and little projects.
Don’t be afraid to look at your local secondhand market place for your woodworking machinery. It’s a great option for less expensive tools that have already had a little love.
And a smaller chop saw like the one we started with worked well for us in the beginning. We were limited in the size of projects we could do, but it allowed us to get working right away before we were ready to purchase our miter saw. If a miter saw isn’t in your budget, a smaller chop saw may work just fine for your initial smaller woodworking projects.
Books!
There are some great woodworking books that I highly recommend. These can help you take your projects to the next level.
Tools you don’t need right away, but are nice to have
Pneumatic Nail Gun
I was lucky and received a nail gun set and air compressor for Christmas when we were starting to build up our woodworking tools. I use my nail gun all the time! The small brad nails that it uses are great for attaching trim or for securing small pieces while the wood glue is drying so that you can keep working.
A nail gun isn’t really necessary in the beginning because you can use glue and clamps to secure pieces, but it is so handy. It allows you to continue working instead of taking breaks for glue to dry. It makes my work go so much faster!
I have a set similar to the one in the picture. This set is expensive, but I’ve seen it go on BIG sale at Lowe’s on Black Friday for several years. If you’re military, Lowe’s also gives a 10 percent military discount on top of sales!
Kreg Jig
As you start to dive into woodworking you’ll see a lot of woodworking bloggers talk about using the Kreg Jig. And it’s for good reason! The Kreg Jig is a little tool that guides your drill so that you can create pocket holes. Pocket holes are great because instead of having screws showing on the outside of your project, they’re hidden away on the bottom or inside. It makes your work look much more professional.
A Kreg Jig isn’t a necessity but it is so nice to have! When you’re ready to purchase one it will really take your work to the next level!
My wish list tool of the moment
Scroll Saw
My little garage workshop is totally equipped with the essentials, but there are still tools that I drool and pine over. The tool I have been dying to get my hands for a while now is a scroll saw. A scroll saw has a thin reciprocating blade that is great for cutting intricate designs. I have a head full of ideas that I want to make when I finally get to add one to my workshop.


Don’t be overwhelmed!
Please don’t feel overwhelmed by this big, long list.
You don’t need to have all of these tools at once to get your foot in the door with woodworking. Woodworking is an amazing hobby! It is my best creative outlet. And, I feel so empowered when I look around my house and see the pieces I worked so hard to create being used by my family. It is an incredibly rewarding feeling and I want you to feel that too!
Keep your eye out for garage sales, estate sales and auctions and maybe you will get lucky with some inexpensive secondhand tools. MANY of the tools in my garage have either been purchased secondhand or given to me when a friend or family member was cleaning out their tool supply. Just remember, you don’t need to purchase everything at once if it’s not in your budget.
Start small and work your way up.
You can do this!