How to Colorwash Wooden Beads (and all other wood!)
Using a colorwash method on wooden beads is a way to add color while still preserving the look of the wood grain. It’s similar to dyeing wood. In this post I’ll teach you how to colorwash wooden beads. It’s easy!

This post contains affiliate links.
I recently bought these wooden beads from Amazon for a few projects. I love the look of natural wood, but for my DIY Hanging Plant Shelf I was already using a natural wood shelf so I needed a way to add some contrast. So, I decided to figure out how to colorwash the wooden beads to make it more interesting.

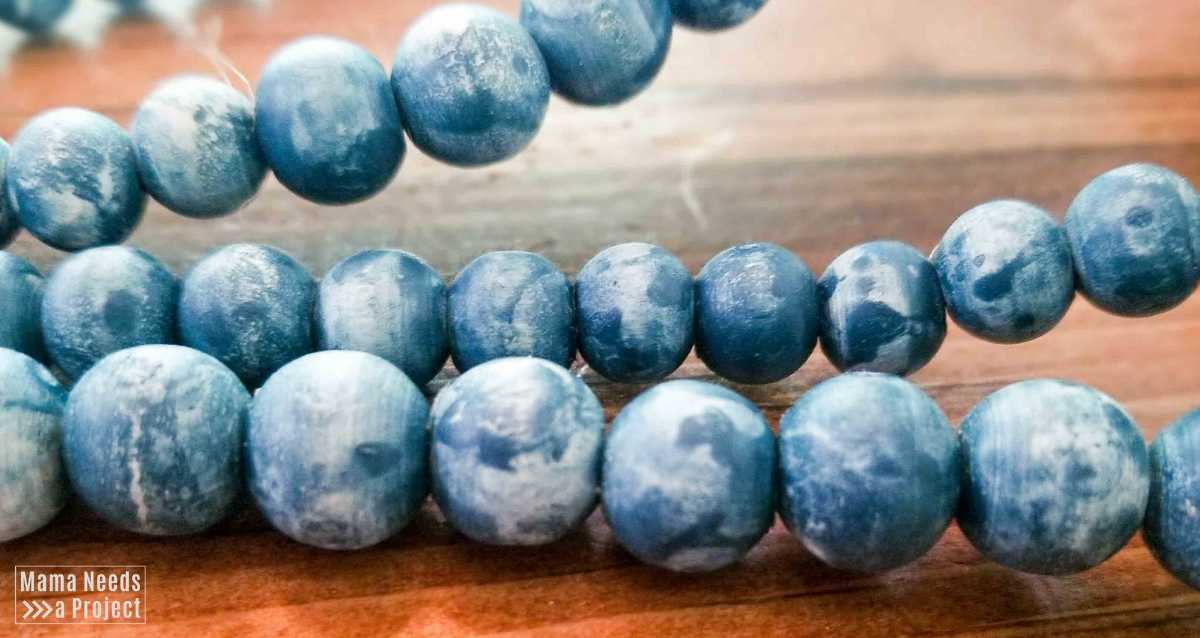
I love how each bead turned out a little different from the rest. None of them are an exact match. Colorwashing added some amazing texture and the variety of color makes this hanging planter so much more interesting and unique.
Pin for later!

How to Colorwash Wooden Beads
Colorwashing is just the same as whitewashing, but with colored paint. It was a quick project for these little beads, but it can easily be done on bigger pieces of wood. Here’s how to colorwash wooden beads (and any other piece of wood).
1. Mix up the colorwash
For my colorwash I used a 1:3 ratio of paint to water. Adding more paint will make the color darker. Adding more water will make the color lighter.
Because the wooden beads I was colorwashing were very small, I used a plastic spoon to measure out my colorwash. I used 2 spoonfuls paint and 6 spoonfuls of water in a small plastic container. Then I mixed it together.

2. Colorwash the beads
After the colorwash is mixed up, it’s ready to use on the wooden beads. I dropped spoonfuls of beads into the mixture and rolled them around to make sure they were completely covered. My toddler happily helped with this step.

If you’re using larger pieces of wood you can apply the colorwash with a paint brush. Or, you can create a larger batch and dip your piece of wood in, although this method will leave you with a lot of unused colorwash mixture.
Also, if you’re using a larger piece of wood and want to get a deeper saturation I recommend sanding the wood before applying the colorwash. Sanding removes any outer finishes on the wood and opens the pores of the wood so that it will accept the colorwash better.

3. Let the beads dry
I did my colorwashing outside and let my beads dry on a piece of cardboard in the sun. This was good because they dried quickly, but not so good because they stuck to the cardboard a bit. I recommend letting your wooden beads dry on a surface that won’t stick to your paint. Wax paper or parchment paper would be good alternatives.
I also recommend putting them onto something with raised edges, like a cookie sheet, so they don’t roll away. I set up a little wood barrier to keep my wooden beads from rolling away while they were drying.
Colorwashed wood dries quicker than painted or stained wood. My beads were dry and ready to use within about an hour.

Colorwashed Wooden Beads
Once your beads are dry they’re ready to use! If you’re looking for a project to use these beauties, check out my DIY Hanging Plant Shelf.
This simple colorwashing technique add so much texture to natural wooden beads! And it can easily be applied to any unfinished wood piece.
I have a few more projects planned with this method and I can’t wait to share them with you!
