How to Darken Wood Without Stain (7 Creative Methods)
Do you have lovely wooden furniture pieces that you want to darken but don’t want to use traditional wood stain?
In this post, I’ll show you how to darken wood without stain and answer the most common questions surrounding this method. Let’s dig in!
- There are several innovative natural products that you can use to stain wood. Unlike commercially prepared stains, these are non-toxic and affordable for any budget.
- Household items such as coffee, tea, vinegar, steel wool, rusty nails, beets, and spices can be used to make wood darker without having to stain wood.
Darken Wood without Stain Using Household Products
Did you know you can use everyday household products to darken wood? Here is a simple yet effective way to make and apply natural household stains.
1. Prep Your Wood
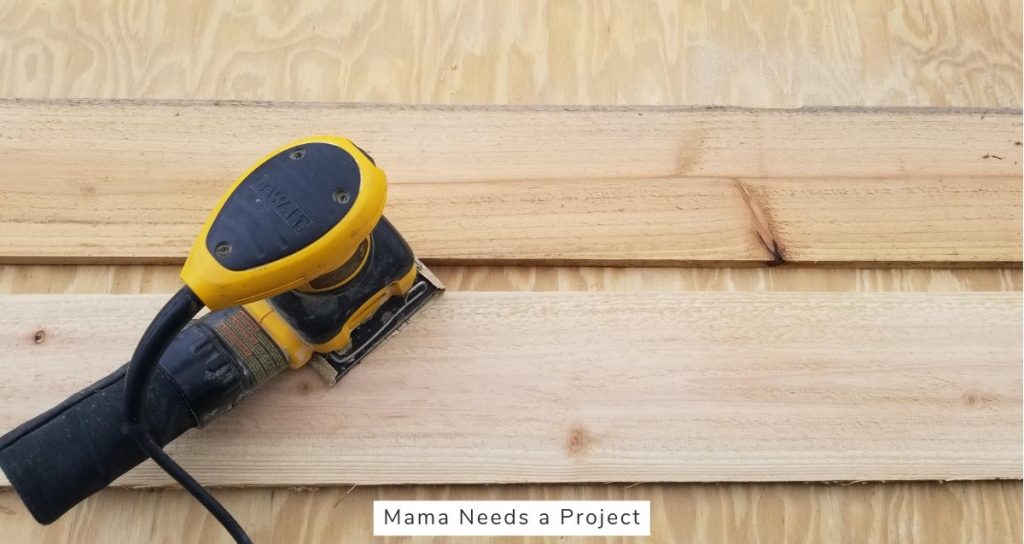
Before doing any wood staining, you must prep the wood properly to ensure you get an even coverage with a smooth finish.
Sanding the wood is the best way to achieve a smooth wood finish. You’ll want to use either a sanding block or an electric orbital sander depending on the size of your project.
When choosing the correct grit for your sandpaper, remember this rule: The lower the number, the coarser the wood.
Before you sand, the wood surface is probably quite rough, and you will need to sand a couple of times with different grit levels.
I recommend first starting with a sanding block with a 120-grit level. This will remove any super rough areas and prep it nicely for fine grit sandpaper. Always try to sand the wood with the wood grain. If you sand against the grain, you can create scratches in the wood, which you don’t want.
Once you’ve finished sanding the entire surface with the 120-grit sanding block, switch over to a 180 or 200-grit sanding block or sandpaper and continue sanding for even smoother finish.
When you finish sanding, use tack cloth to clean off all the excess wood dust and ensure the wood is ready for your homemade wood stain.
2. Make Your Household Stain
Several different household items can be used for staining wood. One of the key advantages to using something other than commercial stains is a homemade stain is not toxic.
Some ingredients that can be used for a DIY wood stain include coffee grounds, tea, turmeric, beets, black walnut husks, and vinegar with a steel wool pad or rusty nails.
To make your wood stain, you will need to prepare the ingredient you decide to use. Follow the instructions below for each ingredient option:
Coffee grounds
Brew coffee and allow it to percolate as directed on the package. The stronger the coffee, the darker the coffee stain will be. Allow the coffee to cool completely before you use it.
Tea bags
Steep tea bags in a glass jar for at least an hour. To get as much color out of the tea leaves as possible, I recommend steeping overnight or up to 24 hours. Regular black tea will work perfectly for this application. This will give you a beautiful natural stain.
Turmeric
Turmeric is a bright golden-yellow spice that can work surprisingly well as a natural stain. Mix equal parts turmeric and water and mix well to combine. If it seems grainy, you can put it in a pot and heat it to dissolve the grains. This stain will give you a yellow hue.
Beets
If you have a juicer, you can juice the beets and use the fresh juice as a wood stain. If you don’t have a juicer, you can purchase canned beets and use the juice from the can. Note: this will give you a bright red stain, not a natural reddish wood stain.
Black walnut husks
I used this method as a kid when building forts with my neighbors. We had a walnut tree in our yard, so we gathered a bunch of walnuts, put them in a large bucket, and covered them with water. We let them “steep” for several days and then stained wood planks. It makes the wood darker and smells great!
Vinegar and steel wood pad
Take a mason jar and place a fine steel wool pad inside. Next, fill the jar with distilled white vinegar or apple cider vinegar and allow it to sit for at least two days. The vinegar will dissolve the steel wool through chemical reaction and create a beautiful DIY wood stain. Strain the leftover wool pieces from the stain with a mesh strainer and let it sit for another four to six hours. The longer you let the stain sit unused, the darker it will become. If it is too dark, add some more white vinegar and mix to incorporate it into the stain.
Vinegar and rusty nails
You will achieve a similar chemical reaction using white vinegar or apple cider vinegar and rusty nails. The vinegar contains acetic acid which will react with the rusty nails and create a stain color. Place the vinegar and nails in a glass jar for at least 24 hours. When the stain has reached the color you want, strain out the nails and use the stain on the wood’s surface.
3. Apply the Mixture
Before using the stain on your wood furniture or project, I always recommend doing a patch test. This will help you see the stain’s appearance before staining your entire surface. It will also give you some practice with the wood stain and see how it works with the wood grain.
For your patch test, you can either use a scrap piece of wood that matches the wood you will be staining, or if you are working on wood furniture, do a patch test on a small portion of the piece that isn’t visible such as the bottom or back.
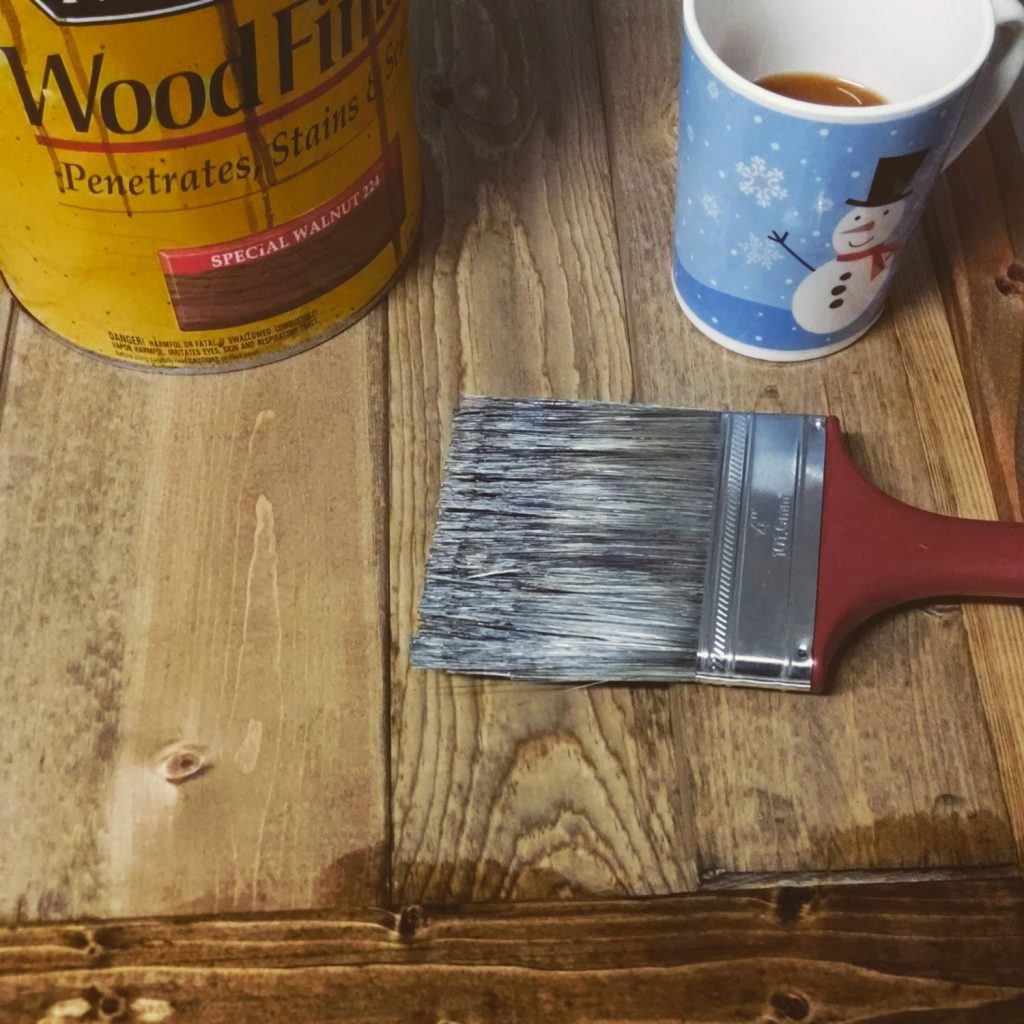
Using a clean cloth or sponge brush, lightly rub your natural household stain on the wood. Ensure you are applying in the direction of the wood grain. You can also use a wood stain brush to help get into all of the cracks in the wood.
Use broad, sweeping motions and make sure you don’t have any areas where the stain “pools” to avoid flaws or uneven color.
If the wood has knots or crevices, be sure to use the cloth to get stain all in those gaps and space for an even coating.
Depending on the depth of color you want to achieve, you will likely want to leave the stain on the wood for at least five minutes.
Wipe off any excess stain. If you want a darker stain, first allow the first coat to dry completely then apply another coat. Repeat this step until you have your desired shade.
4. Let it Dry
The drying process will depend on several factors, like the stain you choose, humidity, and airflow in your workspace. I would say to allow the stain to dry for at least one hour between coats.
If you are planning on sealing the wood furniture, I recommend letting the wood stains sit on the surface of the wood for at least 24 hours before using polyurethane or another sealant.
Note: If you use the vinegar and steel wool or rusty nails stain, you’ll notice that the color will change after a few hours. The curing process is unique for this type of natural stain.
How to Darken Wood with Oil
One of the most popular oils to darken wood without stain is boiled linseed oil. This oil is extracted from the flax plant and can be a great option to darken wood.
To use this oil, you need to prep the wood surface, use a lint free cloth, and apply the oil to the lovely natural grain of the wood.
The oil not only can darken wood, but it also can help preserve the wood from the elements since it’s water resistant.
The drying process is quite long, and it can take up to a week to completely dry. It will then cure for 2-10 weeks, depending on the environment where your wood furniture is kept.
Another oil you can use to bring out the natural wood grain is tung oil. This is extracted from tung nuts from a tung tree. This incredibly versatile oil is water-resistant, durable, and food safe once fully cured.
You will apply it the same way as linseed oil; however, tung oil needs at least five coats to protect the raw wood completely. Tung oil takes 2-4 weeks to cure completely.
Wood oils can be an exceptional way to darken wood while adding protection to its surface.
Check out this polyurethane vs tung oil comparison for more info!
How to Darken Varnished Wood
If your project does have a wood varnish on it (like polyurethane), you can use a medium grit sandpaper to roughly sand the surface of the wood. This is going to “rough up” the surface and make it easier for the gel stains to adhere to the wood’s surface.
Use a tack cloth and remove all the wood dust and other debris that may have accumulated on the project.
Next, use gel stain for darkening wood. Gel stains are unique in that instead of being absorbed into the wood; they sit on the surface of the wood.
Be generous with the application to avoid streaky stain lines.
Take a lint free rag and apply the gel stain to the wood surface. Make sure you use those broad sweeping motions and go with the wood grain.
Finally, allow the stain to sit on the wood for at least five minutes, then wipe off the excess.
FAQs
How do you darken wood naturally?
Some of the best ways to darken wood naturally is with dark coffee grounds, tea, walnuts, vinegar and various metals, vegetables, and even spices. You can also use wood oils to darken wood and add protection.
How to darken pine wood without stain?
Pine trees are well-known for having porous wood, meaning it absorbs moisture and stain very well. However, sometimes if you are using commercial stains, the coverage can become blotchy and uneven.
Using a tea stain, coffee stain, or walnut husk stain is a great option for pine wood because it’s easy to apply, the cover wood easily, and they offer a visually appealing result.
How to darken cedar wood without stain?
The best way to darken cedar wood without stain is by using wood oils. The reason oils work so well on cedar is because cedar is an oil-rich wood. An oil like dark tung oil will work beautifully and slightly darken wood.
Final Thoughts
There are plenty of natural wood stains you can use to darken wood without using a traditional wood stain. Whether you want to create your own stain from household items for wood furniture, or you prefer to use an oil that has been used to preserve wood for hundreds of years – there are several different options.
Have you used one of these natural wood stain techniques? Show me on Facebook or send me a message!

Miriam Ronne wears many hats, including but not limited to freelance writer, blogger, professional quilter, serial DIYer, and obsessed dog mom. She loves to teach beginners how to do all sorts of crafts and techniques. If she’s not writing her next blog post, she’s either sewing a new project or playing with her pup. You can find Miriam on her blog, Stitch Obsessed, or connect with her on Instagram.