
How to Paint in Between Deck Boards (Easy Tips and Techniques)
Whether you have a new deck or an older deck, you probably view it as the centerpiece of your outdoor living space, and as such, you want it to look its best for as long as possible.
One of the best ways to protect your wood deck boards is in deck painting. Painting decks, in general, is a little more complicated than you might think. That’s why I’m going to walk you through the deck painting process, including how to paint between deck boards.
Applying paint or wood stain to your decking boards will require a bit of preparation and some elbow grease, although you can save a bit of effort by using a few pieces of specialized painting equipment that we’ll get into later. Let’s get started!
Tips For Getting Paint Between Deck Boards
Since the gaps between deck boards are often less than a quarter-inch, you’ll need to find what works best for your specific needs and tools.
The best tools for this are going to be those that can get into small gaps, or that can be adjusted to fit into the spaces between deck floorboards.
Some of the best tools to have will be brushes designed for grooves and cracks, a moldable sponge, specialized smaller bristle brushes, or even using a pump sprayer to apply paint between deck boards where you can’t normally reach.
Crack & Groove Brushes
One of the best tools to have on hand before painting between deck boards, particularly for older decks, is a crack and groove brush.
These are used just like a conventional paintbrush, though they have a shape and texture ideal for getting into small spaces.
Simply dip the brush into the paint, and give it a gentle press on the edge of the tray to remove excess paint. Then, with even pressure, run your brush along the space between the deck boards for an even and professional-looking coat of paint.
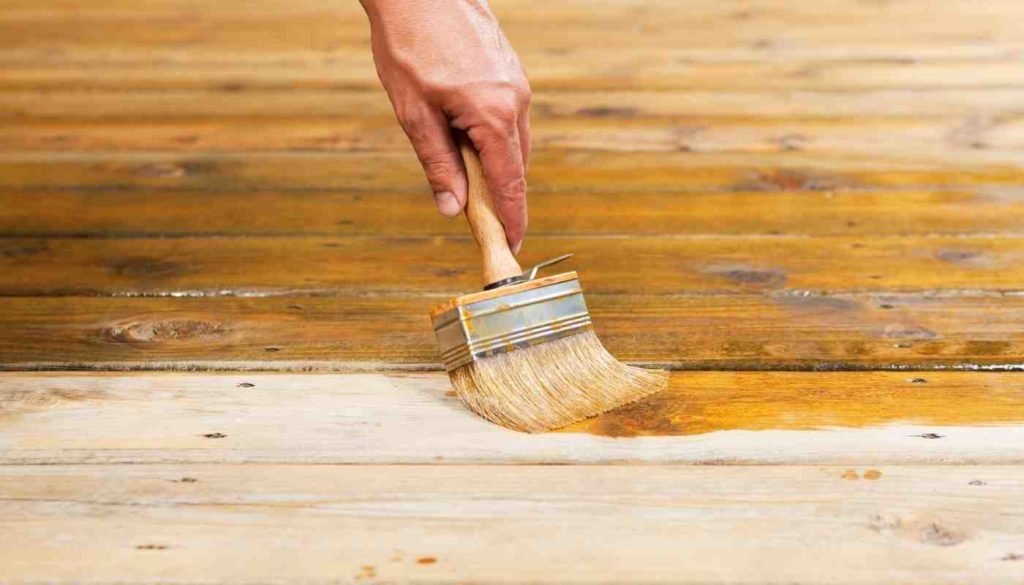
Using A Bristle Brush
It’s possible to use a standard bristle brush to get in between the deck boards, particularly since they are available in such a wide variety of shapes and sizes. You can use them just as you would a specialized groove brush.
One warning, however, is to be aware of your brush pressure. Too much pressure as you slide the brush into the gaps can cause damage to the bristles, which can either result in the damaged bristles affecting the finish, or broken bristles being left behind in the coat of paint.
Check out these best deck stain applicators you can use for your deck!
Using A Pump Sprayer
Using a pump sprayer is a great way to quickly paint between deck boards, although it does require that you own, rent, or borrow a sprayer.
You’ll start by mixing a specified amount of paint with a thinning agent, the exact ratio of which will be determined by the manufacturer’s instructions for the sprayer. Add enough to fill the reservoir two-thirds full, so there is sufficient space to build air pressure.
Then you’ll keep the container pressurized by pumping the sprayer while using the nozzle to apply paint at a distance of no more than 6 inches away.
Moldable Sponge Application
A moldable sponge is one of the best ways to apply deck paint to small gaps and spaces that conventional painting tools can’t reach. It can be folded or molded to fit into the gap where it’s needed, and they tend to apply the perfect amount of paint without over-application.
First, you’ll dip the sponge in the paint, wiping off any excess paint, and give it a slight dabbing compression on the edge of the paint tray to make sure it isn’t overloaded with paint.
Then, rub the sponge into the gaps where the paint is needed, gently dragging it in one direction or the other to spread the paint. Be sure you aren’t using a back-and-forth scrubbing motion, as that will nearly always cause the sponge to tear and leave pieces behind in the paint.
Finally, allow plenty of time for the paint to dry before you apply a second coat. Sponge painting applies a very thin coating, and it’s not uncommon for people to think it’s dry prematurely.
Preparing A Wood Deck For Deck Paint
Deck painting will require a bit of prep work to make sure the surface is ready to accept the new paint. This involves cleaning, stripping away old paint and other debris, and making sure you have an optimal surface for the paint to adhere to. Whether you’re looking to waterproof plywood, or another surface, be sure to prep the areas before starting.
Cleaning Your Wood Decking
The first step in surface prep is cleaning. For this initial cleaning, many people choose to use a power washer or pressure washer, which can not only help remove dirt and debris but also remove paint that may be leftover on previously painted deck boards.
If using a pressure washer, it’s important to remember that while it can remove old paint, it can also damage the deck wood if not used carefully.
Sanding The Deck Floor
Once the deck boards have been cleaned well, it’s time to sand them. The goal of the sanding process is to remove paint that may remain after the first cleaning so that you are dealing with a deck that is as close to new wood as possible.
Be sure you are sanding evenly, and only where needed, so that you aren’t contributing to an uneven surface. Most of the dust from sanding is easily swept off, but once that’s done it’s going to be time to clean the deck boards again.
If you’re painting a deck with peeling paint, this step is essential to get the best results. I put together a list of the best sanders for deck refinishing that are great products worth considering.
Cleaning The Boards Again
Since you’ve already cleaned and sanded the deck boards and are down to as bare of a deck as possible, your second cleaning will be relatively easy.
Simply take a garden hose and use the natural movement of the water to rinse off any remaining dust or debris left on the boards.
It’s best to do this early in the day, so the deck can dry in direct sunlight for several hours before you begin repairing small cracks and getting ready for your first coat of paint.
Dealing With Deck Board Cracks
If you have an older deck, the deck boards will likely have some gouges or cracks in them that will need to be filled before you can continue with surface prep.
How you fill cracks will depend on how deep or wide the cracks are. Cracks deeper than about 1/4 inch can be filled with paintable acrylic caulk, and to fill cracks less than that you can simply use a wood filler rated for exterior use.
Wood Filler
Wood filler is relatively simple to use and will help give a more uniform appearance to your paint job. Wood filler is an epoxy and cellulose product that, when dried, will not only take paint or stain, but can be sanded, drilled, and nailed just like regular wood.
Paintable Acrylic Caulk
Larger gaps or cracks in the deck boards will require a paintable caulk to fill in. You’ll want to be sure you follow the manufacturer’s instructions, but they are all relatively similar in the process.
Cut the tip off of the caulk tube, and apply an even bead of caulk to the cracks. You will need to be sure that the cracks are clean, dry, and debris-free, and before you begin applying stain or paint, you’ll need to allow it to dry sufficiently.
Many brands are paintable within a few hours, while others require a “full cure” before you can paint them.
Priming The Deck Surface
Once you’ve prepped the wood and are ready to paint, you should apply a primer. Primer is a special base coat that acts as an adhesion aid and stain-block between the deck boards and your eventual top coat of paint.
The primer should be applied per the manufacturer’s instructions, and allowed to completely dry and cure before painting over it. This ensures that your paint will have the best chance for a long-term application and lasting good looks.
Painting Your Deck
Once all the prep is out of the way it’s on to the easy part. You’ll apply the pain in an even coat, allowing the first coat to fully dry before applying the second coat.
You’ll want to use the correct paint or stain for your surface. For example, you can use these stains for pressure treated wood.
Most people only pain the deck boards, however, and neglect to pain the deck board cracks, or the spaces between deck boards. That’s because the board placement makes it relatively simple to use paint rollers and be done in a short time. Getting between the boards, however, takes a bit more effort.
Remember to always stain or paint your deck during moderate temperatures and avoid the rain. Here are the best times to stain a deck.
Related Reading: How To Paint High Walls
How To Paint Between Deck Boards
Staining a deck can be tedious, but here’s how to get the job done!
Break The Paint Film
To give the paint the best chance for adhesion, you’ll want to make sure you break the protective film of the paint already on the boards.
This means getting a little paint thinner on a rag or sponge and running it down the cracks between boards. Once everything is dry again you can start cleaning.
Clean Any Debris
Using another rag with mineral spirits or paint thinner, thoroughly clean all of the boards of the deck.
Protect The Area Under The Deck
Use drop cloths or old bedsheets to protect any landscaping under the deck, or anything else you don’t want to get paint on.
Paint
Now you can apply paint between deck boards with any one of a variety of tools. Some homeowners use a crack and groove brush, some just use an old toothbrush, and some even use a sprayer.
Even though the paint will be in the expansion joints between boards, it’s still important that you let it fully dry before advancing to the next coat.
Deck Paint vs Deck Stain
Many people wonder what the difference is between oil-based paints and stains.
While the stain is often easier to apply and retains more of the wood’s original appearance, it also doesn’t have the protective abilities of paint. Stain also does little to hide surface flaws, which can be essential for bare wood or old boards.
Paint will take a little more effort to apply, but since it goes on in two coats, it has a greater ability to protect the deck floorboards from sources of damage. This includes damage from use and traffic, as well as from UV damage.
Final Thoughts on How to Paint in Between Deck Boards
Using deck stain in between boards can be challenging, but it’s certainly possible by using the right technique and tools.
By using the right brush (like a bristle brush), painting or staining your wood deck will be a breeze.