How to Paint Trim | Colorful Playroom Reveal!
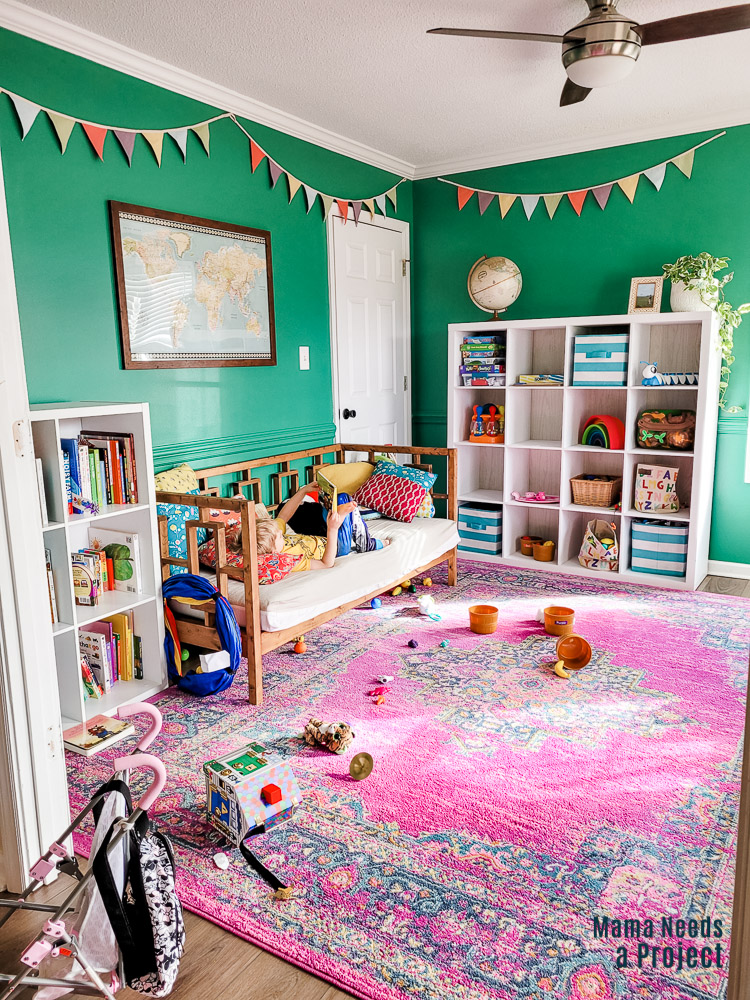
A few weeks ago – after my kiddos received waayy too many presents for Christmas – I decided it was time to focus on organizing the playroom and making it a whole lot more fun. And I LOVE how it turned out!
Today I’m showing you just how stinking cute this new play space is, plus walking you through one of my favorite parts – the painted trim chair rail.
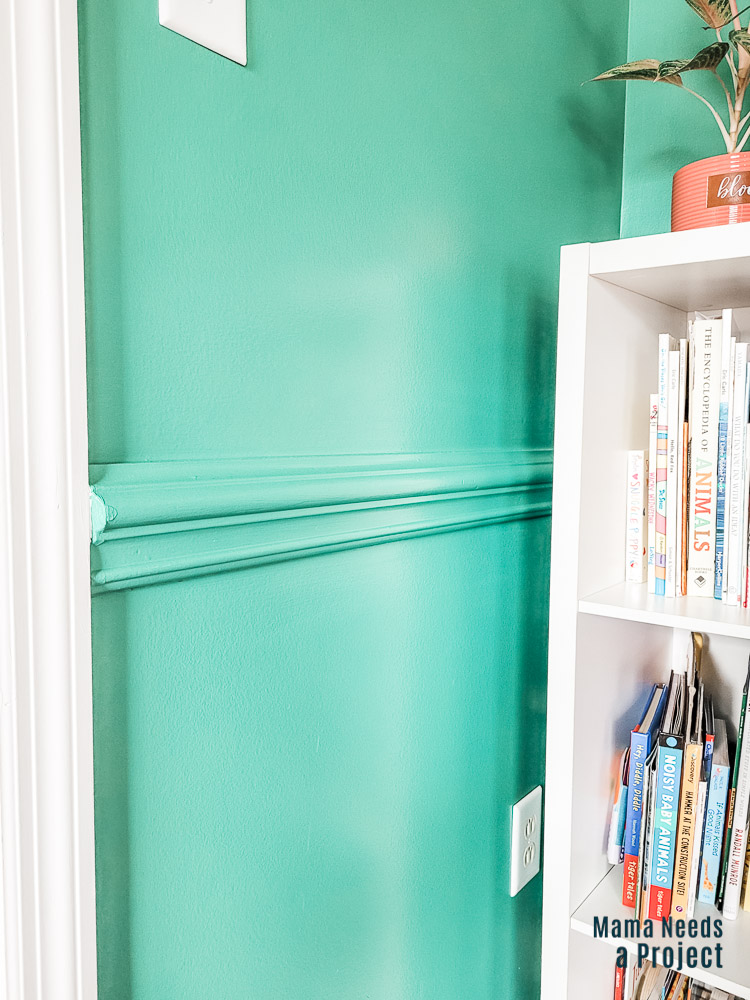
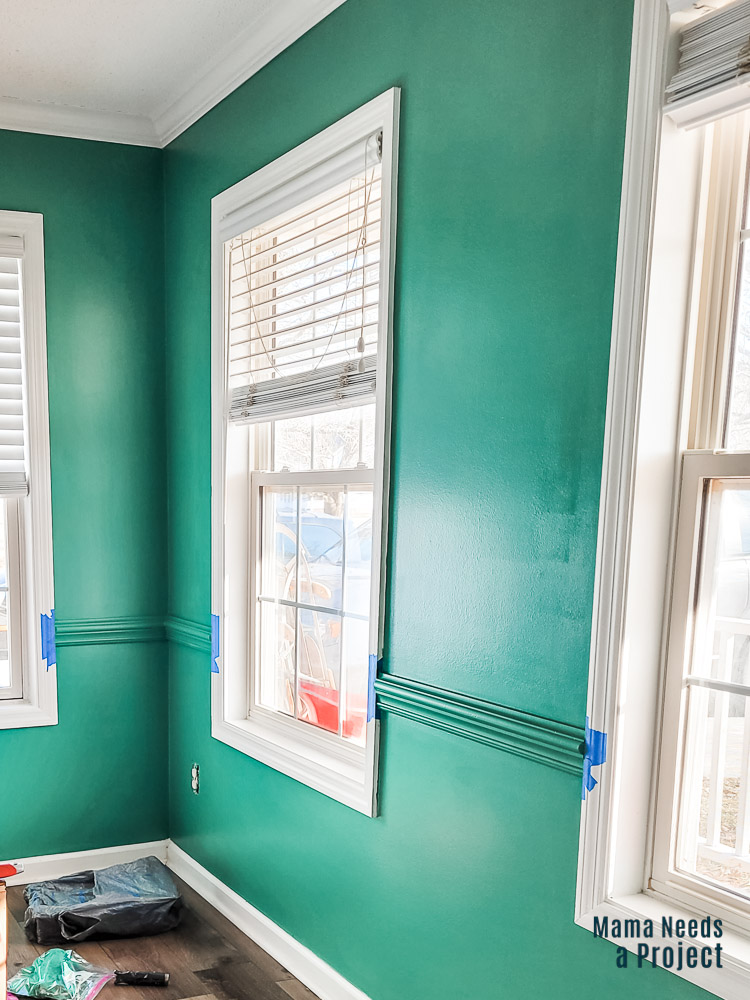
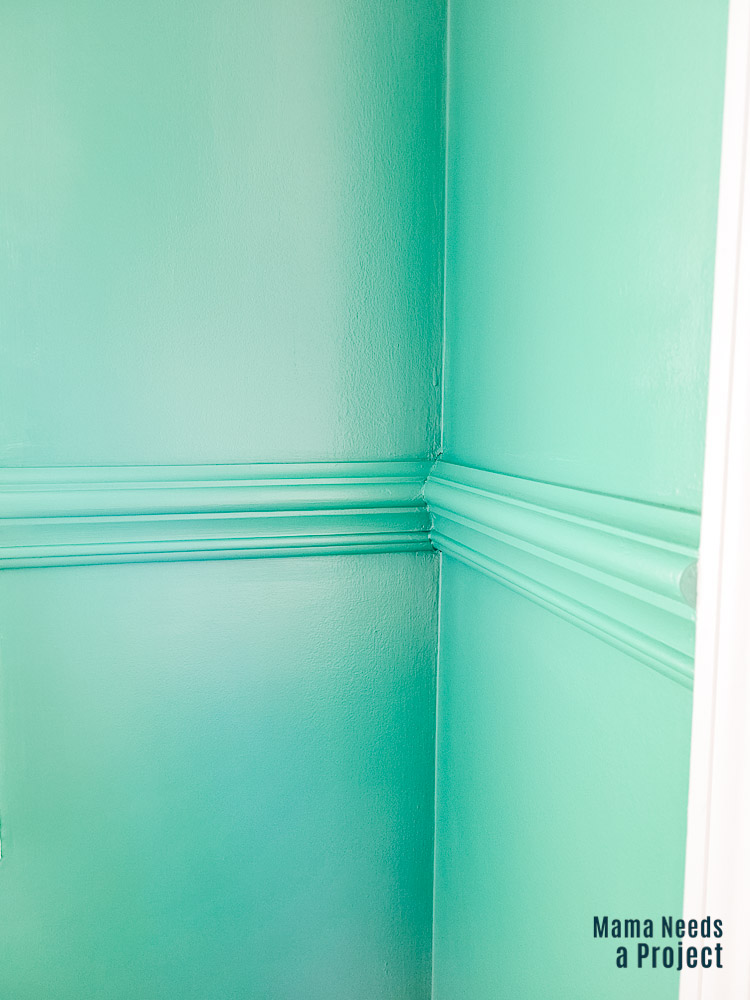
This house is full of chair rails, fancy moulding and formal features that are totally not my style. My initial plan for this colorful playroom was actually to remove the chair rail – it’s totally out of place in a room for kiddos. But after removing the chair rails in our hallway I knew it would be a serious headache trying to repair the drywall behind the chair rail so that it blended in with the texture of the rest of the wall and I just did not want to do it.
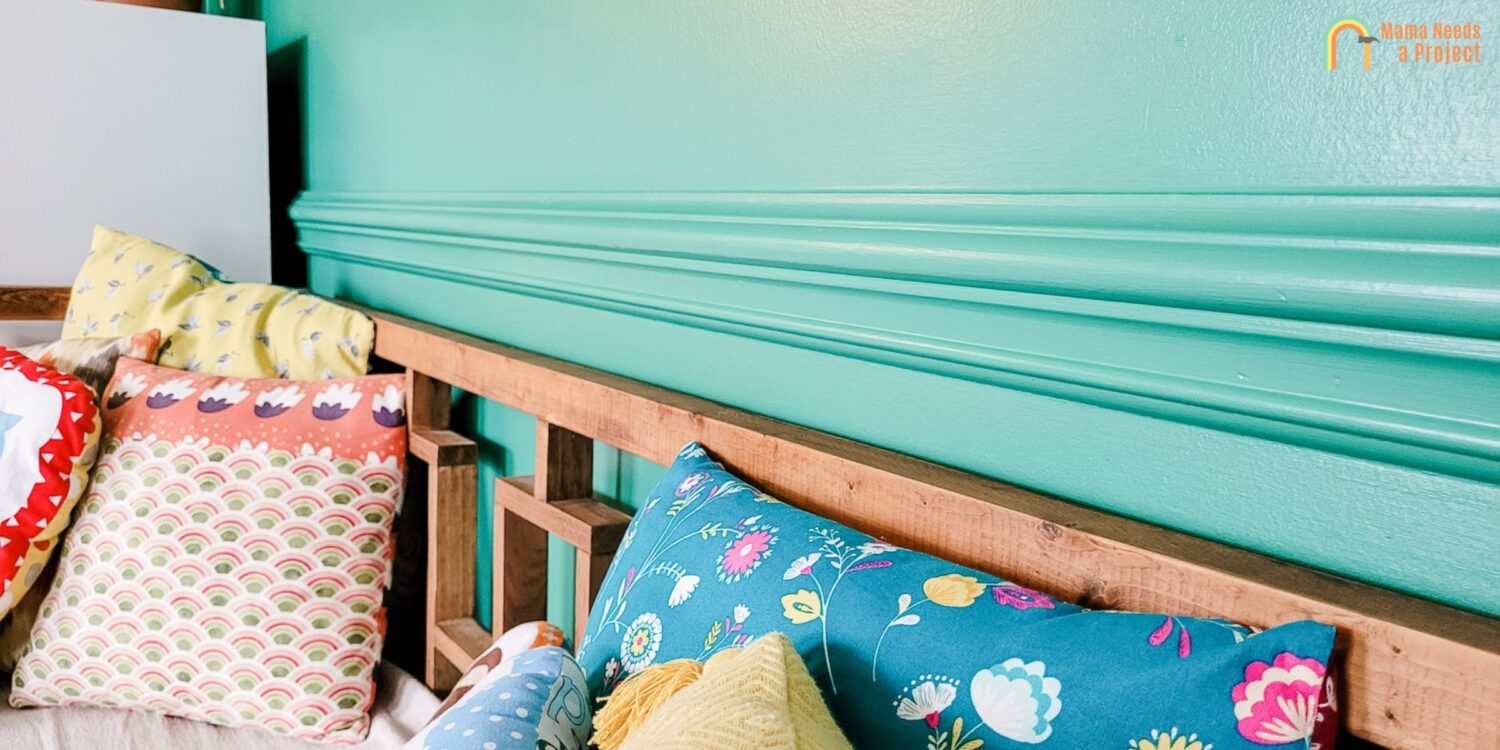
So instead of removing the chair rail I opted to paint it the same color as the wall and hope it would just disappear into the wall.
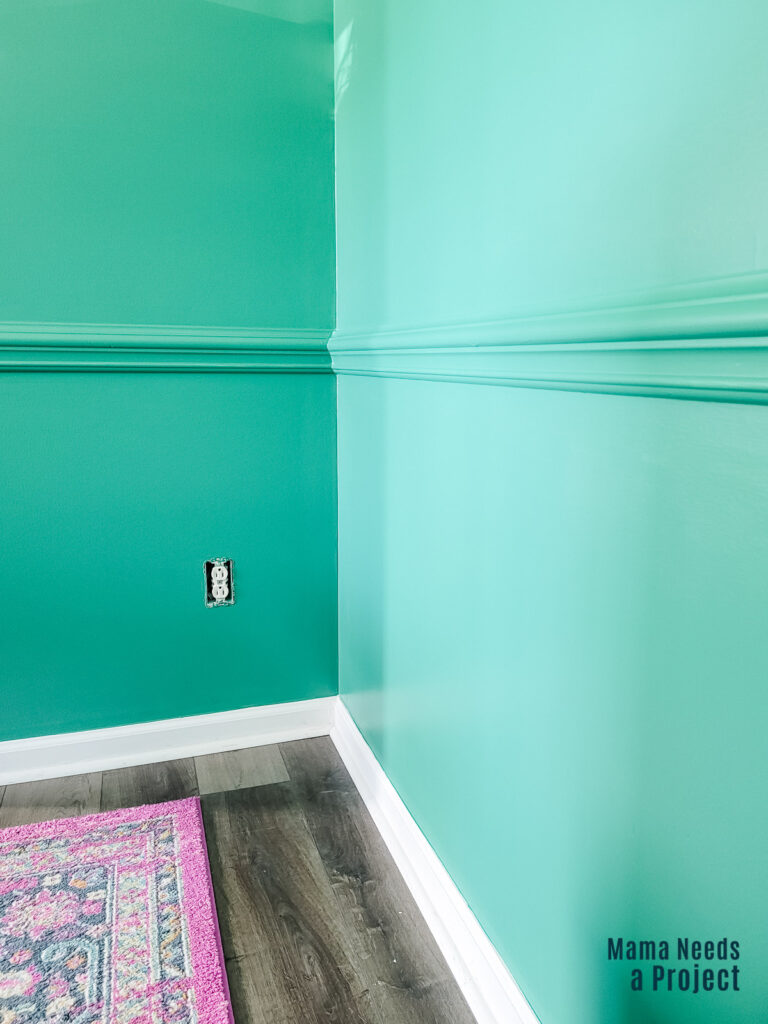
This painted trim does not blend into the wall (in my opinion) but instead stands out as a cool, modern feature of the room and I absolutely love it!
Honestly, I can’t believe how good the painted trim looks in here with the bold paint color.
If you’re looking to update some dated trim I totally recommend testing out painting it. In addition to this painted chair rail, I have also painted trim around our front door and it’s such a bold, fun design feature!
Related Reading: How To Paint High Walls
So now that I’ve shown off this pretty new room, let me walk you through how to paint trim in your home. It’s a super simple process, but be sure to pay close attention to the prep work – I find that it makes all the difference!
How to Paint Trim
this post contains affiliate links
Prep trim for paint
Sand
The first thing you’ll want to do to prep your trim for paint is to sand it. I used 150 grit sand paper and sanded mine by hand. The goal for sanding the trim isn’t to get all of the existing paint off, but to rough up the surface enough that the new paint can adhere to it.
Most trim is painted with a high gloss finish and this type of sheen is hard to paint over. Paint just doesn’t stick to it well. Sanding the surface to make it less shiny and a little roughed up will make a huge difference in how well your new paint adheres to the trim.
If you need help removing the paint, check out these wood paint and stain strippers and you can use one of these sanders for trim work.
Clean
After you’ve finished sanding wipe down the trim with a damp cloth to remove the sawdust from the surface. You want the trim to be free from dust, dirt, lint and anything else before you start painting. You might need to remove staples from the wood before painting.
Tape
Once the trim has been sanded and cleaned it’s time to tape. Use painter’s tape along the wall at the edge of the trim on the top and the bottom. Also be sure to tape around the edges of the trim where it meets door frames and windows – basically anywhere you don’t want to paint.
What kind of primer to use for painting trim
Before you actually start painting your trim it’s important to use a high quality primer. The primer will create a base layer for the paint and give you a much more even finish in the end.
I recommend using Zinsser Bulls Eye Primer. This stuff does such a good job of creating a surface that paint can adhere to easily. Plus I love that it can be cleaned up with just water.
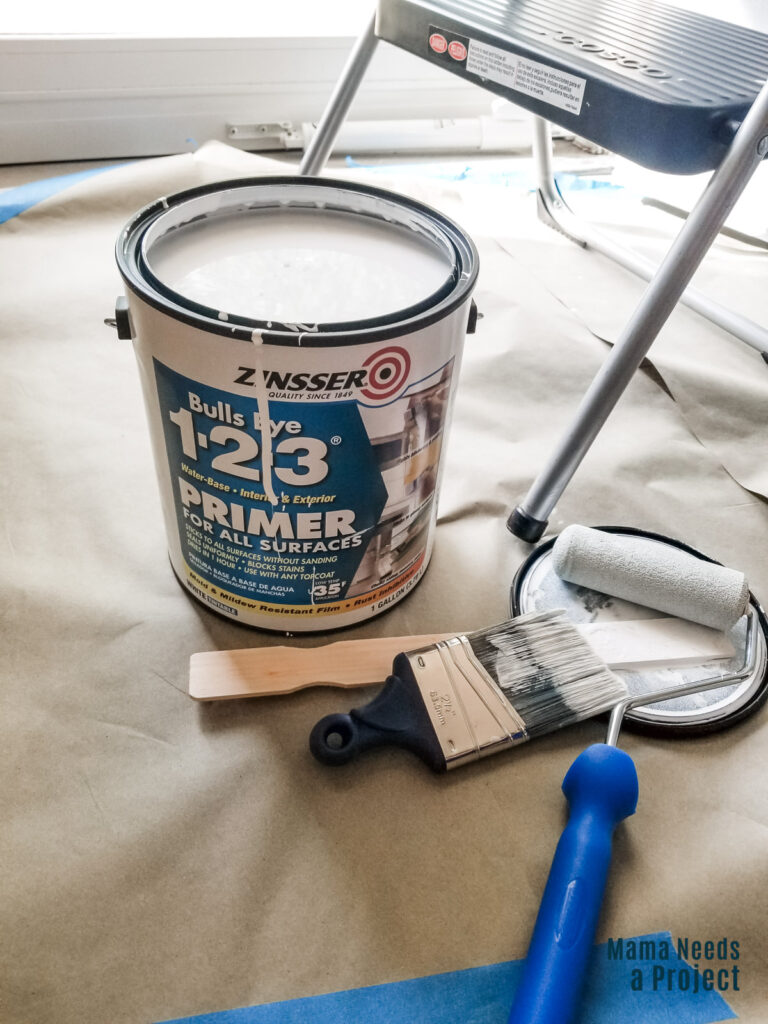
Paint 1-2 coats of primer on the trim, paying attention to the dry time recommended between coats on your can of primer. I’ve done it with both 1 and 2 coats of primer and had good results both times.
Lastly, do a light sand on your trim after your last coat of primer before you start with your first coat of paint. I just do a quick hand sand with 150-220 grit sandpaper. Be sure to wipe down the trim when you’re done to remove any sawdust before you start painting.
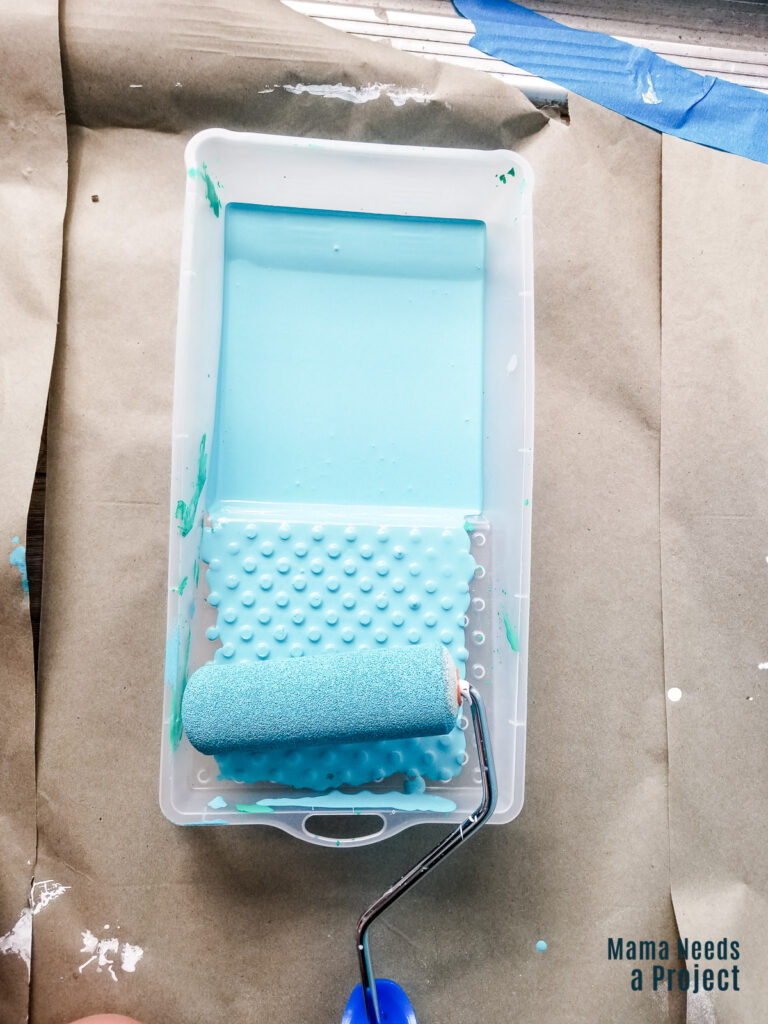
Choose the right kind of paint for trim
Now that the trim is prepped it’s time to finally paint! For most of the trim I’ve painted in my home I’ve used Behr Ultra Paint & Primer in One from Home Depot. It’s an enamel paint that I’ve been really impressed with! It dries hard and so far I haven’t had any issues with chipping or spotty coverage. It’s also what I used to paint my front door with great results.
When I painted the chair rail in the playroom I just used the same type of paint that I was already using to paint the wall – Valspar Signature from Lowe’s. It’s been a little over a month and so far it’s held up just fine!
Traditionally trim is painted with a gloss paint so it’s super shiny. For the chair rail in the playroom I used a satin finish paint – the same as I used on the walls. And for the doorways that I’ve painted trim around I used a gloss paint because that’s what I was using for the doors.
The right tools for painting trim
When I painted my front door I learned a great method for eliminating brush strokes when painting and it’s the same method that I now use for painting trim.
I start by painting the trim with a paint brush. I prefer using an angled brush, but I don’t think it matters much. Then I go over the painted areas with a foam roller while the paint is still very wet. The foam roller smooths out any brush strokes and makes the finish of the paint look super professional.
It’s important to use a foam roller and not a regular nap roller like you’d use on walls. It’s the foam that leaves you with a smooth surface. I used a 4″ foam roller like this one.
How many coats of paint for painting trim
When I painted the chair rail in the playroom I ended up needing to do 3 coats of paint, but when I painted the trim around door frames I only needed 2 coats.
The number of coats of paint you’ll need to do really just depends on how your trim looks. Do as many coats as you need to get an even, full coverage finish. I would expect to do at least 2 coats, and be ready to do a couple more if necessary.
2 tips for painting trim
Painting trim is pretty simple as long as you remember to take the time to do the prep work of sanding and priming. I did want to share a couple more tips that I’ve learned as I’ve painted trim in my house.
1. Use a box knife to score the edges of the tape before removing it
One problem that I into with one of my painted trim projects was that when I removed the tape after painting my paint started peeling off the trim right along with the tape! It was so frustrating to have spent so much time painting and waiting in between coats only to have it all ruined when I removed the tape.
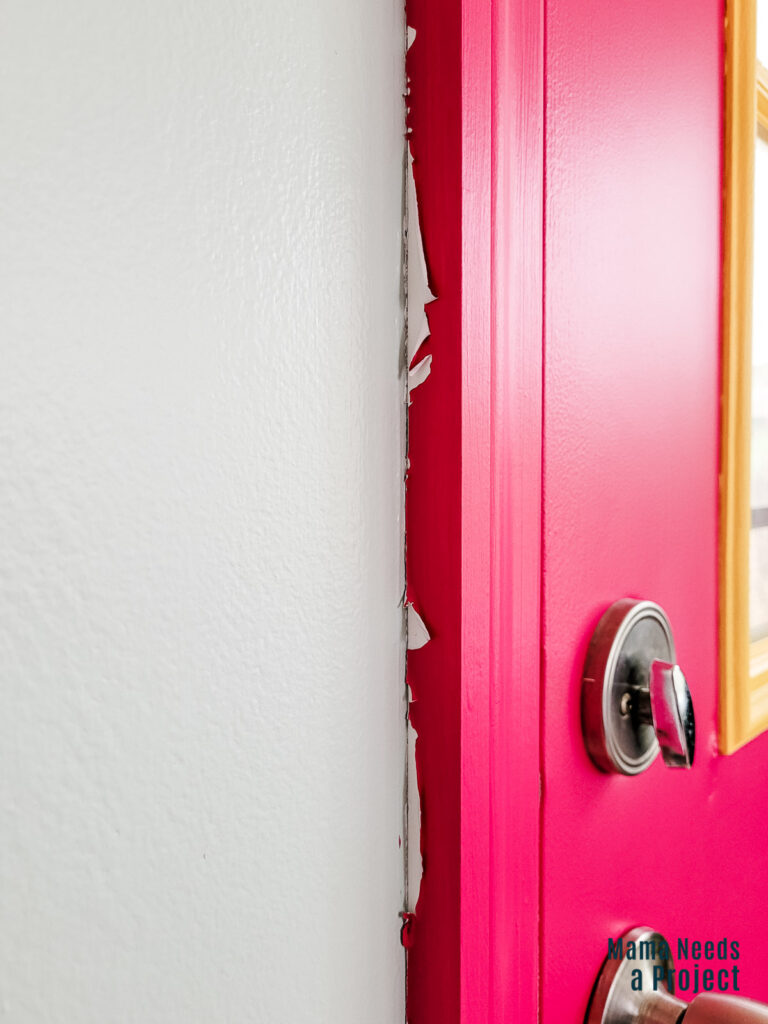
I did find a way to get around this issue. I used a box knife to score around the edges of the painters tape – right along the painted edge. Then after scoring the tape I peeled it off. This saved me from any more peeling paint on my trim.
Also, I now realize that the reason I ran into this problem is because I slacked on one important step in the process – sanding. I did a super quick, basically non-existent sanding job on the trim and because of it all of those layers of primer and paint just didn’t have a good surface to stick to and peeled right off. So moral of the story – don’t let your hard work go to waste and don’t skip out on sanding. It’s important!
2. Go over brush strokes with a foam roller to smooth them out
I know I talked about this already, but this foam roller trick is so good! It makes the paint job look so much more professional and hardly adds any time to the painting process.
So after you use a paint brush to get into all the nooks and crannies of your trim take a few extra minutes to over the wet paint with a foam roller and watch all those brush strokes disappear. It’s so good!
How to paint trim
I hope this little tutorial was helpful for you in your process of painting trim in your own home. Whether you’re giving your trim a refresh of the classic white or amping up the personality with a bold color these steps have worked great for me and I hope they work well for you too!
Related: How to Remove Acrylic Paint From Wood
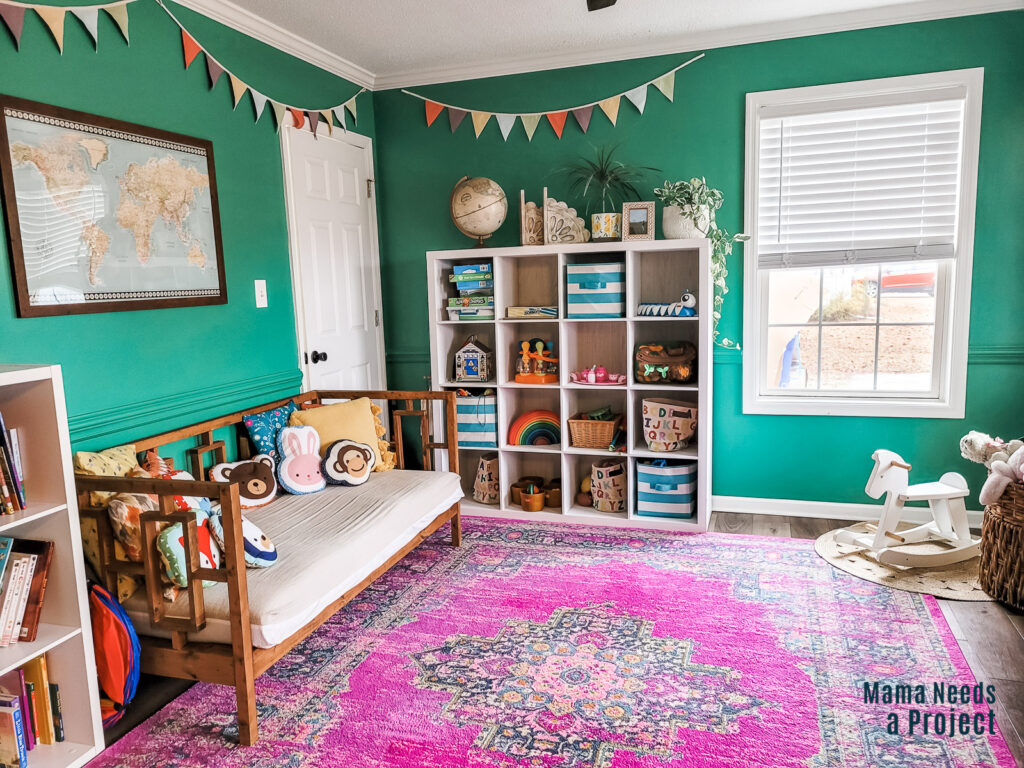
Painted trim before & after
And one last picture of the playroom. Isn’t the impact of paint huge?? We just love spending time in this colorful space!