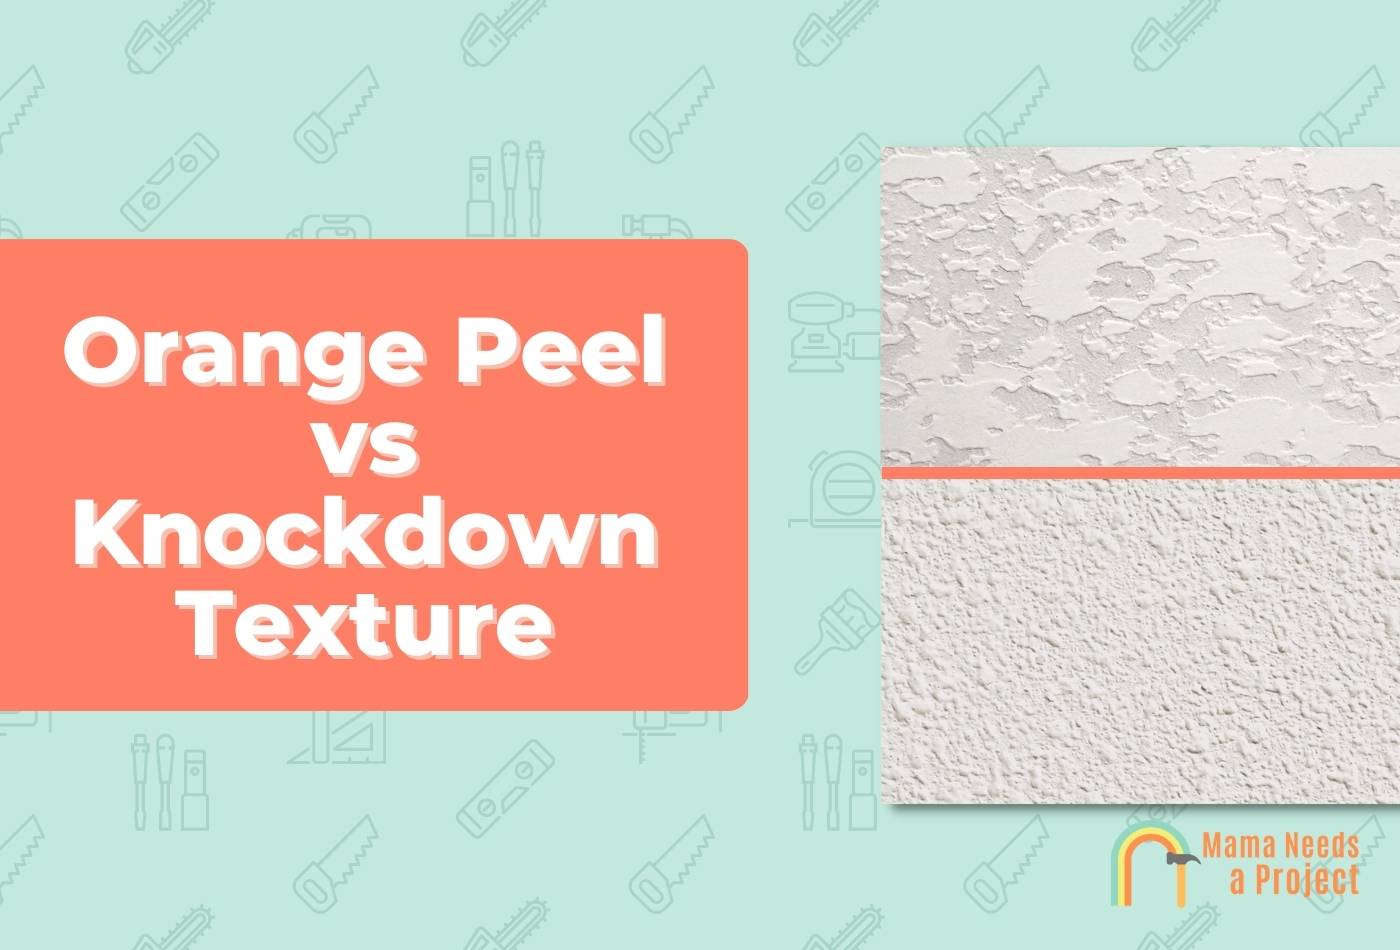
Orange Peel vs Knockdown Texture (Which is Better?)
Ceiling textures used to be the name of the game when it came to interior design trends in the 90s and early 2000s.
And there’s no shortage of options!
Two of the most common include orange peel texture, and knockdown texture.
But what’s the difference exactly? And which one should you choose?
I’ll explore the key differences between orange peel texture and knockdown texture, which is better, and much much more. Let’s dig in!
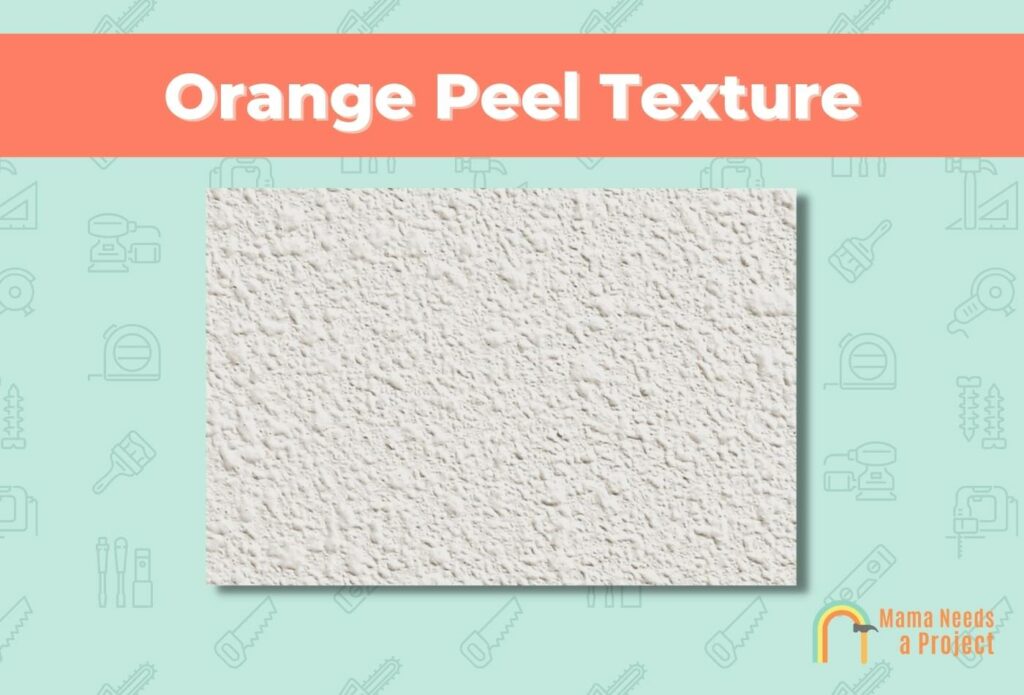
What is Orange Peel Texture?
Orange peel texture is somewhat similar to the classic popcorn texture that we’re all familiar with.
However, instead of sharp points, it’s made with a more bumpy finish that looks like orange peels.
This drywall texture is easily applied by spraying it onto your ceiling with a paint sprayer.
While this is often used on ceilings, you can use this on any smooth surface to hide imperfections and add an artistic flair to the room.
Pros and Cons
The main benefit of an orange peel texture is that it can hide imperfections in your ceiling as well as adding visual interest to the room.
Orange peel texture is also easy to apply, you’ll just need to spray it on and let it dry. This means it’s easier to apply than a knockdown texture.
When comparing knockdown texture vs orange peel in terms of how easy they are to clean, orange peel wins this test because there is less change of depth – hence, it’s easier to clean.
The main downside of textured ceilings is that they can attract mold and mildew, so I wouldn’t recommend this for a bathroom or other humid location.
Additionally, orange peel drywall textures are more difficult to remove or patch because it has not been knocked down – therefore you’ll spend more time sanding if you want to remove it. (This is something to keep in mind if you want to remove it one day!)
How to Apply Orange Peel Texture
To apply an orange peel texture to your ceiling, you’ll want to start by cleaning the ceiling and removing any dust or debris.
Next, you’ll need drywall mud, a spray gun with a hopper (and an air compressor), and some paint to cover the ceiling. You might want to tape off any windows or trim to avoid overspray.
You can simply spray the drywall mud on the ceiling in 3 foot sections. It’s best to go in the same direction throughout the entire room. After one pass, you can go over the area again to ensure you didn’t miss any areas.
Check out the video below for more info!
How to Remove Orange Peel Texture
If you want to remove existing orange peel texture from your ceiling you can simply wet the area with warm water and some dish soap and use a high grit sandpaper (I recommend 2,000 grit) to remove the ceiling texture. After sanding, wash the ceiling again with a damp rag.
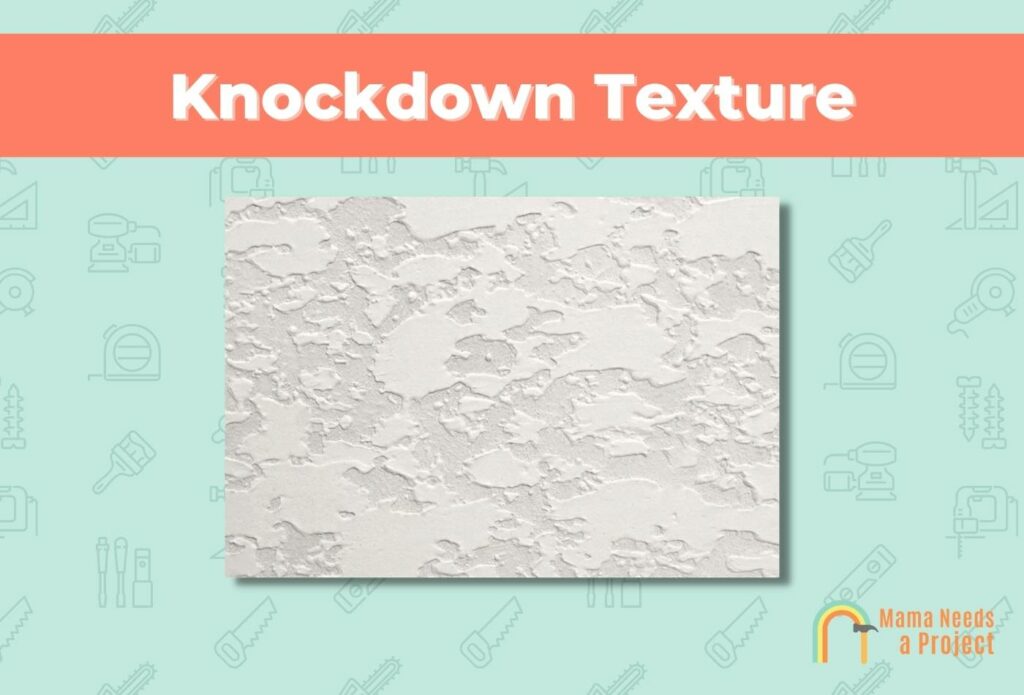
What is Knockdown Texture?
Knockdown texture is also similar to popcorn texture except, as the name suggests, it looks knocked down slightly.
This ceiling texture is a great way to add depth to your room from the uneven surface imperfections it provides.
A knockdown finish adds visual interest and an unusual pattern to any surface by applying drywall mud randomly throughout the area.
It’s known for a more modern look when compared to orange peel textures, so it can compliment any decor or design choices you make.
Just like with orange peel textures, it can be applied to both ceilings and walls (or any drywall surface).
Pros and Cons
If you’re looking for an enhanced aesthetic appeal to your room, adding a knockdown texture can be a great option.
In addition, you can also gain some sound diffusion that all ceiling textures provide. So if you’re in a room with hardwood floors and other hard objects, this can be a great choice to add some comfort.
The main con of this ceiling texture is the additional work required to complete the job. Whereas with orange peel drywall texture you’ll just need to spray it on and let it dry, with knockdown texture you’ll also have to “knock down” the ceiling to get the desired look.
You’ll need a knockdown knife to get rid of the bumpier surface that this texture yields, so if you don’t have one – this is an additional cost.
Wondering how to find a stud in the ceiling? Check out these easy methods!
How to Apply Knockdown Texture
Knockdown ceiling texture is applied very similarly to orange peel.
First, you’ll need to prep the wall or ceiling you’re working on. You can patch any areas that need work and wash it down with a damp rag.
Next, you’ll need to gather your drywall compound, paint sprayer, hopper gun, and air compressor.
After gathering your supplies, you can start spraying your ceiling (or walls) with the mixture and allow it to dry. Be sure not to apply too much to your ceiling, otherwise you might be forced to remove some of it and restart. Just like with orange peel drywall texture, you’ll want to break the area up into smaller 3 foot sections and coat each section before moving on.
The main difference is the final step, in which you’ll need a drywall knife or knockdown knife to remove that mounds and peaks on the wall or ceiling.
Check out the video below for more info!
How to Remove Knockdown Texture
Similar techniques can be used to remove knockdown texture as orange peel texture. You’ll just need a damp rag, some sandpaper, and some will power to get the job done. Start by using your rag on the ceiling surface to loosen the texture. Then, go over it with sandpaper to completely remove the textured surface. Finally, wipe the area clean.
Orange Peel vs Knockdown Texture: Which is Better?
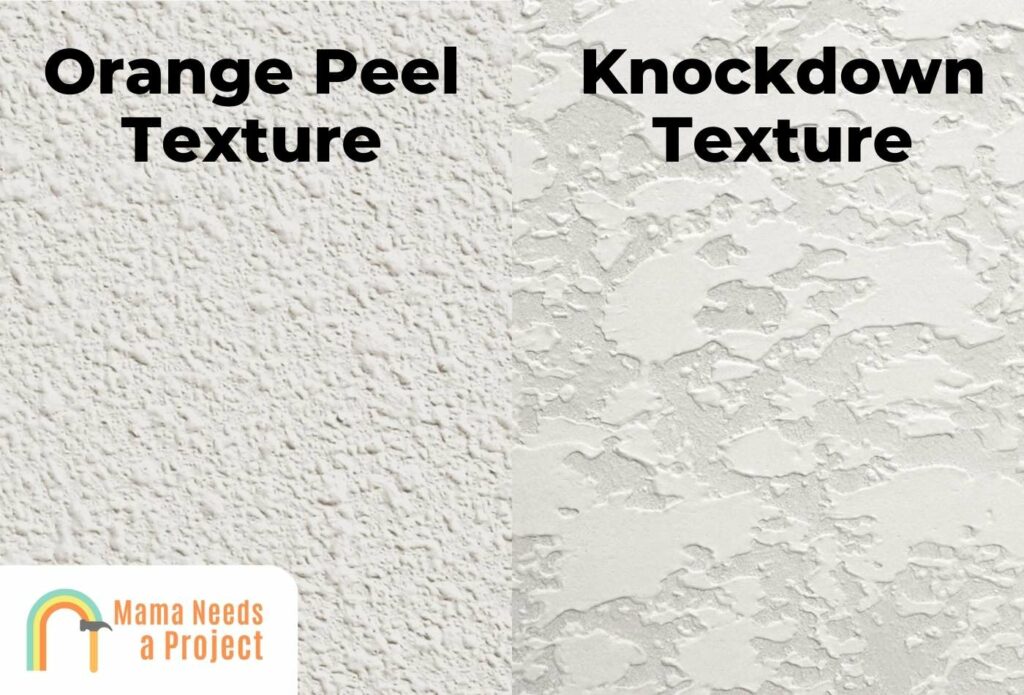
If you’re looking to add a textured surface to your room, both an knockdown and orange peel finishes are great options.
They are essentially the same textured finishes other than the slight visual differences and additional work required for a knockdown finish. Both can be applied to walls, ceilings, and other drywall surfaces.
Orange peel offers an easier application – which is something to keep in mind, and it’s also easier to clear.
Ultimately, it’s up to your design taste to decide which is better. Knockdown is known for providing a slightly more modern look compared to orange peel.
Tips for Adding Ceiling and Wall Textures
Textured surfaces like textured walls or ceilings can be a great way to add visual interest to any room.
- Use a paint sprayer. While some people claim you can use a paint roller, it’s much more difficult and often won’t yield the same results.
- Keep the spray direction in mind. If you’re creating a textured ceiling, try to work in small sections and spray up and down. If you’re creating a textured wall, you can spray from side to side.
- Practice spraying first. You can use scrap cardboard to practice your spraying so you have a good idea of how fast the the texture comes out.
Final Thoughts on Knockdown Texture vs Orange Peel Texture
When it comes to comparing orange peel ceiling texture and knockdown textures, the main difference is the visual appearance and application process.
Orange peel ceiling texture looks as if you covered the ceiling with citrus peels and painted over it. Knockdown ceiling textures add more depth.
Both are great at hiding imperfections and adding texture to your room.