Skinny Console Table Woodworking Plans
This skinny console table is the perfect solution for a small space!

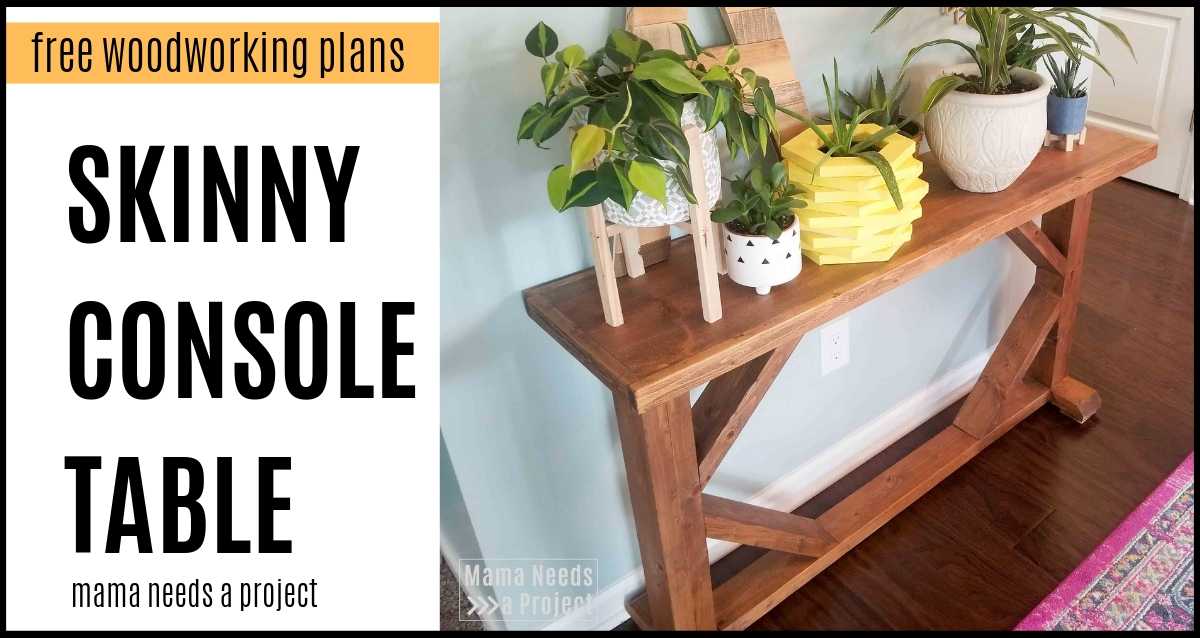
I built this skinny console table a few years ago to fit into a narrow space in my dining room. I needed something big enough to provide some visual interest (and function), but small enough not to block the walkway. This skinny console table fits the bill at only 12 3/4″ in depth.
This table has had many functions over the last few years, but most recently it’s been where all my clearance rack houseplants hang out. This is a pretty serious upgrade from the pile of unopened mail that it used to hold.

This project was the very first piece of furniture that I built off of plans I created myself. When creating the plans I wanted something that went along with the dining room table I built using plans provided by Shanty 2 Chic.
I think the style of this console table coordinates really nicely with the dining room table. I mimicked the angled pieces from the dining room table and also the style of the feet.
The angles of the console table are also a great compliment to my Big X Wood Wall Quilt that I have hanging in the same room.

Build a Skinny Console Table
Since this table was built a few years ago I don’t have step-by-step pictures to share with you. But, I have created easy to follow woodworking plans that are available in my woodworking plan shop.
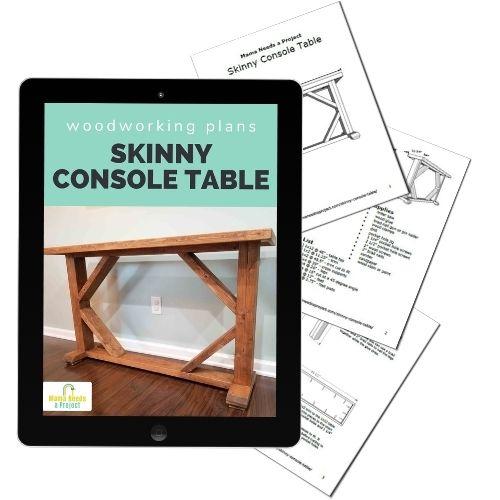
All of the woodworking plans in my shop include a lumber list, cut list and supply list. They also feature digitally rendered images and detailed instructions that walk you through each step of the build. I use easy-to-understand language that’s perfect for beginners.

Tips for building your Skinny Console Table
You can get all of the details for this build in the printable woodworking plans. Below I’ll share some tips for the building process.
- I recommend using a Kreg Jig for the pocket holes. Whatever pocket hole jig you end up using, just remember to adjust the jig for the thickness of your board. This plan uses both 3/4″ and 1 1/2″ thick boards.
- Sand and stain your pieces before assembly. I find it so much easier to sand and stain wood before my project is assembled. I also prefer to do this ahead of time because I’m often sloppy with my gluing. If you get glue on the raw wood that glue spot will not take stain! I like to play it safe and do the staining first.
- My favorite brand of wood stain is Minwax. It is a water-based stain that penetrates the wood to enhance the natural wood grain instead of covering it up. My skinny console table is stained in Minwax Early American. Another similar stain color that I’ve used frequently is Minwax Provincial.
- Use wood glue on all of your joints. Wood glue will create the strongest hold for your joints.
- Pre-drill all of your holes. It’s important to pre-drill your holes to prevent your boards from splitting. I have this set of drill bits.
- Don’t pre-cut your trim pieces. Wait to cut trim pieces until you are ready to attach them to the tabletop. Then, measure to get an exact fit. I give trim measurements in the woodworking plans, but I recommend cutting the trim based on the exact measurements of your piece. A piece of trim that is just barely too short doesn’t look good!

Get building!
If you have any questions about the Skinny Console Table or any other woodworking plans on Mama Needs a Project, please ask! Leave me a comment below or respond to an email and I’ll get right back with you.
And, if you build this project please share it with me! Tag me on Instagram or share a picture on the Mama Needs a Project Facebook Page.