
Staining Plywood (Tips & Tricks)
Plywood is such a versatile material that I use it a lot for my projects. It’s great for furniture, outdoor projects, and everything in between.
But how do you stain plywood to get the style you want?
In this post, I’ll show you exactly how to stain plywood so you can get the look you want as well as a few tips and tricks to make the process even easier. Let’s dig in!
- Yes, plywood can be stained with oil-based, water-based, and gel wood stains.
- High-grade plywood is best for staining, since it’s smooth and virtually free of blemishes.
- Staining plywood can be challenging, and if you don’t do things right the stain may peel off soon after application.
How to Stain Plywood
1. Gather Your Materials
The first thing you should do is gather all the materials you’ll need to stain plywood the right way.
You should gather everything before you begin so you don’t have to interrupt the process midway through to look for what you’re missing.
The following materials are commonly used to stain plywood. You may not use all these materials, and you may need others, but these basic materials will get the job done:
- 120- & 220-grit sandpaper
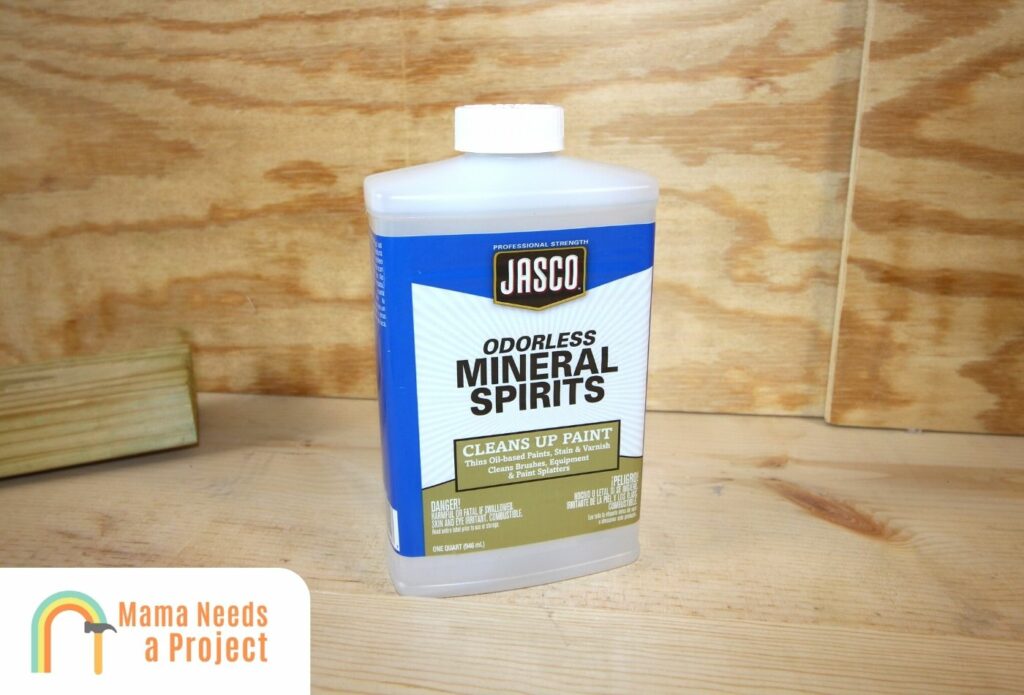
- Mineral spirts or warm soapy water
- Two natural-bristle brushes (or one if you’re using a roller)
- 2-3 clean rags
- 2 paint stirrers
- Pre-stain conditioner
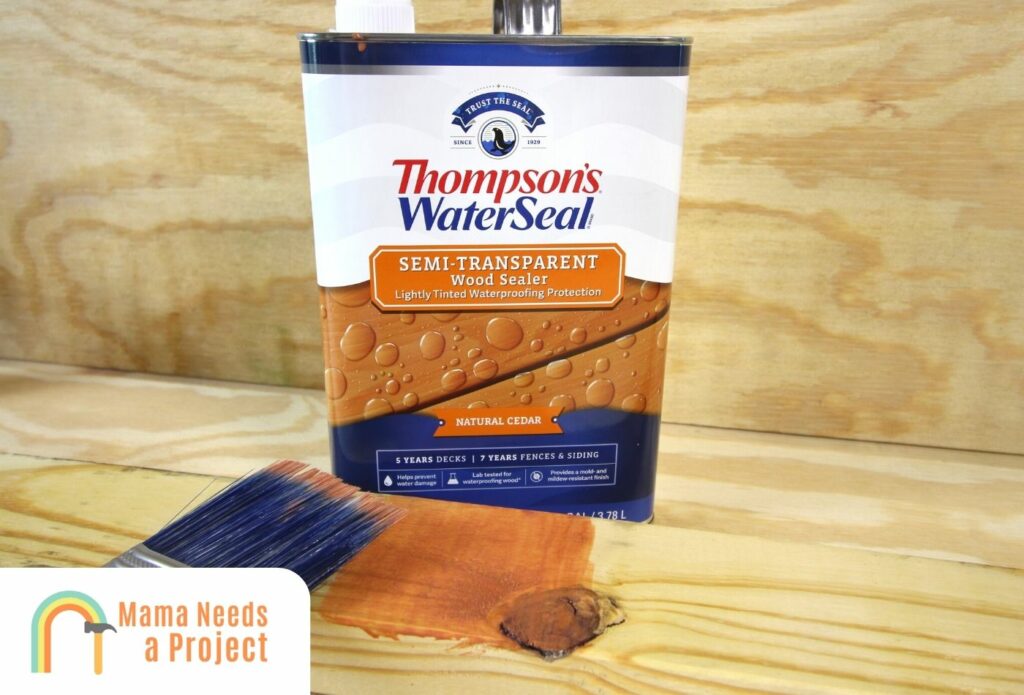
- Stain
- Sealant (polyurethane, lacquer, etc.)
- Protective gear (goggles, respirator, gloves)
- Desk or floor fan
- Tarp or old bed sheet
2. Prep Your Work Area & the Workpiece
Work Area Prep
Once you have all the necessary materials, you need to prep your work area; this way you have plenty of room to operate.
At this point, lay out the tarp or old bedsheet to prevent stain, wood conditioner, sawdust, mineral spirits, etc. from getting on the space around your area.
You should also open windows and turn on any fans to ensure good ventilation.
Workpiece Prep
Prepping the plywood is one of the most important parts of the stain application process.
This step should be broken down into three sub-steps: sanding, cleaning, and applying wood conditioner.
The first step is integral. You need to sand the surface so it’s receptive to the wood stain.
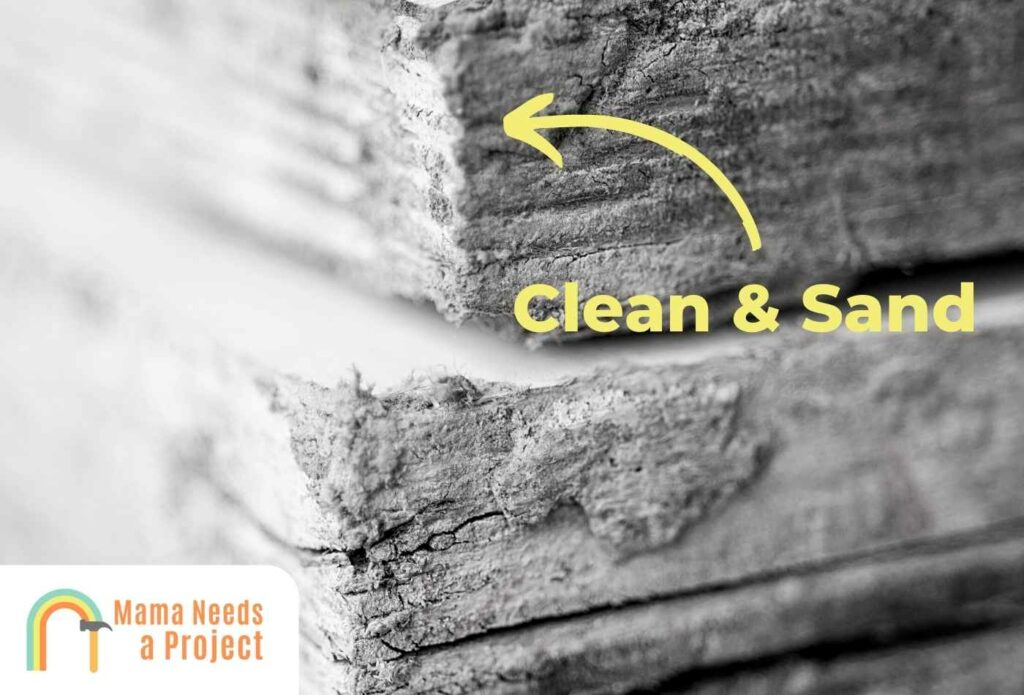
But your goal here shouldn’t be to sand so much you take off a lot of material; instead, you should be trying to rough up the surface so the stain can easily access the wood pores.
It’s best to stain by hand with a lower-grit sandpaper first, and then move up to sandpaper with a higher grit count.
Avoid using an orbital sander, as this can take off too much material and harm your plywood.
Once you’ve done enough sanding, wipe down the plywood with mineral spirits to remove caked-on sawdust.
Then run a shop vac over the plywood to suck up any residual dust, dirt, etc.
If you don’t want to use mineral spirits, use warm soapy water.
After cleaning, give the workpiece a few hours to dry.
Once it’s dry, you need to apply wood conditioner to the workpiece—not only will this expedite the wood stain absorption process but it’ll also make the stain richer and more visually appealing.
3. Apply the Stain
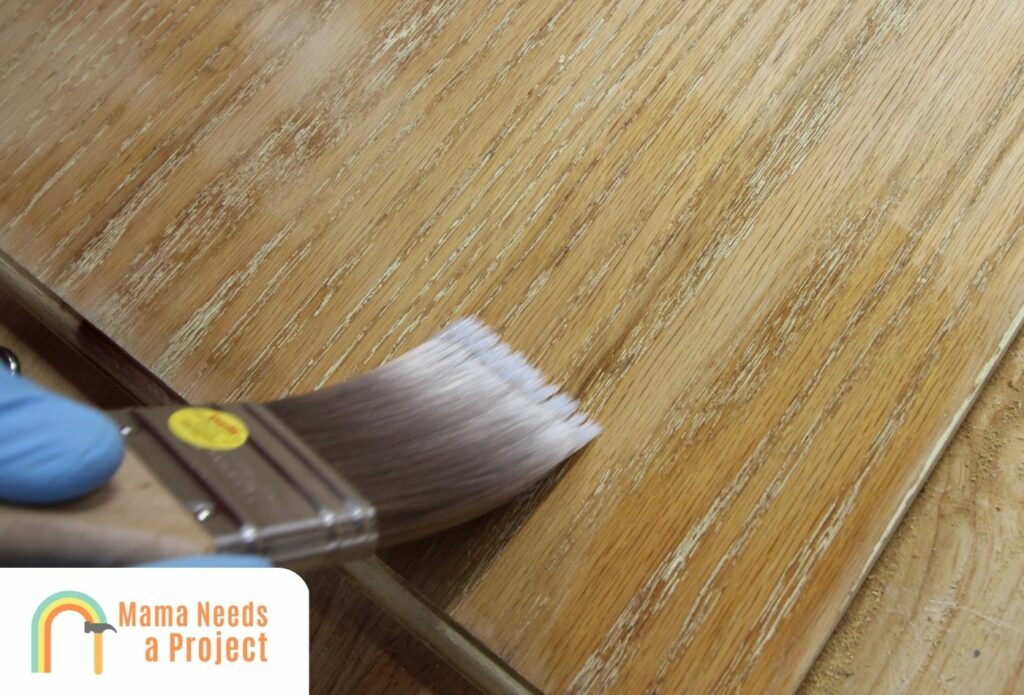
Once the workpiece is ready, it’s time to apply stain.
First, make sure the stain is thoroughly mixed using a mixing stick. Avoiding shaking the stain as this can cause bubbles that you don’t want.
Once it is mixed well, dip your wood stain brush in so the bristles are about half-covered with stain. Don’t tap the sides of the can/container, as doing so will create air bubbles.
Now apply the stain to the plywood, going with the grain if you can.
Brush lightly in long, uninterrupted strokes to prevent stain from building up around the edges.
It’s best to apply stain in a swirling motion, as opposed to up-down or left-right strokes.
Curious about which stain to use? Check out my Ready Seal vs Cabot stain comparison to find out!
4. Remove Excess Stain
After the surface has been adequately covered with stain, closely examine it to identify any excess stain.
If this is identified, wipe it off with one of your clean rags. But don’t wipe so much that you take off all the stain in that area.
5. Let the Workpiece Dry
Once all the excess stain has been removed, you need to let the stain dry.
How long the drying process for wood stain takes largely depends on the stain you used.
If you used an oil-based product, expect the drying process to take 5-7 hours. Gel stains take just as long, whereas water-based products usually dry in 30 minutes to a couple hours.
It’s extremely important to have patience at this time. If you try to apply another coat before the one you put on before is dry, the new coat won’t adhere properly and you may have a mess on your hands later on.
6. Apply Wood Sealant
After you’re done putting stain on, you may think the process is over, but it doesn’t end here.
Apply sealant, like polyurethane, to ensure that the stain and your plywood is protected for a long time.
I recommend using a water-based polyurethane, since these don’t have an amber or yellowish tint, meaning you won’t have to worry about discoloration.
But before polyurethane can be applied, you’ll need to rough up the recently stained surface; again, don’t apply too much pressure, as you’ll take off too much stain.
Need more help? Check out the video below!
Staining Plywood Pros & Cons
Pro: Preserves the Wood Grain
One of the most attractive things about wood stain—even colored wood stain—is its ability to highlight wood’s grain and other features.
You don’t get this from paint because paint is applied over the grain, whereas stain is absorbed into the wood.
And plywood has some of the most unique grain patterns, especially the high-grade stuff. Staining only makes these more prominent.
But you need to apply stain the right way, otherwise the finished product won’t be visually appealing; it may be filled with brush marks or blotchy. No thanks!
If accentuating the stain is your top priority, consider wiping on stain (as opposed to brushing or rolling it on). It’ll take longer, but it’ll be much easier to get an even, uniform, and smooth finish.
Pro: Stain Doesn’t Peel
Yes, stain doesn’t peel, but ONLY if it’s applied properly. A telltale sign that you didn’t apply stain the right way is peeling.
Peeling is often what you get after applying too much stain, and it can also happen if you try to expedite the drying process with a heat gun or hairdryer.
Additionally, peeling can occur if the stain gets dried out by the sun.
But stain that’s properly applied won’t peel, mainly because it doesn’t rest on wood’s surface (like paint); well, gel stain does, but oil- and water-based stains, i.e. the kinds most woodworkers use, don’t.
Pro: Added Protection
Adding wood stain to plywood won’t just make it visually appealing but stronger too.
After stain has had plenty of time to soak into plywood’s pores, it hardens, making the surface more durable overall.
And when a sealant like polyurethane is added afterward, the surface becomes virtually waterproof.
This is why outdoor plywood is often stained; the stain makes the wood more resistant to the elements.
Plus, it’s easy to touch up with a clean rag, and even a hardwood like oak plywood can accept stain.
But in terms of durability, paint does have stain beat, since it dries on top of wood surfaces (as opposed to inside them). I’ll explain this more in a later section.
Check out this guide to staining birch plywood for more help with your project!
Pro: Variety of Stains to Choose From
There are many stains on the market these days, and most of them look great on plywood.
That said, oil-based stains with an amber tint don’t look good on lighter plywoods, generally speaking.
But since there are a variety of stains available, it’s easy to find something that’ll complement surrounding furniture and fixtures.
Did you know you can also whitewash plywood! Yep! I love the way it looks!
Con: Somewhat Difficult to Apply
Applying wood stain is one thing; applying wood stain correctly is a whole different story.
To do things right, you need to be extra careful. That is, you need to dab the brush or roller properly before you apply stain, and you need to brush/roll in a way that ensures even, smooth coats.
Along with accentuating wood grain and a range of natural colors, wood stain will also make brush marks prominent, and these can diminish the overall visual appeal of the surface.
Also, you need to know when it’s best to apply another coat and when it’s best to hold off; the kind of wood stain you use will play a big role here. Remember: oil-based stains are much thicker than water-based and even some gel-based versions.
You’ll also need to know how long to wait in between coats. Not allowing enough time could cause a handful of problems that’ll collectively set you back a few steps.
Con: Doesn’t Last as Long as Paint
Wood stain doesn’t last as long as paint, but the difference is only 2-3 years.
The main reason why is because paint adheres to the top of a wood surface, whereas stain gets absorbed into the pores. So as stained wood degrades naturally over time—as all wood does—the wood finish goes with it.
Paint, on the other hand, is more like a protective coating, one that significantly slows wood’s natural degradation process.
Since a paint coating is comprised of many layers, it’s harder for the elements to wear it down to the point where natural wood is showing.
Best Type of Stain for Plywood
Oil-Based Stain
Oil-based stain is best if a durable, long-lasting, and prominent stain is what you’re after.
But oil-based stains do have a yellowish-amber tint, and for this reason it’s best to avoid using them on lighter, softer woods, like birch, spruce, and ash.
It takes 5-7 hours for an oily stain to dry completely, and it can be applied with a foam brush or roller.
Personally, I like oil-based products because they’re richer and you have to do very little to maintain their appearance over time.
That said, the thickness of an oil-based stain makes it harder to apply; it may take you 15-20 minutes of brushing/rolling just to get an even coat.
Plus, this kind of stain is replete with volatile organic compounds (VOC), so you need to be careful when applying it, as it’s quite toxic (as far as wood stains go).
Water-Based Stain
Water-based stain is another highly preferred stain. It’s particularly attractive when applied to plywood, as it’s thinner and you don’t have to worry about discoloration—it’s a colorless stain!
Plus it dries much faster (1-2 hours) and isn’t rife with VOC like its oil-based counterpart.
I like transparent water-based stains best because you can still see all the wood has to offer while getting the added protection wood stain guarantees.
The big downsides with water-based stain are it’s less durable, and its thinness can make application challenging, especially during the sanding process; if you sand with too much pressure, you could take off the stain you applied not too long ago.
Gel Stain
The main thing that separates gel stains from oil-based and water-based wood stain is gel stain dries on top of the wood’s surface like paint and other finishes.
It still accentuates wood’s features, but it can add subtle thickness to the workpiece, something that doesn’t happen with traditional wood stain.
Gel stain is viscous like oil-based stain, so 5-7 hours will need to go by before it’s completely dry.
It’s pretty much ineffective on many hardwoods because it doesn’t get absorbed, which these woods need.
But because of its thickness, you really don’t need more than a couple coats; even one may do for a piece of soft plywood that isn’t going to be in harm’s way often.
Tips to Staining Plywood
Use High-Grade Plywood for Easier Staining
Plywood comes in different grades, with D being the lowest and A being the highest.
Higher-grade plywoods, specifically A- and B-grade, are more receptive to wood stain, since they’re smoother and their grains are consistent.
Lower-grade plywoods, on the other hand, are full of knots and even minor splits and cracks.
Also, lower-grade plywood can be blotchy or discolored, and applying wood stain to wood in either condition wouldn’t yield anything positive.
Higher-grade plywoods are more expensive, but they’re worth it, especially if you want the plywood to be visible 100% of the time.
Always Test Before Applying Stain
Before you apply wood stain to your workpiece, test out how the stain looks on a sample piece, ideally one that’s made of the same material.
In other words, use a hardwood sample if you’re staining hardwood plywood, and a softwood sample if you’re staining softwood plywood.
The sample piece will give you a good idea of how the workpiece will look with that particular stain applied.
Obviously, if you intend to try numerous stains, you’ll need several pieces of sample wood.
When testing a stain, you don’t have to wait hours for it to dry (as you would when applying stain for real).
Instead, just wait 15 minutes. After such time has passed, you’ll be able to tell how the stain looks.
Sampling like this will help you avoid making a mistake that could elongate the overall staining process or ruin your workpiece altogether.
Well-Ventilated Area & Proper Safety Gear
Before you apply wood stain—and definitely before you apply wood sealant after staining—ensure you’re in a well-ventilated area and wearing the proper safety gear, i.e. goggles, a respirator, gloves, long pants, and long sleeves.
All this protection may sound extreme, but it really isn’t, especially if you’re working with oil-based stain and polyurethane. The fumes from both products could overwhelm you, making you nauseous and giving you a headache at the very least.
Plus, if you get a heavy-duty stain or poly on your skin, you’ll experience irritation instantly; it’s much worse if you get either finish in your eyes.
Lastly, before you start brushing or rolling out wood stain, make sure there’s at least one open window and have a ceiling, desk, or floor fan running.
Better to Apply Less Than More
It’s better to apply less stain than more, since correcting a wood surface that needs more stain is a lot easier than correcting one that needs less.
- If you don’t apply enough wood stain, all you have to do is apply more once you notice the inadequate coating.
- If you apply too much stain, you’ll have to remove the excess stain with a lint-free tack cloth, which can be challenging since you need to avoid wiping off too much stain.
And if you leave the excess stain where it is, eventually it’ll dry, crack, and peel, leaving you with a blotchy surface.
Staining Plywood for Outdoor Use
If the plywood you intend to stain is going to be outside 24/7, then it’s best to stain with an oil-based wood stain, since these are the strongest.
Outdoors, the plywood will be subjected to the elements, including rain, wind, sunlight, and pests – so it’s critical to give it maximum protection.
Using A- or B-grade plywoods outdoors is advised, since these plywoods are built to stand the test of time and they’re also receptive too all kinds of wood stains.
Lastly, if you’ve chosen to stain the plywood with a darker wood stain, make sure you apply a stain-blocker after; this will drastically slow fading caused by the sun.
Final Thoughts on How to Stain Plywood
So is plywood stainable? Certainly!
Now, is it easy to stain? That’s a different story.
Above all else, you have to be patient—patient when applying the stain and patient as you wait for it to dry.
If you don’t rush through the application process, you’ll avoid applying too much poly. If you don’t rush the drying process, you won’t run the risk of taking off what you applied earlier.
The best stains for plywood are oil-based and water-based stains, mainly because these are absorbed by wood pores.