
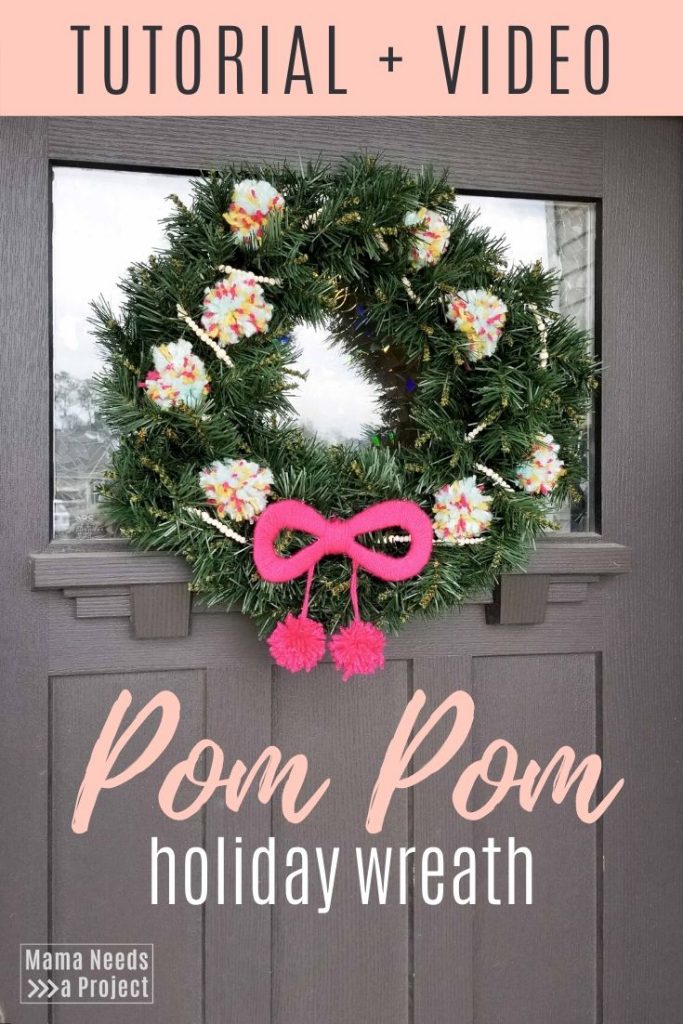
Winter Pom Pom Wreath
Up next for DIY Colorful Christmas a super cute, super festive Winter Pom Pom Wreath!
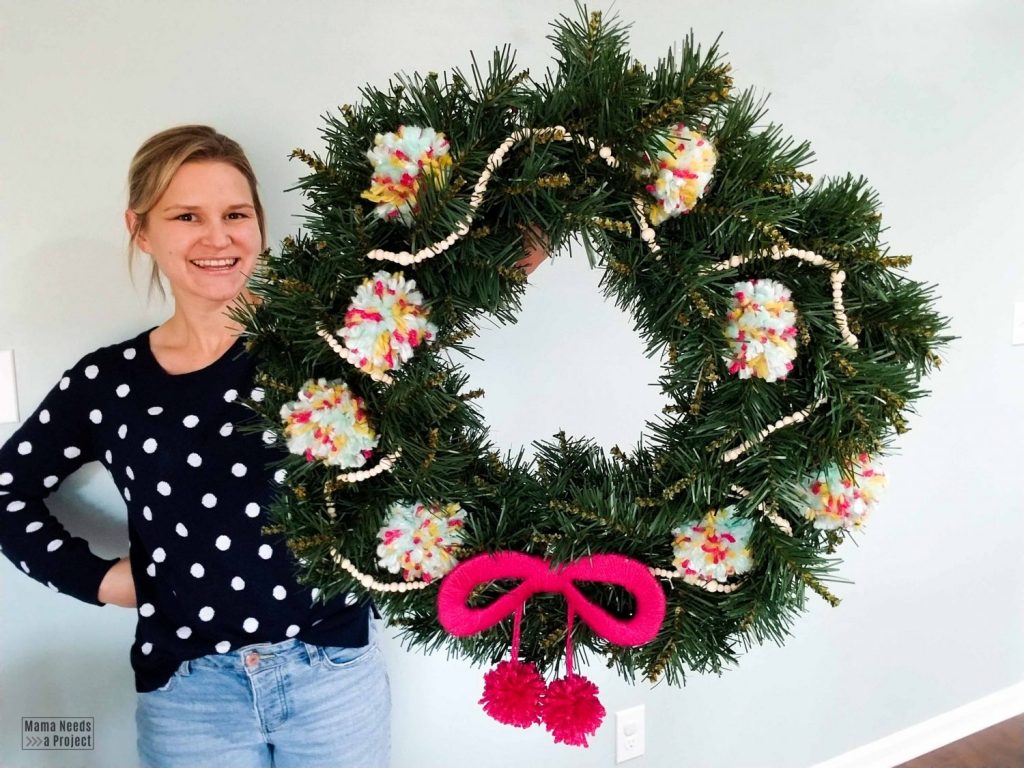
I’ve been going pom pom crazy over here with my winter and holiday decor! Maybe you noticed with my Pom Pom Christmas Tree Ornaments or my Pom Pom Christmas Trees. To round out this pom pom craze I just finished up a Winter Pom Pom Wreath for my front door. (I think that’s a record number of times to say pom pom in one paragraph.)
I started with a standard green faux wreath that I think I picked up at Michael’s last year. Then, added some natural wood beads, pom poms and a cute little bow. I love the color combo. Using a super bright pink instead of red for Christmas decor might just be my new favorite. It’s fun and bold and I just love it!
Pin for later!
To make this wreath I used my printable pom pom maker templates and a printable bow template. You can download both of these files in my free resource library! Just enter your information in the boxes below and you’ll get the super secret password sent right to your email.
Winter Pom Pom Wreath
This post contains affiliate links.
Supplies
- Printable pom pom maker template
- Printable bow template
- Thread scissors
- Wreath like this one
- Yarn
- Wooden beads (these are what I used)
- String
- Embroidery needle
- Cardboard
Make Bead Garland
The first thing I did was make a little garland for the pom pom wreath using wooden beads. I’ve used this set of wooden beads for several projects (like my DIY Hanging Plant Shelf, Easy Pom Pom Ornaments and DIY Wooden Bead and Ring Garland). And I still haven’t used all the beads in the set!
First, choose a pattern for your beads. I rotated through using the three smaller sized beads in the set. Then, use a needle to thread the beads onto string. I used an embroidery needle from a beginner embroidery set that I purchased a couple years ago. It has a large eye that makes it super easy to thread the string.
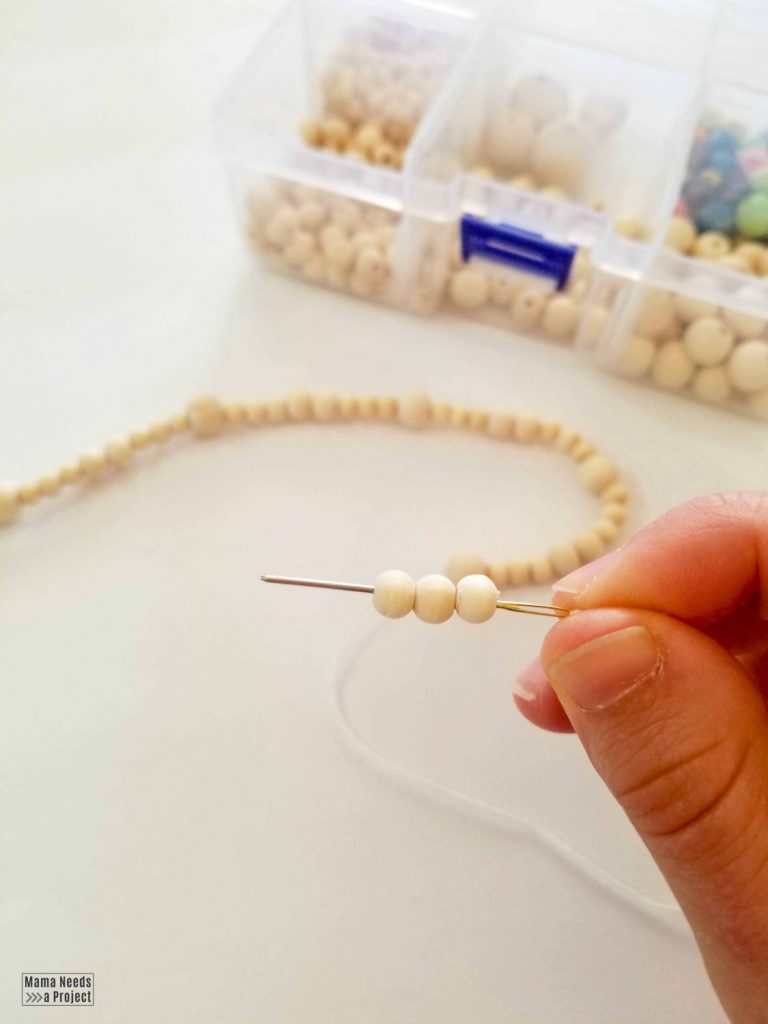
I didn’t have a set length for my beaded garland. I just periodically held it up to my wreath to see if it was long enough. I ended up making it big enough to wrap around my wreath about 1.5 times.
Make pom poms
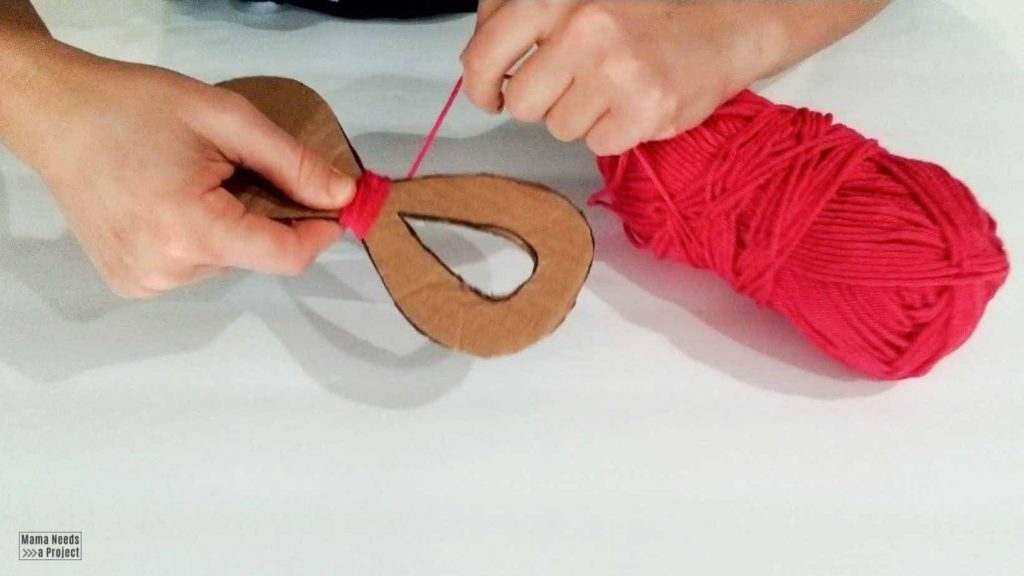
Next, make the pom poms. I used the smallest size pom pom maker from the set of templates in my free resource library.
To make your pom pom maker, print out the templates from the free resource library. Then, trace the size you want to use on cardboard and cut out two copies from the cardboard. These two pieces of cardboard will act as your pom pom maker.
For the pom poms on this wreath, I used three different colors of yarn to make a kind of speckled look. To do this, hold all three colored strands of yarn in your hand and wrap them around the pom pom maker together. Cover the entire pom pom maker with yarn.

Then, use a pair of small thread scissors to cut around the outside of the pom pom maker, putting the scissors right in between the two pieces of cardboard. While you’re cutting around the outer edge, use your thumb to hold the thread in the center of the pom pom maker.
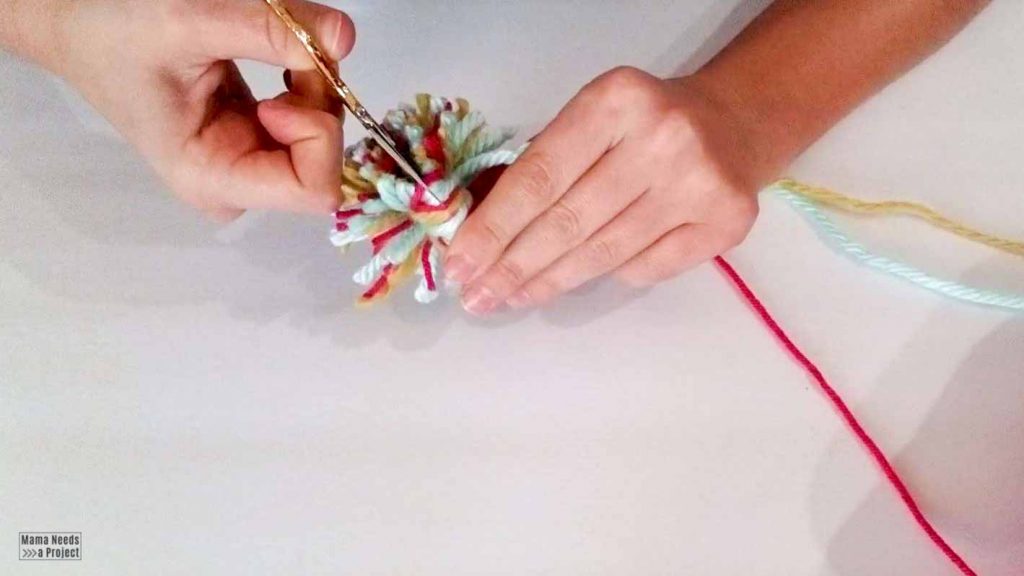
After cutting around the outer edge, wedge a piece of yarn in between the two pieces of cardboard. Wrap it around the center of the cut pieces of yarn, keeping it in between the two pieces of cardboard. Pull this piece of yarn tight and tie it into a knot.
Then, you can remove your cute little pom pom from the pom pom maker! Isn’t it cute.
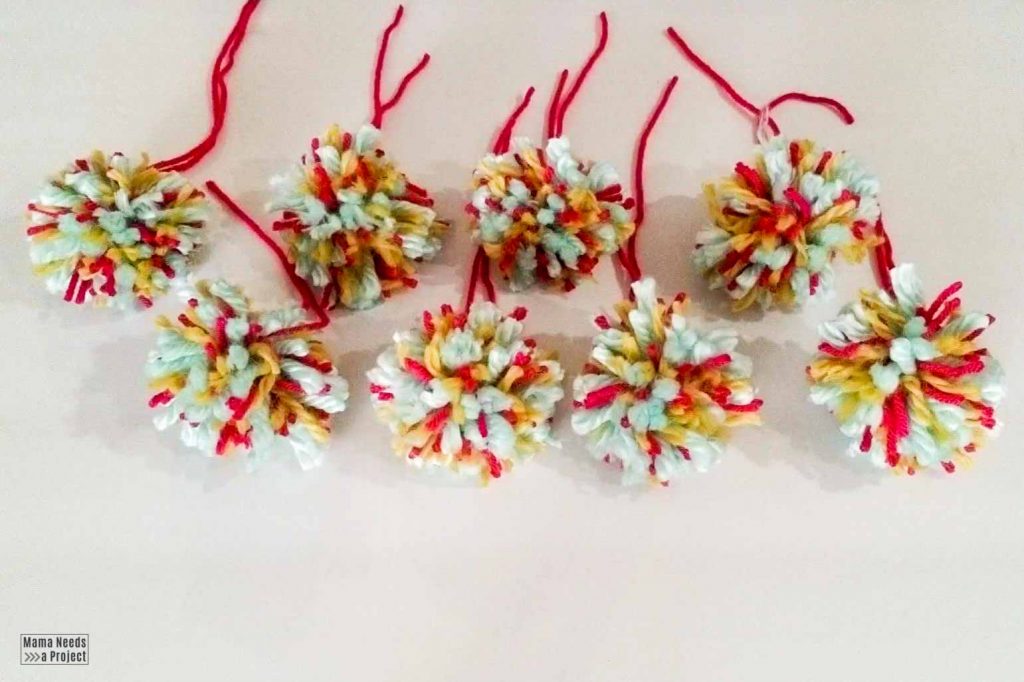
Now, repeat that a millions times. Or 8 times. I made 8 pom poms like this for my wreath, but if you’re feeling really inspired, go ahead and make a million. I love pom poms, too.
Make the Bow
Okay, once those multicolored pom poms are done, you can make the bow. I brainstormed a few different ways to do this, but ended up cutting the outline of a bow out of cardboard and wrapping it in yarn. This seemed like the best way to create a sturdy bow out of yarn.
You can download my bow template in my free resource library. After you download the template, trace it onto cardboard and cut it out. Then, wrap yarn around the cardboard – I used a fun bright pink. Be sure to cover all of the cardboard with yarn so none of that brown is showing.
Then, whip out your small pom pom maker and bust out 2 more pom poms to hang from your bow. You’re a pro now so this should go super fast.
Make that Pom Pom Wreath!
Finally! Let’s put all of these pieces onto the wreath!
First, I arranged the garland, pom poms and bow on the wreath until I was happy with how they looked. Then, I used some string to tie the garland onto the wreath. My string is white, but green would have been even better.
Next, I tied the pom poms onto the wreath using the long pieces of yarn I had leftover from tying them together. And, last I tied the bow to the wreath using some pink yarn.
Hang that baby up!
This wreath turned out super cute, which makes me so happy because I started it without much of a plan. I was worried the bow would look cheesy, but I actually really like it. A cozy pink yarn bow seems entirely appropriate for the holiday season.
Let me know what you think!
I’d love to hear what you think about this project! And if you make one, pretty please show me. I’d love to see your versions of this project! You can find me on Instagram and Facebook as @MamaNeedsaProject.
Can’t wait to chat!
Happy holiday crafting!