
How to Find a Stud in the Ceiling (EASY Methods!)
Whether you’re looking to hang a ceiling fan, a piece of art, or a plant – finding studs in the ceiling can be tricky.
Luckily, there are a few different ways to find studs so you can get on with your DIY projects.
In this guide, I’ll explore a few surefire methods to find studs in your ceiling. Let’s get started!
There are three methods you can use to find ceiling studs:
- Using a stud finder
- Tapping the ceiling
- Manually measuring your studs
Ceiling joists are always either 16″ or 24″ apart, so it is important to remember when finding them to hang something heavy, like a ceiling fan or hanging chair.
How to Find a Stud in the Ceiling
Method One: Use a Stud Finder

The most popular method is definitely using a stud finder. A stud finder is a handheld device that searches for wooden studs in walls and ceilings. You can pick up a stud finder from your local hardware store for around $20 or $30.
Magnetic Stud Finder
As the name implies, a magnetic stud finder uses a magnet to find screws and metal found in studs. It is important to note that a magnetic joist finder can be tricky to use since it will attract ANY metal in the ceiling, not just screws in the stud.
Also, a magnetic stud finder isn’t your best option if your home was built using metal mesh. The mesh will confuse the detector, and you’ll have a difficult time finding the ceiling joist so in these cases, you may want to use an electronic stud finder.
Electronic Stud Finder
Unlike magnetic stud finders, electronic stud finders use sensors to detect the dielectric constant in the ceiling or wall. Simplified, this means the electric stud finder can tell if there is something solid in the ceiling, like a joist, and will give you a numerical reading on the screen. A lower reading typically indicates a stud or joist is present.
Some electronic stud finders will also detect metal pipes and electrical wires – so be sure to keep this in mind.
There are two main types of electronic stud finders on the market: edge and center stud finders. Here is a breakdown of how they work.
- Edge: Detects the edge of a stud or joist. To use this type of detector, you need to find both edges of the stud and determine the center.
- Center: This type of detector has two sensors that measure simultaneously to find the edges of the stud. It then uses those two points to find the center of the stud. If you have popcorn ceilings, be aware that the texture of the ceiling can make detecting a bit more tricky with the bumpy movements.
Once you find the center of a ceiling stud, you can then use your tape measure to measure 16″ from the center to find the next ceiling joist center. If you do not find a stud 16″ away, measure 24″ as those are the most common distances between ceiling joists.
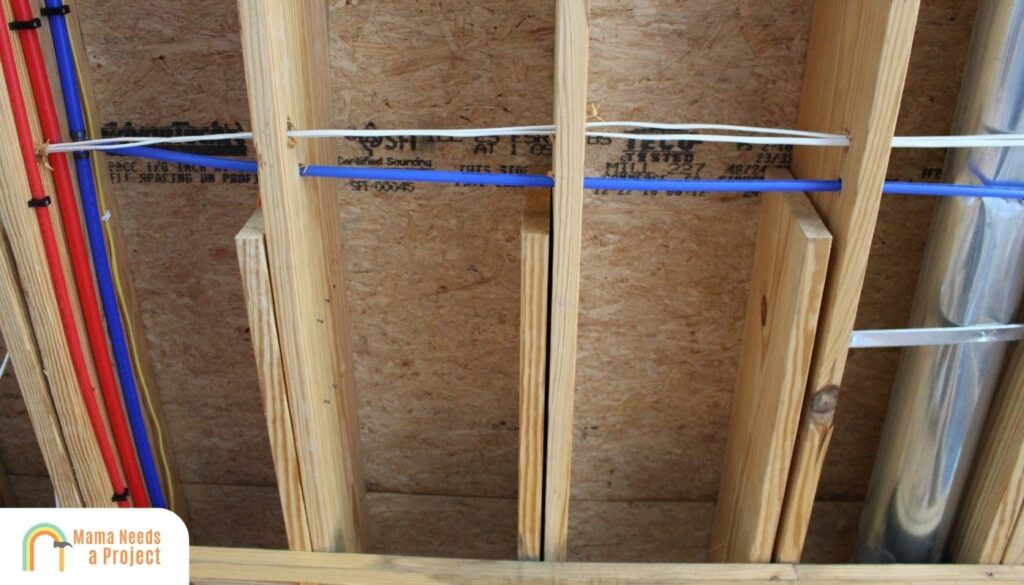
Here’s what the studs in your ceiling will look like without drywall hiding them!
Each stud finder will have its own set of instructions and features, so it is important to read through the instructions for your specific device and refer to them for troubleshooting.
Here’s the stud finder I highly recommend!

- 2022 NEWEST UPGRADED STUD FINDER MODEL- More Accurate and Consistent than 95% Stud Finder on the Market-After…
- DURABILITY&5 SCANNING MODE that go as deep as 2 inches-This Povlen wood/metal stud finder has High-Quality…
- Easy to Use and Reliable – our goal is to develop the reliable stud finder with laser level to help you avoid…
How To Use a Stud Finder
Regardless of what type of stud finder you decide to use, you will need to follow these simple steps for finding wall studs.
- Drag the stud finder slowly across the ceiling. If you are using an electric stud finder, it will start giving you a reading that you can use to figure out where the studs are. If you are using a magnetic stud finder, you can feel the magnet’s pull when you get close to the metal screws and nails in the wood.
- Once you locate the ceiling joist, mark the edges. It will take some trial and error to find the edges. If you are questioning whether you found a stud, take a small nail and hammer it into the spot where you think the joist is. If it pops through the ceiling easily, keep looking. If you meet resistance, you’ve found a stud. Use your stud finder to confirm.
- Find the center of the joist. The center is where you will attach your item to the ceiling joist, so it is essential to mark the center when you find it.
- Measure out 16″ or 24″ from the center to find your next joist. Continue this process till you have found and marked as many joists as you need for your project.
Here’s a great video explaining how to use stud finder easily.
Method Two: Manually Find the Joists by Tapping
If you can’t find your stud finder or you don’t want to purchase one, a tried and true way of finding ceiling studs is tapping. Simply start tapping along the ceiling and listen to the sound of your knuckles on the surface. Once you reach a joist, you will hear a shallow thud.
Once you’ve discovered a joist, you then need to find the edges so you can mark the center of the joist. Slowly tap across the ceiling in small increments. When the shallow thud turns into a more resonating knock, you know you’ve gone past the stud.
Mark the first edge with a marking pencil. Measure 2″ from the edge to find the other edge of the stud and tap to confirm the location of the stud’s edge. Mark the second edge, and then mark the center.
You can then take a small nail and gently hammer it into the ceiling in the center of the joist to confirm that you have, in fact, found a joist. You didn’t hit the joist if the nail pops right through the ceiling. If it takes a little effort to hammer the nail through, Eureka! You found one!
Now, you can measure 16″ or 24″ between joists to locate the other ceiling joists you need for your project.
Tip: Remember to always find the center of the joists since that’s where you want to attach your heavy item.
Here’s a video to help you find studs in the ceiling by tapping!
Method Three: Manually Find the Joists by Measuring
This method ties into both the stud finder and tapping methods. Measuring is necessary when finding more than one ceiling stud, and it is important to measure correctly. When a home is constructed, joists are spaced 16″ or 24″ apart.
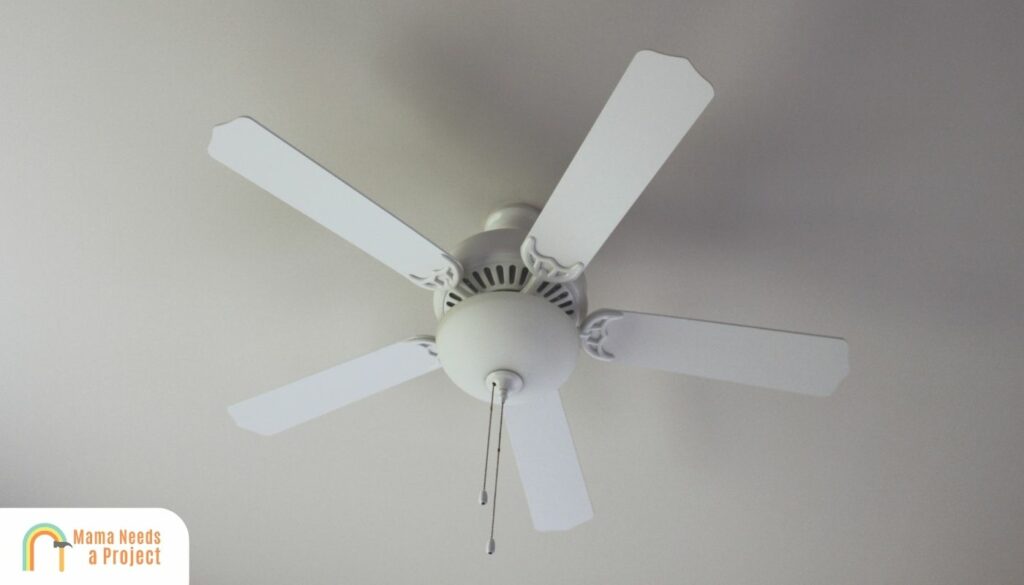
This is the method I used to hang my ceiling fan this weekend.
Once you find the center of your first joist or stud, you can measure out 16″ and find the center of the next stud or ceiling joist. Finding the joist’s center is key because you want a solid foundation for whatever you plan on hanging from the ceiling.
FAQs
How Far Apart Are Ceiling Joists?
Typically, ceiling joists will be either 16″ or 24″ apart. Both measurements are standard for construction.
Can You Use a Stud Finder on the Ceiling?
Yes, you can! It might be tricky if your ceiling has a texture like a popcorn finish, but you need to take it slow and try to keep it as still as possible when it is scanning the area.
Can You Find a Stud in the Ceiling Without a Stud Finder?
You certainly can! You can use the tapping method to find ceiling studs. You can also use crown moldings to hint where joists can be found. Molding is nailed into joists and studs, so if you are having difficulty finding them, look to see if you can see the tiny nails in your molding. Chances are you’ll be able to locate ceiling joists using this little trick.
Final Thoughts
Finding a stud or ceiling joist doesn’t have to be difficult!
You can locate studs using a stud finding tool, the tapping method, or by manually using a measuring tape to space out your studs.
I recommend using several methods to be sure exactly where your studs are and avoid false positives.

Miriam Ronne wears many hats, including but not limited to freelance writer, blogger, professional quilter, serial DIYer, and obsessed dog mom. She loves to teach beginners how to do all sorts of crafts and techniques. If she’s not writing her next blog post, she’s either sewing a new project or playing with her pup. You can find Miriam on her blog, Stitch Obsessed, or connect with her on Instagram.