How To Remove Nails From Wood (7 EASY Ways in 2024)
Removing nails from wood is often necessary, but it can be extremely difficult in some cases.
Nails are commonly used in construction and other wood projects to join two pieces of wood together securely.
However, over time the nails can loosen or the wood can warp, causing the nails to become loose.
Removing nails from wood can be a difficult and time-consuming task, but there are a few different methods that can be used to make the process easier.
In this post, I’ll explore how to remove nails from wood, a couple of options that will let you remove headless nails from wood, and much more. Let’s get started!
7 Best Ways To Remove Nails From Wood
One of the first things you need to know is that different kinds of nails need different approaches to remove them.
Bent nails need a different technique than sunken nails, and headless nails are going to need yet another technique and toolset.
Because there are a lot of different ways nails can get stuck in wood, it’s important to have a plan to deal with each different kind of nail you want to remove.
You should also remember that galvanized nails and coated nails can behave differently in a wood surface than other kinds of nails. In some cases, you may even use several techniques to remove a single nail from wood.
With that in mind, it’s usually a good idea to have several of the tools when you want to remove nails from wood. That way you’re prepared for every possible problem and don’t need to run to the hardware store in the middle of your project.
Related Reading:
- Carpentry vs Woodworking: What’s the Difference?
- How to Remove Heat Stains from Wood
- How to Remove Acrylic Paint From Wood
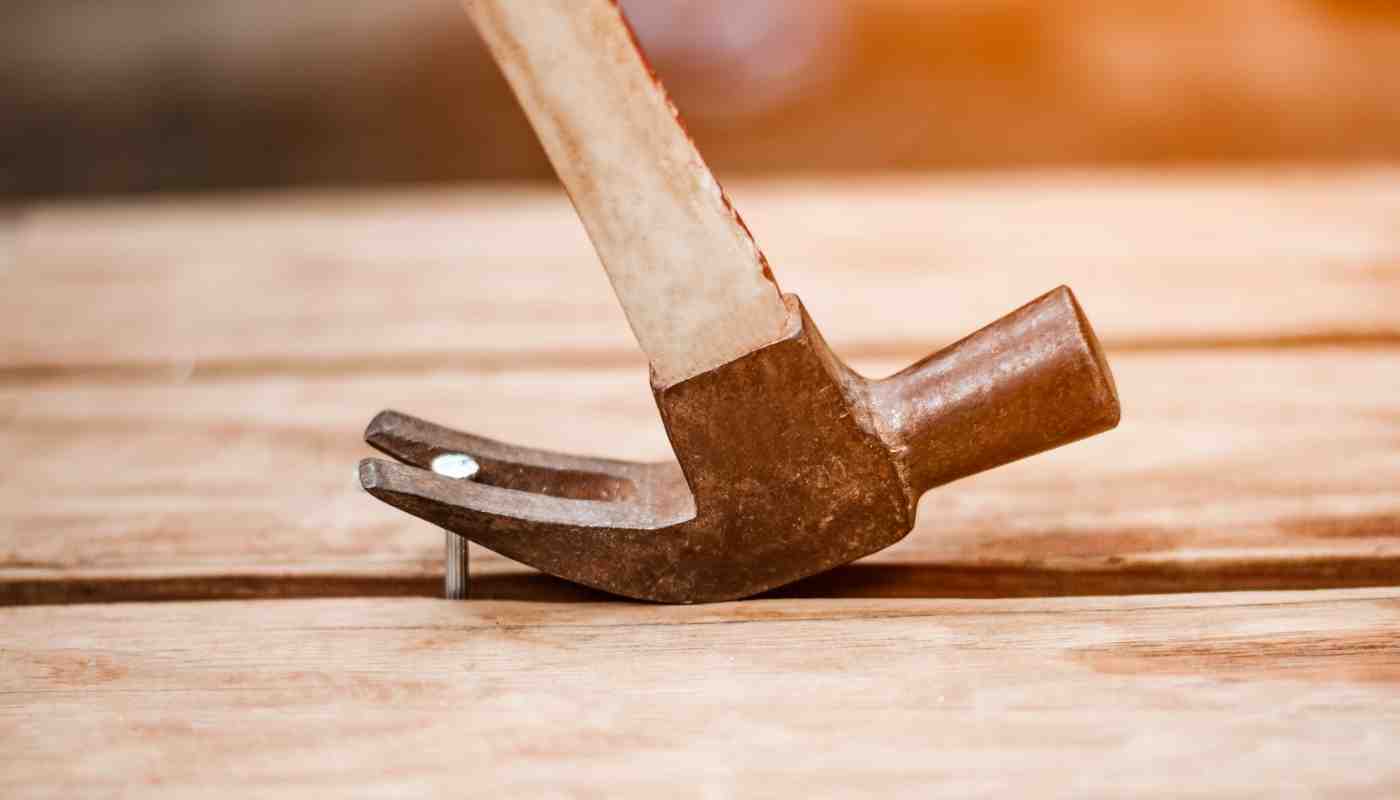
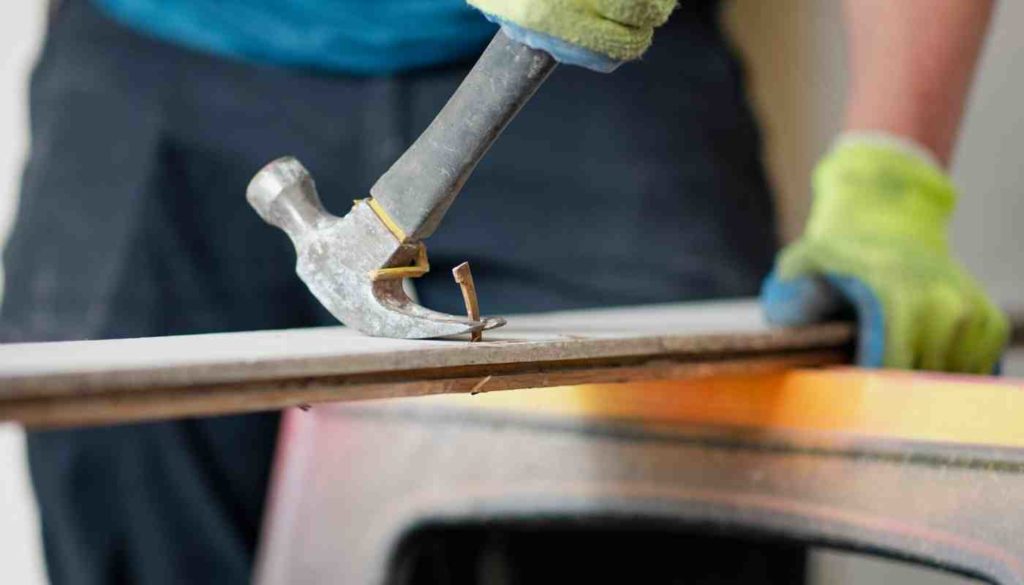
Use A Claw Hammer
Claw hammers are probably the most common way to remove nails and staples from wood.
This is the process everyone is familiar with and has either done or seen done before.
That said, there are some definite limitations to using a claw hammer, as well as a few important advantages.
The main problem with using a claw hammer is that the hammer needs to be able to grip the nail head to work.
If the nail head is flush with the wooden surface, or you’re working with sunken nails, a claw hammer isn’t going to have anything to grip.
However, if the nail head is accessible, this is probably the best and simplest tool you can use.
Just line the claw end of the hammer up with the nail head, slide it along until you feel the nail grip in the claw, and then press back on the hammer handle until the nail starts to pop free.
Once you’ve got the nail head out of the wood surface you can start pulling to remove it.
It’s important to use a straight pull instead of pulling on an angle to avoid breaking off the nail or causing additional damage to the wood’s surface.
While this is the easiest and most effective option if the nail head is exposed, you’re going to need a different set of tools for headless nails, sunken nails, a buried nail, or any nails applied by a nail gun.
Try A Nail Jack
Nail jacks are purpose-built tools that are designed to help you remove buried nails.
They can reach a little deeper into the wood, and grip the nail head faster and more easily than a claw hammer can.
That means they need less of a lip on the nail head to successfully remove them.
One variant on a nail jack, a nail hunter jack, is a good option for removing nails from a nail gun, or just about any smaller nail that isn’t going to have as obvious a nail head.
Both of these tools are great for removing nails from wood, but they can also both cause some damage in the process. The shape of these tools is designed to dig for and remove sunken nails, but that means that they can increase the side of the nail holes and cause some splintering on either side of the nail.
Dents and scratches on the wood surface around the nail are also common when you’re using a nail jack. So, this is a good tool for stubborn nails, but only really effective if you don’t care about the wooden surface or are already planning to resurface the wood after you’ve finished.
If you want to remove nails there aren’t many more effective tools out there than a nail jack.
Get A Nail Kicker
Nail kickers are a favorite tool of the salvage industry, but are still not well known outside of it.
A nail kicker can often be the best option for removing a headless nails, buried nails, and other difficult nails without damaging the wood surface.
Nail kickers are pneumatic tools that use quick hard bursts of pressurized air to force nails out of the wood surface. They’re fast, and they work on a wide range of nail situations.
About the only time you might need a different tool to remove nails are bent nails that don’t have an easy escape from their nail holes.
Some versions of this tool are self-contained while others require a separate air compressor or pneumatic system to provide pressurized air to remove nails.
No matter which version you get, this is an incredibly useful tool to have if you like to re-use wood or want to preserve the wooden surface on salvage projects.
However, despite the usefulness of nail kickers, they’re a very purpose-limited tool. So, if you don’t remove nails regularly you might want to save your money and get other tools that are more versatile or required tools for your projects.
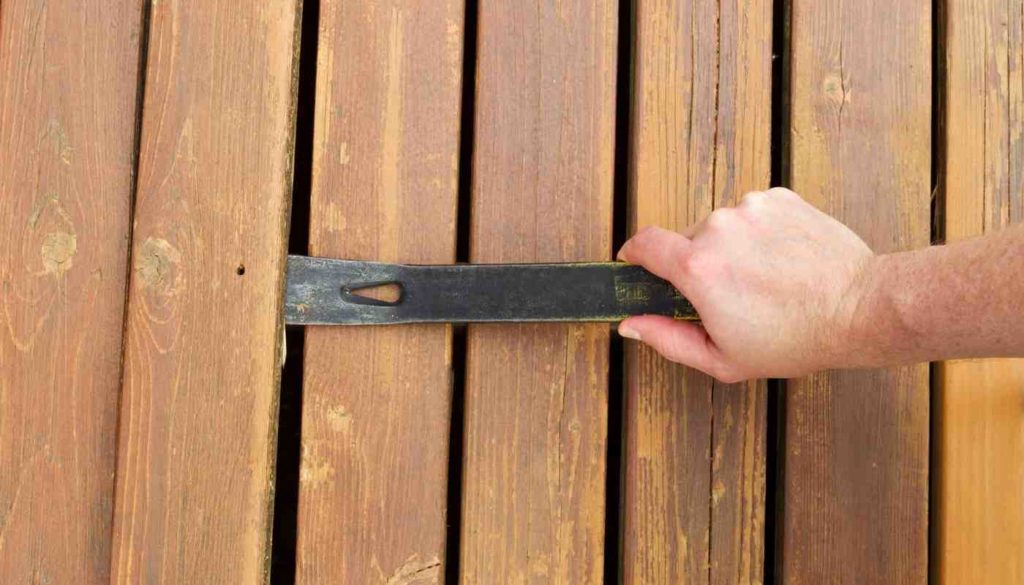
Use A Cat’s Paw Pry Bar
Cat’s paw pry bars can look a lot like any other pry bar. However, the difference is that a cat’s paw pry bar is going to be a lot gentler and less likely to cause serious damage to the wood surface while you’re removing buried nails.
That said, there is no such thing as using a cat’s paw pry bar without causing some amount of damage.
The main benefit of a cat’s paw over a regular pry bar is that the end is designed to get the job done with a minimum of damage, but that’s not the same thing as not causing damage.
However, if you don’t mind causing a little damage to remove sunken nails, bent nails, and other difficult-to-remove nails, this is a good tool to have on hand.
A cat’s paw pry bar will work on a wide variety of nails, minimizes damage to hardwoods and won’t dent softwoods too badly.
You can protect delicate surfaces with a sponge or some fabric while you’re pulling nails, as long as you can still get a firm grip on the nail with the pry bar.
The one limitation is that a cat’s paw pry bar doesn’t have quite as much pulling power as a regular pry bar.
If you don’t mind damaging wood you might want to upgrade to a regular pry bar, which I’ll discuss in a bit.
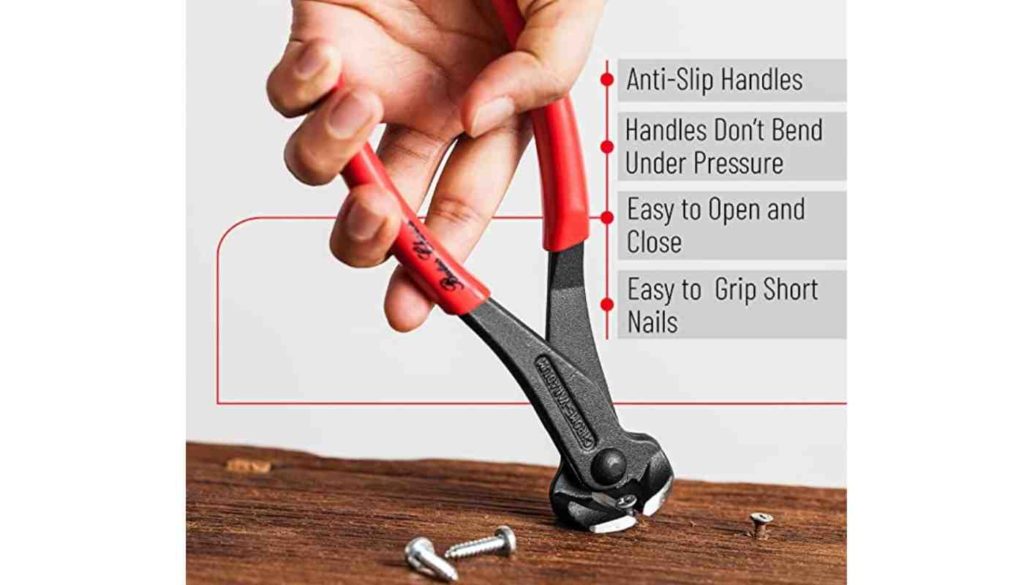
Try A Set Of Needle Nose Pliers
Struggling to remove a headless nail? Needle nose pliers might just be the best solution for your problem.
When it comes to a headless nail pliers are generally going to offer the best grip and highest success rate, even for heavily stuck nails.
Diagonal cutting pliers can also be a good alternative if you’re looking for a little more grip.
Just remember that you need to be careful about pressure with diagonal cutting pliers, too much pressure and you’ll cut the nail head. But, with just a little pressure you’ll get better grip that’s idea for removing larger headless nails.
For small headless nails though, and small nails in general, needle nose pliers will help you remove even buried nails more consistently.
Just get a good grip on the end of the nail and pry it loose. You can twist the nail shank around the pliers if that helps to remove it.
You need a strong grip for this method, but it’s one of the few ways of removing a buried nail that can avoid permanent damage as long as you’re careful.
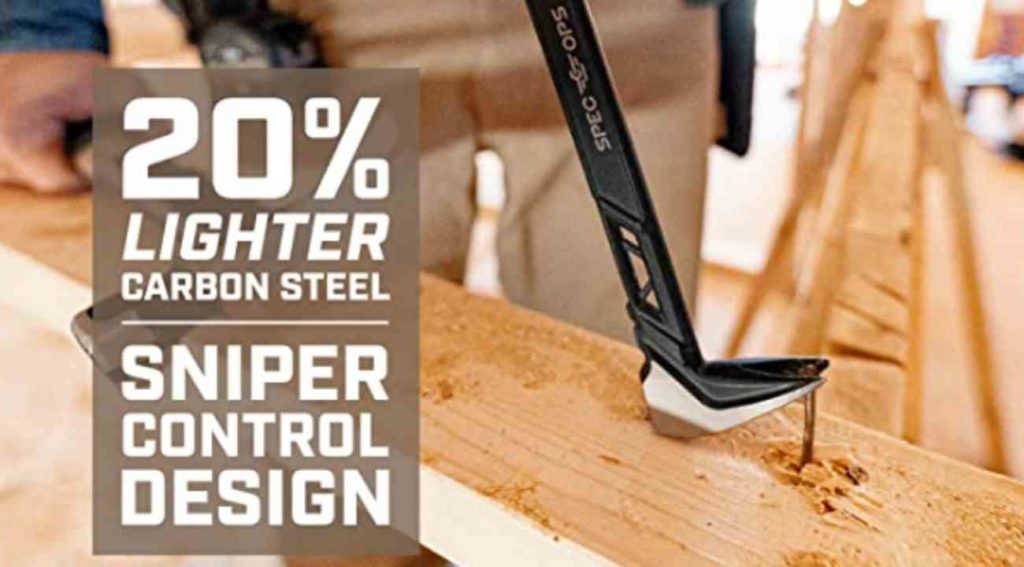
Get A Regular Pry Bar
Have you tried several other tools and still not having any luck getting some nails out of the wood?
It sounds like it’s time for a pry bar.
Pry bars are probably the most heavy-duty tool you can use to remove nails.
They’re much stronger and faster than needle nosed pliers, and the claw end is even a bit more aggressive than cat’s paw pry bars.
If you want to remove stuck nails, but don’t mind causing some damage, this is probably going to be the fastest and easiest tool to use.
But if pry bars are so effective, why aren’t they used to remove buried nails more often?
Mostly because they cause a lot more damage than other kinds of nail-removing tools, and are going to be hard on almost any project.
If all you want is nail-free wood to send through a chipper, a pry bar is just fine. But, if you’re looking for something that you can continue using without refinishing or cutting away the damaged sections, a pry bar just isn’t going to cut it.
Cut Through With A Reciprocating Saw
The last option for removing stubborn nails is actually not removing them at all.
A reciprocating saw, or alternatively a saws-all, is a good option when you’re dealing with a stuck nail you can’t remove at all.
Using the saw you can simply cut through the wood, nail and all.
Once you’ve cut through the wood you can either remove the different halves of the nail, or you can continue your project with the nail still embedded.
This option is good if the wood you’re working on isn’t going to be visible, and if the nail isn’t near any connection points where it won’t get in the way.
Reciprocating saws do have some downsides though, even when you’re giving up on removing a nail.
For one thing, reciprocating saws tend to be more powerful and less precise than other kinds of saws.
A reciprocating saw is going to chew up more wood in the process than a hand saw or even a circular saw, which means that they aren’t very effective if you need precise measurements or don’t have enough wood to tolerate a small amount of waste.
Your reciprocating saw is also going to leave a rough edge on the wood you’re working with.
You’ll need to sand the wood surface afterward if you’re looking for a smoother more professional finish on your work.
Tips For Removing Nails From Wood
Now that you know about the tools you can use to remove nails from wood, I’ll explore some additional tricks that can help make the process easier and minimize the amount of damage at the same time.
Protect The Wood Surface
When you’re removing nails from a nice wood surface and want to preserve the appearance of the wood it can be difficult to know where to start.
No matter what tool you choose (I recommend a claw hammer or needle nose pliers in this case), you can take some steps to protect the wood you’re working with.
A couple of layers of fabric around the nail is one of the simplest and easiest ways to protect the wood surface. Even a regular old shop rag can provide some protection from scratches and splintering.
For more heavy-duty protection, consider a piece of scrap wood or a sponge to protect against splintering and denting at the same time.
Let Wet Wood Dry
A lot of times when nails get stuck in lumber its because the lumber is wetter than it was when the nail was placed.
That means that you can often make your life a lot easier by letting the wood dry out some in a dry low-humidity area for a few days before removing the nails.
This is especially true for any wood that was used on construction sites, stored outside, or otherwise kept in an area where it would have been rained on or flooded.
Even a couple of hours with a fan on the wood can sometimes make a big difference in loosening a stuck nail and making it easier to remove from the wood without damaging the surface.
Plus, when you let the wood dry out more you’re also protecting your tools from unnecessary moisture that can lead to corrosion and rust.
Check The Wood For Signs Of Corrosion
There are a lot of different nail coatings for different purposes, but one of the most common problems with nails is that not everyone uses the right coating for the job.
If you’ve ever seen a wooden fence with black lines coming down from the nails you’ve seen this in action.
Those black streaks are corrosion and metal bleed from an untreated or improperly treated nail.
The streaking happens as the nail reacts with water in the environment and some of the metal leeches out of the nail.
The problem is that corroded nails are often harder to remove, and chances are the wood around them has swollen and shrunk several times, which may have pulled the nail deeper into the wood.
When you see signs of corrosion in the wood you should be prepared with more tools on hand because those nails are likely to be more difficult.
Be Patient
One of the hardest things to learn when you’re pulling nails is that the most difficult nails are almost always going to take longer to remove than you expect.
Patience, and working with the wood and nail to make sure you’re removing without causing too much damage, will give you much better results than if you try and rush.
It’s also important to recognize whether you have the right tools on hand.
If you don’t have what you need, don’t remove that nail. It’s as simple as that.
Watch For Wood Splitting And Splinters
Nails can often be placed in difficult grains of wood to use, which means that it’s important to watch for signs of accidental damage when you’re pulling the nail.
Knots in the wood are particularly prone to cracking and even crumbling when a nail is removed.
If that starts, and you don’t want to create a larger hole in the wood, it might be better to cut the top of the nail off and work around it instead of removing it entirely.
Use Scrap Wood To Increase Your Leverage
One of the best tools you have for removing difficult nails is scrap wood.
Just place the wood under the tool you’re using to remove the nail, whether it’s a pry bar or a claw hammer, and you’ll immediately increase your leverage as you twist and pull the nail free.
Final Thoughts on How to Remove Nails from Wood
Learning how to remove nails from wood can be easier than you think.
Luckily, there are many different tools you can use to remove nails from any wooden surface without significant damage.
The most important thing to remember is that you need to be patient, use the right tool for the job, and protect your own hands and fingers from potential injury.