
Uneven Wood Color After Sanding (How to Fix!)
Ever wonder why wood sometimes displays uneven color after sanding? This can be caused by a variety of sanding mistakes, but the good news is there’s usually a solution!
So if you’ve been wondering why wood can be an uneven color after sanding and what can be done to fix uneven wood color, I’m happy to say I’ve got the answers you’re looking for!
- Uneven wood color can be the result of many improper sanding techniques, including over-sanding, irregular sanding, and applying inconsistent pressure while sanding.
- It’s possible to fix sanding mistakes like these; all you have to do is lightly sand until the surface is uniform in both color and flatness.
What Causes Uneven Wood Color After Sanding?
Over-Sanding
Over-sanding is one of the most common causes of uneven wood color, but it’s also rather easy to avoid.
You see, most wood species boast a variety of colors—few boards are one color through and through.
Therefore, if you over-sand, you may reveal darker, deeper colors that are clearly different from the colors displayed in the outermost layer.
Irregular Sanding
Irregular sanding can also lead to uneven wood color, but avoiding this kind of sanding is slightly more challenging.
Say, for example, you have a big board to sand. If you’re dealing with an uneven surface from the start, the chance of you getting uneven wood color after sanding is all the more likely.
To avoid irregular sanding, first ensure the wood surface is for the most part flat. Once you confirm this, gently sand with high-grit sandpaper, but make sure you apply equal pressure the whole time; this ensures an overall flat surface that’s generally the same color.
And should you see the wood start to change color midst sanding, stop sanding immediately.
Inconsistent Pressure When Sanding
To ensure a successful sanding process, you must apply consistent pressure the whole time you’re sanding wood, otherwise an uneven surface, and uneven wood color, are going to be what you get.
Most people wood agree it’s easier to maintain consistent pressure with a sanding block, but that doesn’t mean consistent pressure can’t be achieved with an orbital sander.
That said, if the workpiece is on the smaller side, it makes sense to opt for a sanding block over an orbital sander.
Sanding Across the Grain
Sanding across the wood grain can also lead to uneven color, but only with certain species.
Essentially, if you sand across the grain when working with oak, ash, or another species that has a pronounced grain, you run the risk of removing more wood than necessary, in which case you’d be left with a pronounced grain and lighter or darker surrounding wood.
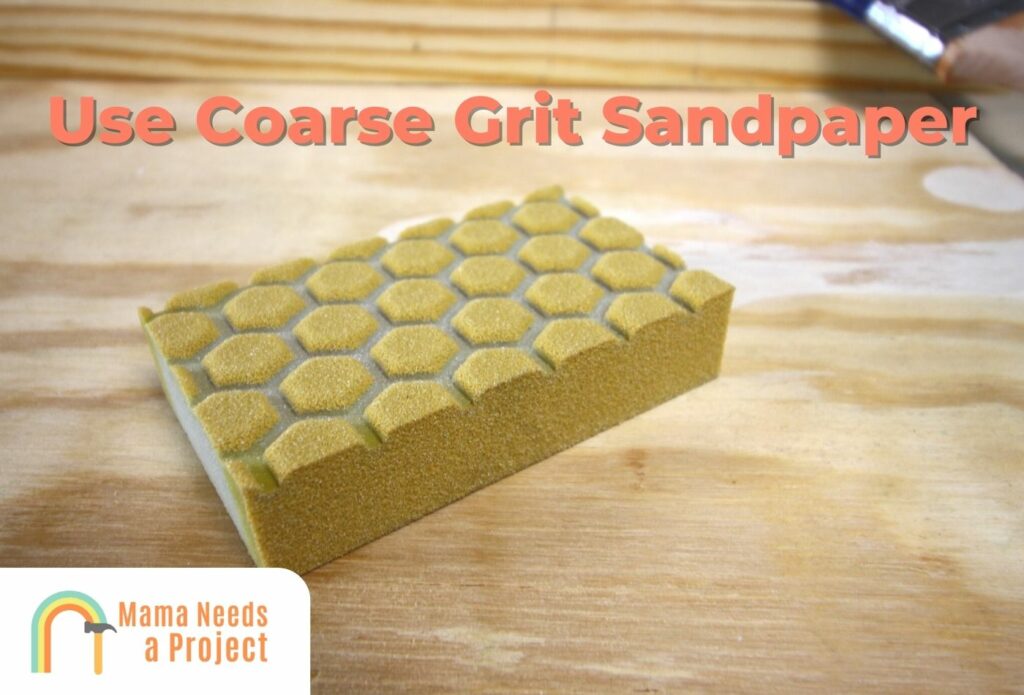
Using Low-Quality Sandpaper

Using low-quality sandpaper for your woodworking project can cause uneven surfaces and inconsistent color, so it’s best to only stick with the high-quality stuff.
And remember that some grit counts are more prone to over-sanding than others.
I recommend 220-grit and higher for light sanding. But if you’re specifically trying to remove a substantial amount from the wood surface, a lower grit count (80-grit to 180-grit) should do just fine.
If you’re looking for new sandpaper, I recommend these 5″ sanding discs!
Sanding When the Surface Is Wet
If the wood surface is wet when you start sanding, you may take off more wood than you want, leading to uneven color.
Therefore, you must give the wood plenty of time to dry out before you start sanding. And if the wood feels dry on top but damp once you start sanding, stop to prevent uneven sanding.
Fixing Uneven Wood Color After Sanding (Step by Step)
1. Outline the Area You Want Changed
The first thing you should do is a grab a carpenter pencil so you can highlight the areas that are displaying a different color. Doing this will make sanding easier later—trust me!
For one, you won’t have to second-guess yourself when sanding. Also, you won’t discolor the parts of the wood that are colored how you like.
Just be sure your pencil marks are light, otherwise you may have to sand a lot to get them off, which could result in you discoloring the wood surface even further.
2. Sand the Affected Areas
Once you have everything outlined, it’s time for some sanding. But before your sanding block or sander meets the surface, you need to be surface of the wood finish you’re aiming for.
If you’re going to leave the surface bare to highlight the wood grain and natural colors, it’s best to use grit sandpaper with a higher count (220-grit or more).
But if you plan on using oil-based wood stain, go for sandpaper with less grits, as this sandpaper is good at opening up the wood’s pores so they absorb plenty of stain.
3. Ensure an Even Surface
Once you’ve remedied the uneven wood color, you should make sure the surface is 100% even.
Why? Because uneven surfaces can look discolored in certain lighting and at certain angles. Imagine going through all the trouble of getting consistent wood color just to have it look right only sometimes.
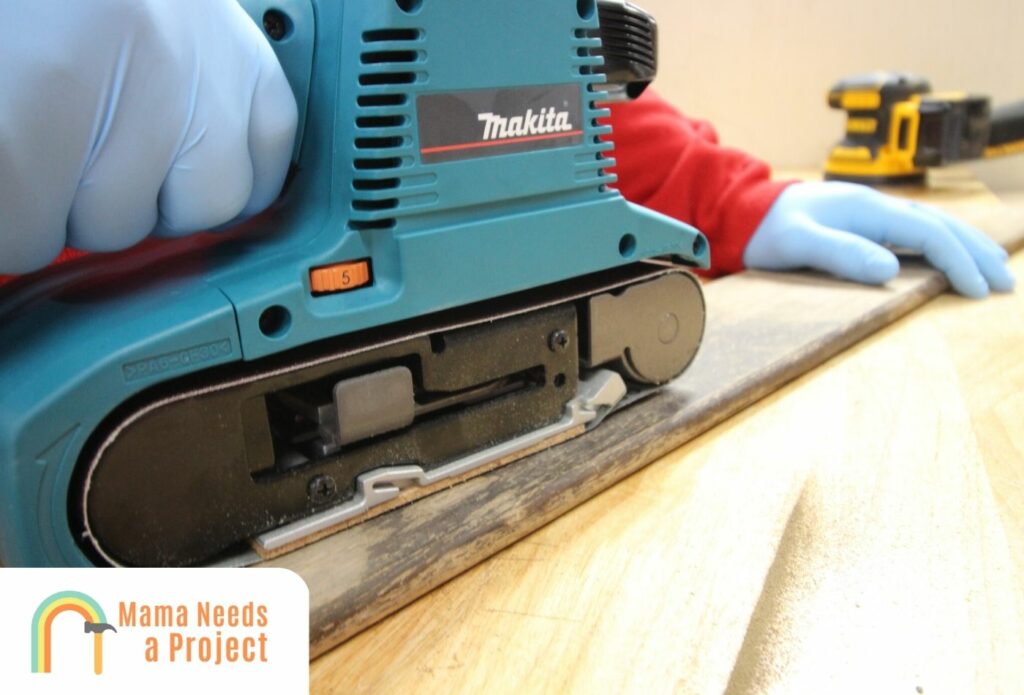
Now, when it comes to achieving an even, smooth surface, you have options. You can try sanding with a power sander to get the desired wood finish, but I suggest using a sanding block.
And once you think you’ve sanded enough, go over the wood surface with a tack cloth to make sure sawdust isn’t disguising any unevenness.
Tips for Sanding Wood Properly
Check Your Progress After a Minute of Sanding
One of the best ways to avoid common sanding mistakes is to check your progress periodically during the sanding process. If you notice sanding marks during a check, sand lightly with finer sandpaper.
Has the grain pattern been altered? Try to avoid the wood grain if it has. Can you still see pencil marks? Don’t stop sanding until they’re gone.
Sand by Hand if You’re Unfamiliar With Electric Sanding Tools
It’s easier to get a smooth surface with a consistent color if you sand by hand or with a sanding block.
This is because you’ll have more control while sanding, and you’ll also be able to stop sanding on a dime.
But if your workpiece is rather large, it may be best to opt for a small, easy-to-maneuver orbital sander; even a portable belt sander might do.
Get Rid of All Sawdust Before You Apply the Stain
If you’re planing on using wood stain after sanding, make sure all the sawdust you created is removed. A tack cloth works best, but a portable vacuum with good suction can make a good substitute.
You see, if there’s sawdust on the surface—blocking the pores—when you start to stain, chances are the stain won’t seep into the pores properly.
And if the stain doesn’t seep in properly, you’re going to be left with a discolored surface and a big mess on your hands.
Clean the Piece of Wood Before Sanding
People who’ve done very little sanding in their lives often get to work without cleaning their boards first, only to find out later that skipping this step was a big mistakes.
All wood has to be cleaned before it’s sanded, otherwise you risk rubbing debris into the surface, which can deface it and make staining very challenging.
Most wood species can be cleaned with warm, soapy water. But if you want to be extra sure all the debris is gone, use mineral spirits (paint thinner).
What to Look For to Know You’ve Sanded Enough
Keep an eye out for the following signs, as they usually indicate you don’t need to sand anymore:
- If you’ve removed the stain that was there, stop sanding and consider possible fixes.
- If a substantial amount of sawdust has been created, assess the situation before sanding again.
- If the surface is starting to change colors, stop sanding immediately to avoid uneven wood color.
- If your sandpaper or sand disc is starting to wear down, it’s wise to stop sanding.
- If you can no longer make out the wood grain or grain pattern, quit sanding.
- If all the pencil marks you made are no longer visible, cease sanding.
- If you start to see heartwood and it’s somewhat damp, don’t sand anymore.
Ways of Getting Out Sander Marks
Even if you use proven sanding techniques, you’ll probably encounter sanding marks here and there.
So how are these removed? Well, if they’re not that deep—and most aren’t—you can wipe down the surface with a damp cloth.
You could also do some light sanding with extremely fine sandpaper; just make sure you sand WITH the wood grain.
Your goal should be to avoid deep sanding marks, since these are harder to remove. Deeper sanding marks are caused by over-sanding, applying too much pressure when sanding, and sanding a wet/damp surface.
And, of course, failing to clean the wood properly before sanding can also lead to marks—sometimes even gouges.
Fixing Sanding Mistakes
Many sanding mistakes are easy to fix, but a handful should be avoided because they’re especially hard to fix. I’ll classify some common mistakes below:
- Over-Sanding: Hard to fix because you can’t get back the material you removed. Often caused by applying too much pressure with lower-grit sandpaper (sub 80-grit).
- Irregular Sanding: Also hard to fix, and for the same reason over-sanding is hard to fix.
- Sanding Against the Wood Grain: This one can be corrected with some light sanding, but only if it’s done with the grain (as opposed to against).
- Failing to Remove Sawdust: Also an easy fix, so long as you don’t let the sawdust bind to the surface.
- Using the Wrong Sandpaper: If your goal was an ultra-smooth surface, but you used low-grit sandpaper by mistake, just correct with some finer sandpaper.
Final Thoughts
So the next time you undertake a woodworking project or sanding job, operate with consistency in mind. If you do, you’ll have a better chance of getting a uniform color and and total flatness.