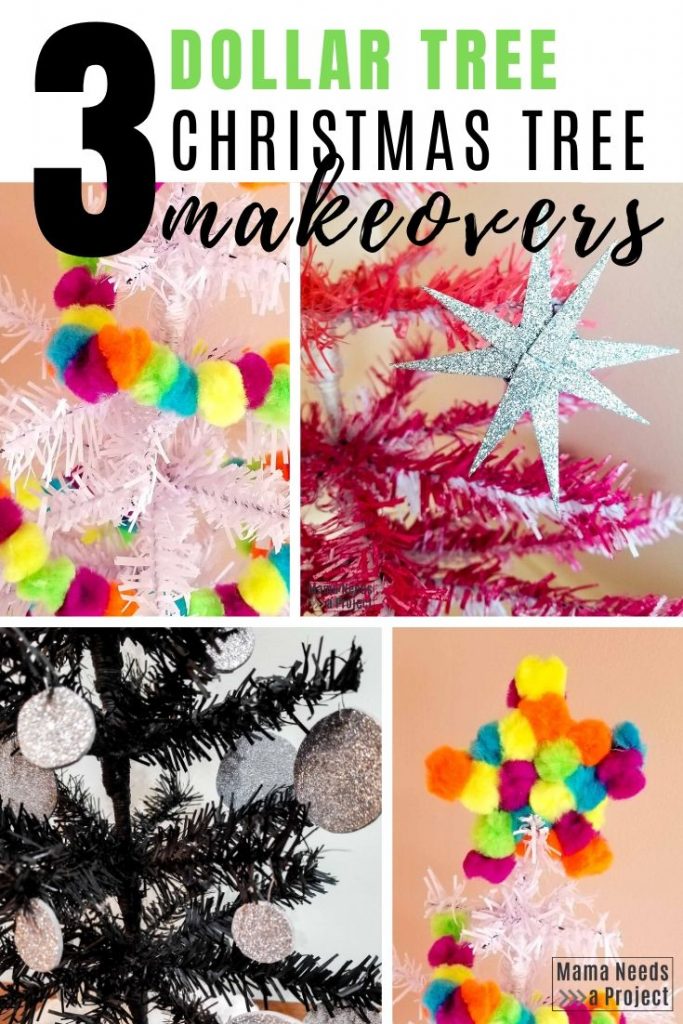
3 AMAZING DIY Mini Christmas Tree Makeovers
I scooped up some Dollar Store Christmas trees and gave them 3 totally different, totally amazing makeovers! This little project was so much fun! Let me know which DIY Mini Christmas Tree Makeover is your favorite in the comments at the end of this post.
Check out ALL of my DIY Colorful Christmas projects here.
I LOVE shopping at the Dollar Tree, especially for holiday decor and craft supplies. My favorite holiday item at the Dollar Tree is the little tabletop Christmas trees. They have white and green mini Christmas trees, but I’m partial to the white ones.
Save to Pinterest!
These mini trees are scrawny and so cute in that Charlie Brown Christmas kind of way. And, the best part is that they only cost $1! I just love them!
This post contains affiliate links.
DIY Mini Christmas Tree #1

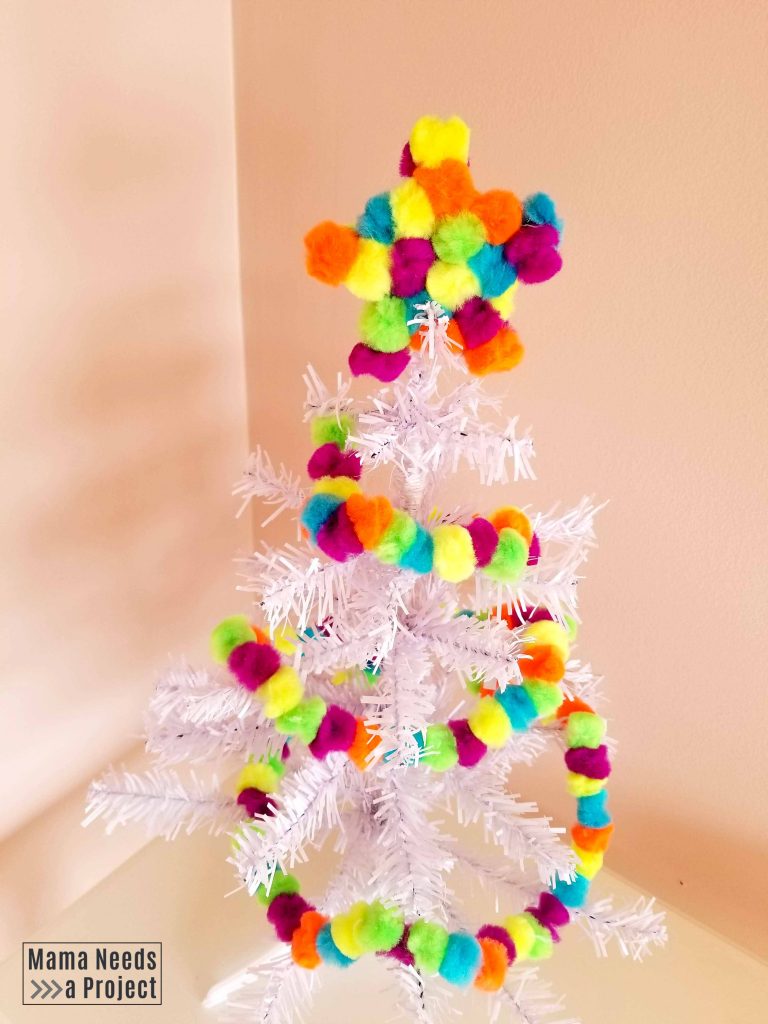
Rainbow Pom Pom Mini Tree
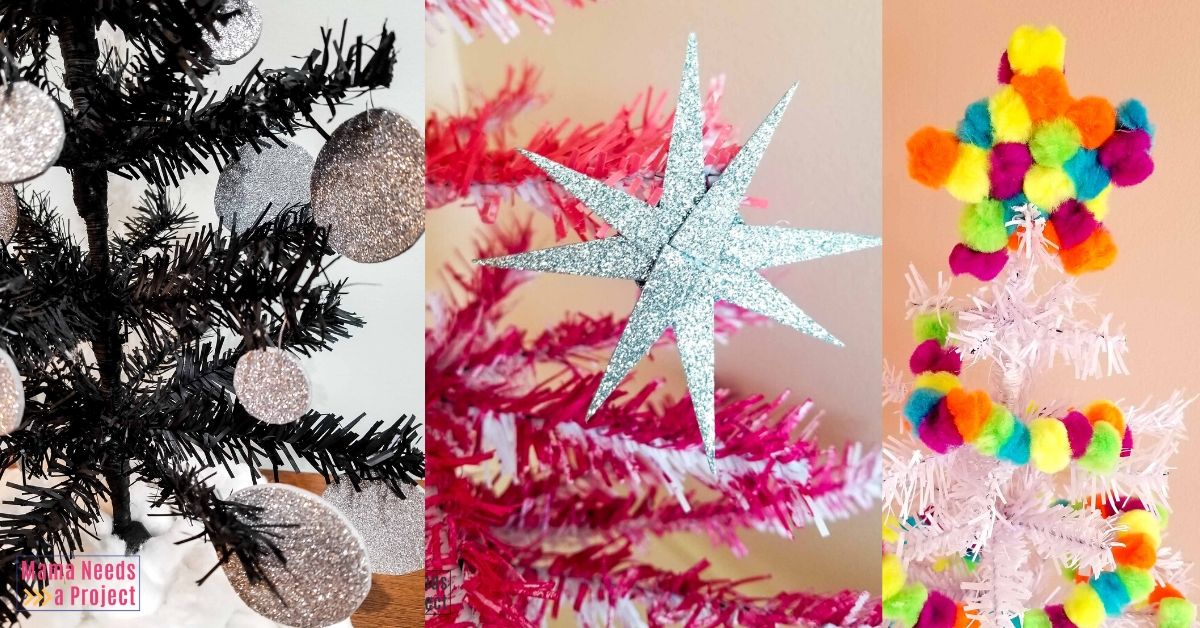
I started easy with this Rainbow Pom Pom Mini Tree. I really do love these white trees (I may already have a few in my house) so I kept this baby in his natural, artificial state.
Supplies
- White Mini Christmas Tree
- 2 packages of pom poms
- small piece of cardboard
- thread & needle
- hot glue gun
Make the Pom Pom Garland
In true cheapskate fashion, the pom pom I used came from the Dollar Tree also. Total cost for this little tree was only $3!
Making the pom pom garland is super simple. Just thread your needle and then start poking it through the center your pom poms. I used about 1.5 bags of pom poms for my garland. I didn’t follow any color pattern, but just went ahead with whatever color I grabbed. This worked well because there is not an even number of colors in the pom pom package.
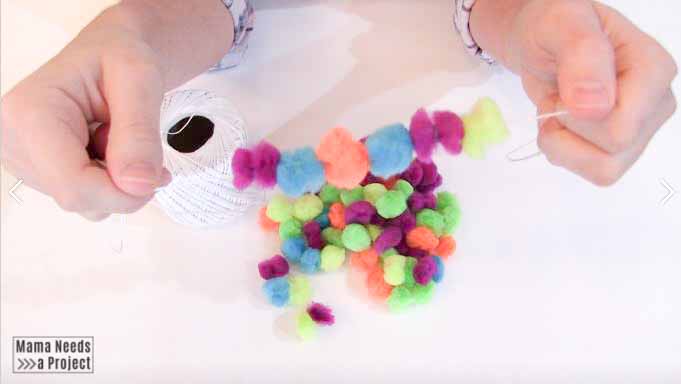
Once I had all of the pom poms threaded onto the string, I spread them out a bit and fluffed them up. You can leave them super tight on the string, but it makes the garland less flexible and harder to wrap around your tree.
Make the Pom Pom Topper
For the star topper on this DIY mini Christmas tree I used more pom poms, a small piece of cardboard and a hot glue gun.
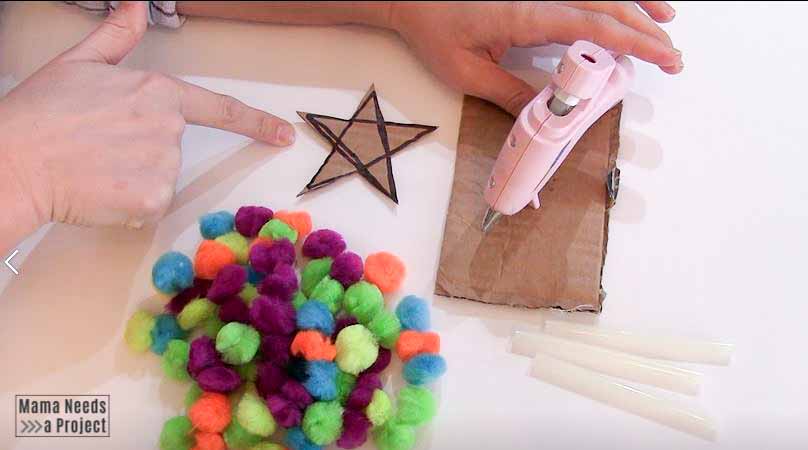
I started by drawing a star onto my cardboard and then cutting it out. Next, I started gluing pom poms onto the star. I chose to cover both sides of the cardboard in pom poms and I added a few along the edges.
This star is goofy and totally not a perfect shape, but I think it’s so fitting for this happy little tree!
DIY Mini Christmas Tree #2
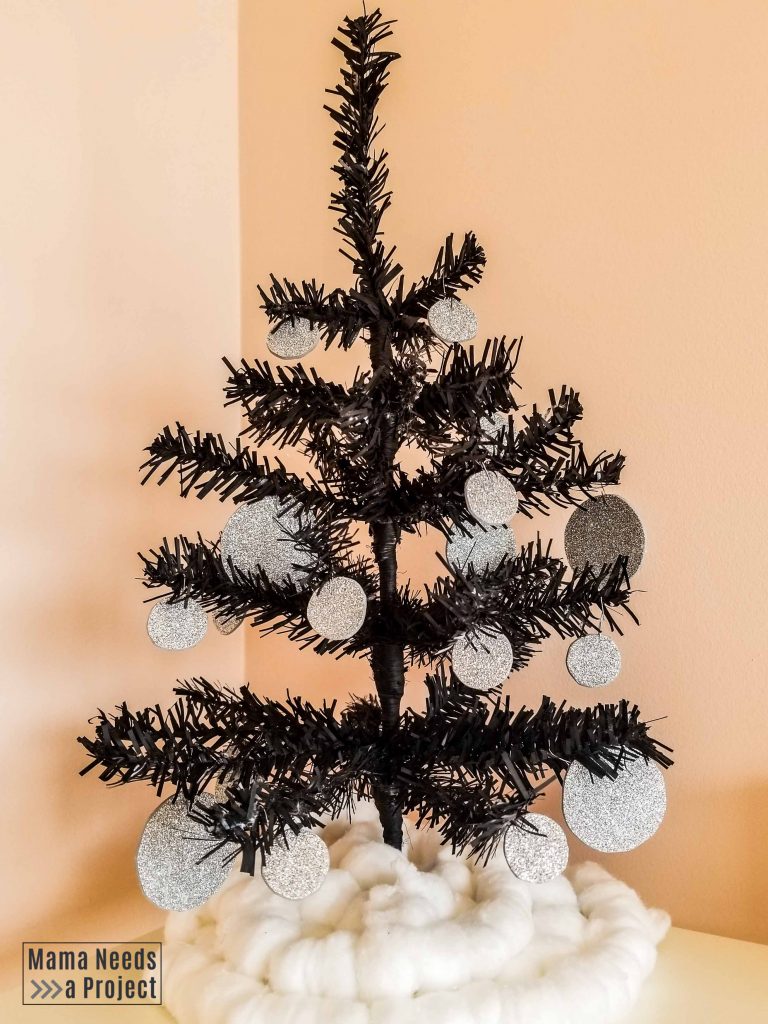
Black Mini Christmas Tree
This black mini tree is not at all my usual style. I’m usually an add-more-color-to-everything kind of girl, but I think the sparkly ornaments and poofy garland/tree skirt on this little black tree really take it from dark and dismal to fancy smancy. And I can dig that.
Supplies
- White Mini Christmas Tree
- Black spray paint – this handle makes it so much easier!
- cotton balls
- thread & needle
- Silver glitter foam sheet (I got mine at Walmart for $1/sheet)
- Ornament hooks
Spray Paint the Mini Tree
I wanted to do something totally different with my second tree so I decided to try spray painting it. Who knew it would work so well!? Spray painting the tree was fast and pretty easy. And it dried super fast.
I wanted this tree to be totally black so I needed to make sure to spray paint every little side of the branches. I started by spray painting it with the branches folded up so I could get the underside.
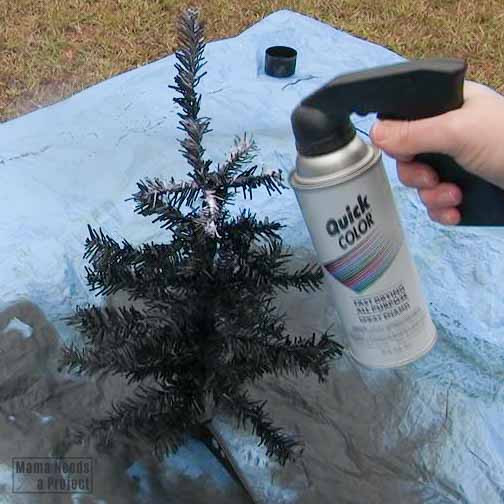
Then I folded the branches down layer by layer to spray paint the top and sides of them. I also made sure to paint the “trunk” of the tree in the center. I worked my way up the tree until I had painted all of the branches.
I did a few touch-ups after my first round of painting had dried, but honestly I didn’t have to do much. The spray painting was surprisingly easy and fast! I expected the paint to chip off as soon as it dried, but it has stayed on great so far.
This little handle made spray painting so much easier – no hand cramps!
Make the Garland… err tree skirt
Next I made the fluffy white garland. It’s made from Dollar Tree cotton balls! Just the same as the pom pom garland in the first tree, I threaded the cotton balls on a string using a needle and thread.
The cotton balls were a little harder to pierce with the needle than the pom poms, so this garland took a little longer. I used an entire bag of 80 cotton balls.
Then, I put the poofy white garland on the tree and it was just too fluffy! It covered up the whole tree and didn’t look so great. So on to Plan B. Instead I wrapped the garland around the base of the tree like a tree skirt. I think it looks MUCH better this way.

And, don’t forget to take a dorky picture with your cotton ball garland. This part is not optional.
Make the Glitter Foam Ornaments
The last thing I did to make this tree fancy smancy was make some super sparkly silver ornaments. I used a sheet of glitter foam that I picked up near the children’s craft section at Walmart.
To make the ornaments, I traced circles on the backside of a foam sheet using a quarter and the small end of a cup as a guide. Then, I cut out the circles.
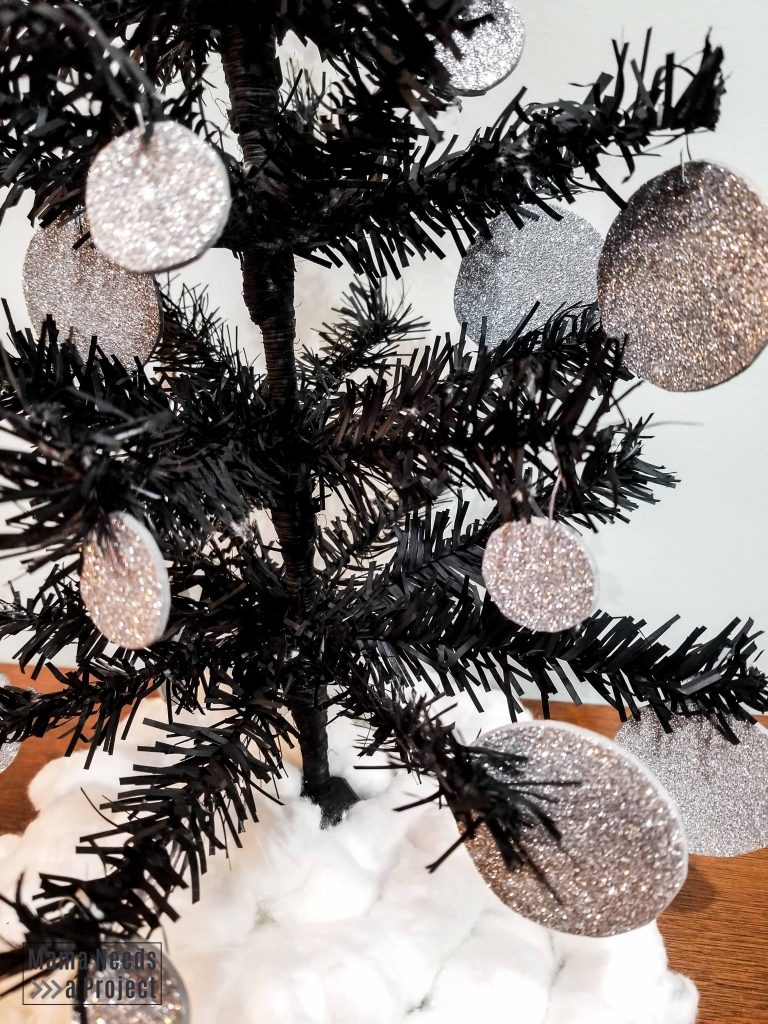
To hang the ornaments, I poked an ornament hook through the circle. The ornament hooks are pretty long for this little tree so I ended up cutting them in half.
DIY Mini Christmas Tree #3
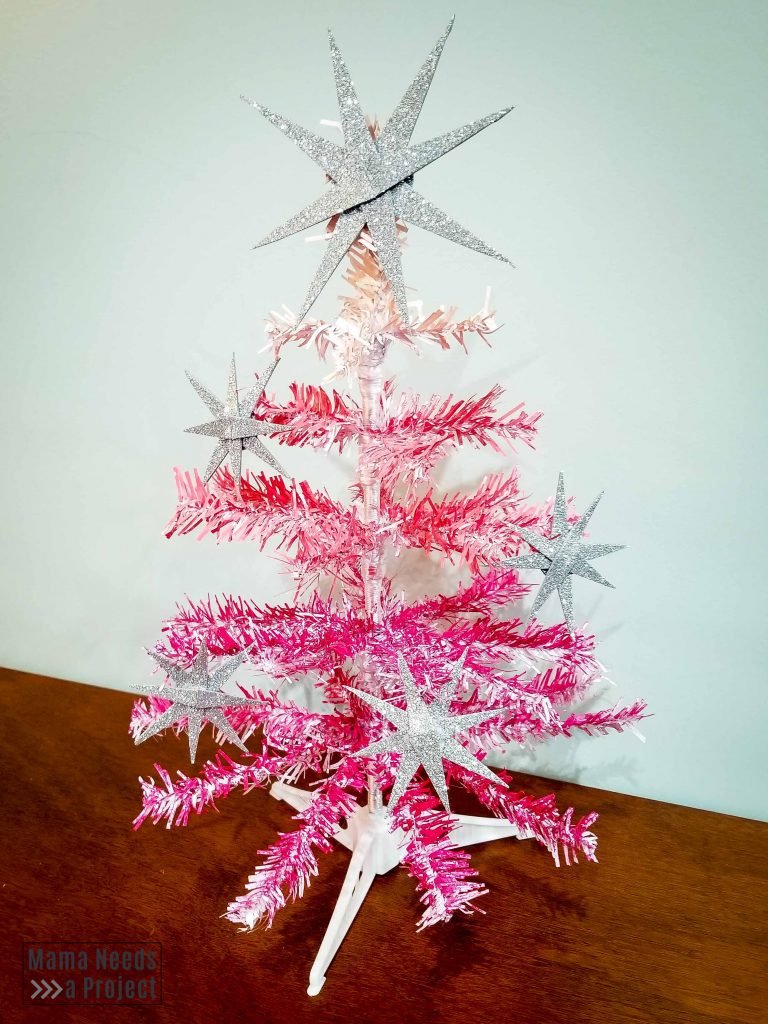
Pink Ombre Mini Tree
I have been drooling over pink Christmas trees for so long! I love, love, love them! I would love to have a full size one, but I just can’t justify buying a new tree when we already have a perfectly good one. So, the obvious thing to do is make my own mini version. And you guys, this tree is what pink Christmas tree dreams are made of.
Supplies
- White Mini Christmas Tree
- 3 shades of pink paint
- paint brush
- silver glitter foam sheet
- ornament hooks
- hot glue gun
Paint the Mini Tree
After spray painting my black tree I knew that the easiest way to paint this tree would be with spray paint. The only problem? I don’t have any pink spray paint on hand. So, I decided to try just painting it with regular paint and it surprisingly worked pretty well!
Instead of making this tree solid pink, I decided to make it ombre with darker pink on bottom and lighter pink on top. I used a some sample sized pink paint that I already had on hand and a small 1″ paint brush.
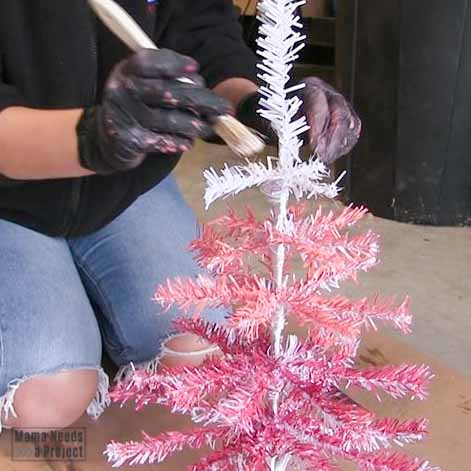
I started by folding down the bottom branches and painting them with my darkest shade of pink with the paint brush. I tried to keep the paint off of the center of the tree, but got a little sloppy and splashed some paint on there. Oops! I worked my way up the tree, folding down a new layer of branches after I had finished the layer below.
I knew that I would drive myself crazy trying to cover up ALL the white on this mini Christmas tree with a paint brush, so I decided to instead make it “mostly” pink. I didn’t paint the under side of the branches and I didn’t go for perfection when painting the tops of the branches.
Glitter Foam Ornaments & Topper
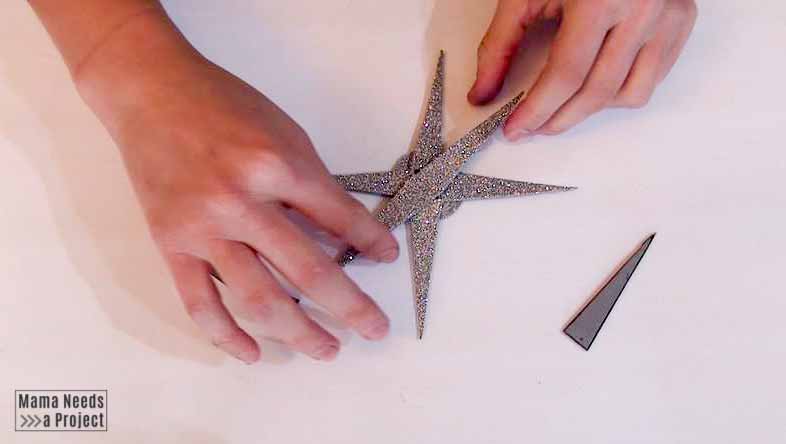
For the topper and little ornaments on my Pink Ombre Mini Tree I decided to make some mid-century inspired starbursts. I think they’re the perfect thing for this classic pink tree!
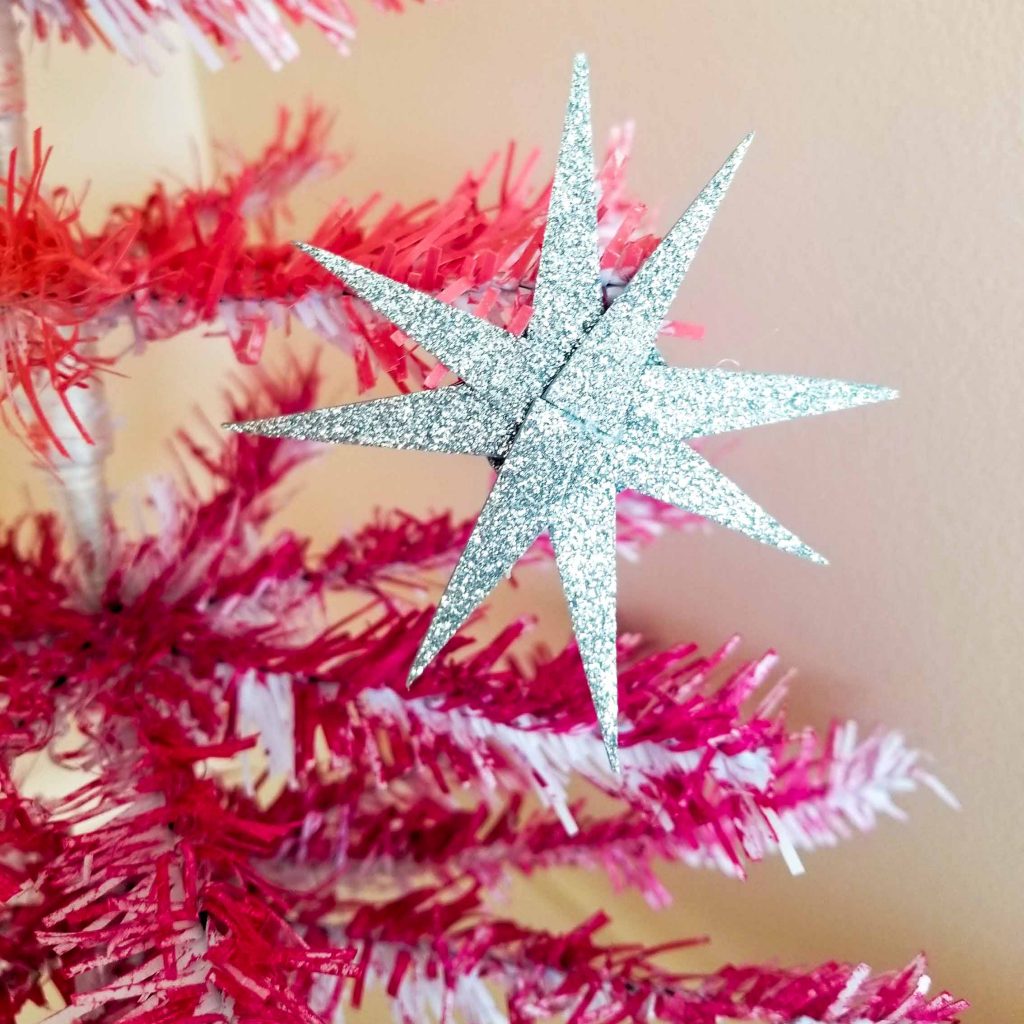
For each DIY starburst ornament I started by cutting a circle out of the glitter foam. Then, I cut 8 long skinny triangles.
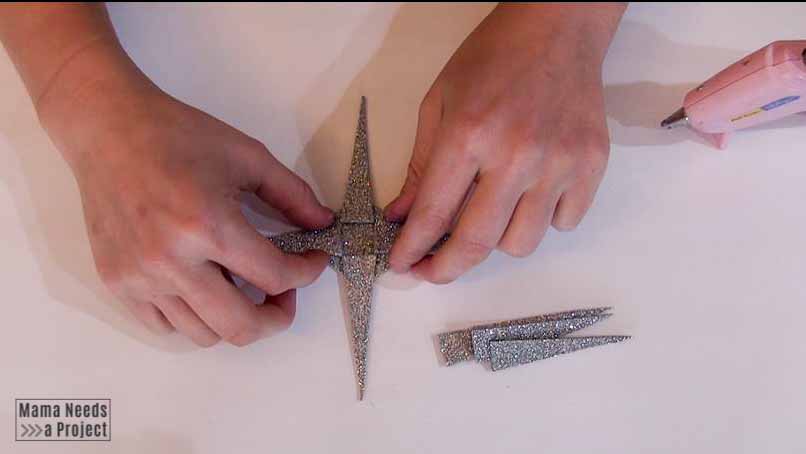
I used hot glue to glue 4 triangles onto the circle so that the triangles met in the middle to create a square. Next, I glue two triangles on top, arranging them so they were diagonal across the center square. Last, I glued the remaining two triangle so they were diagonal in the opposite direction.
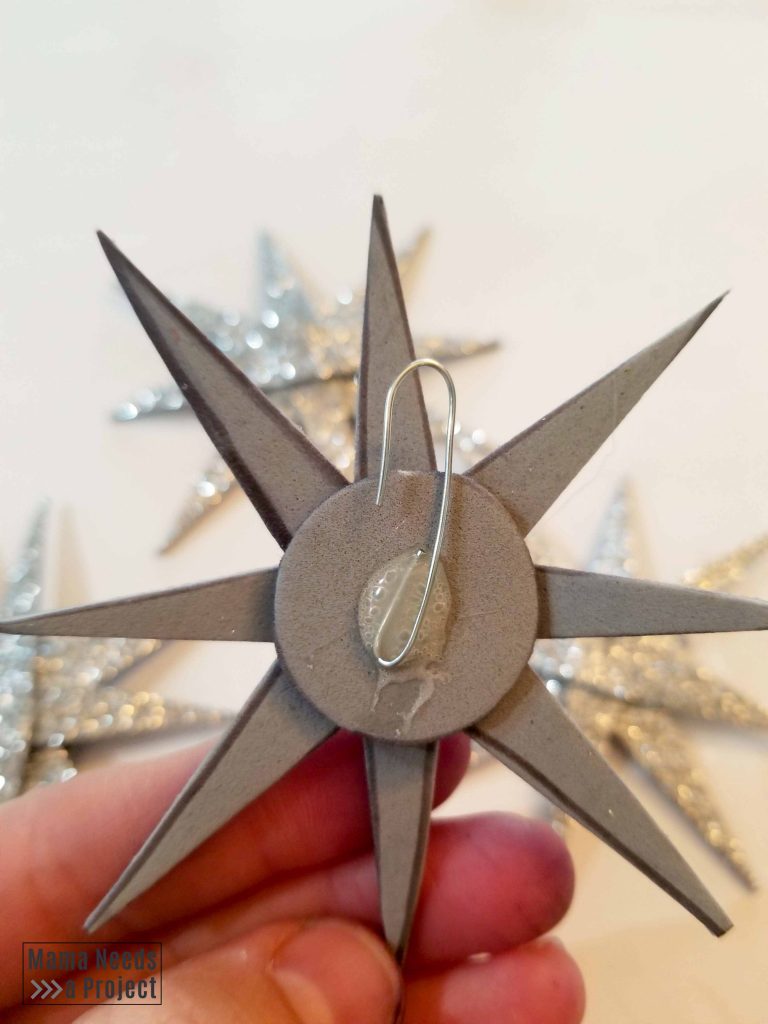
To hang the ornaments, I hot glued ornament hangers onto the back of each ornament. Again, I cut the ornament hangers in half so they weren’t quite so big.
DIY Mini Christmas Trees – 3 Ways!
These DIY Mini Christmas Trees were so fun to make! I love how different they all turned out and I have a clear favorite, but I would love to hear what you think!
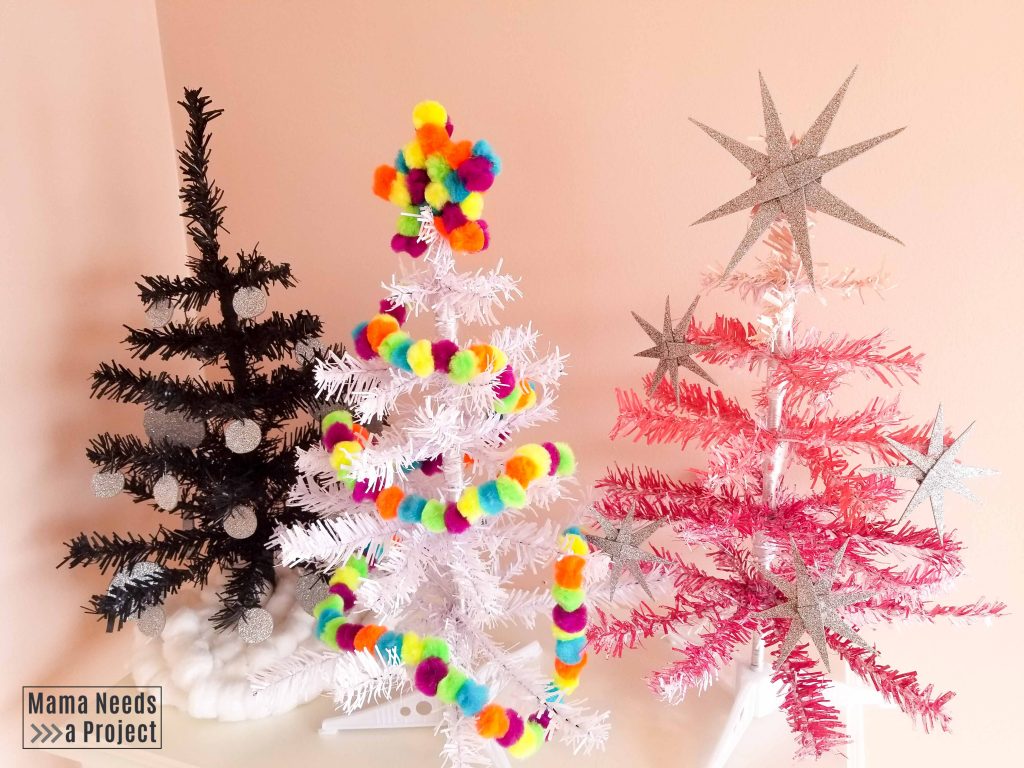
Are you into the simple white & pom poms? Daring and bold black? Bright and cheery pink? Tell me your favorite in the comments! And let me know if you’ll attempt a DIY Mini Tree Makeover.