How Long Does Wood Glue Take to Dry? (5+ Quick Drying Tips)
If you’re a woodworker, you probably know all about wood glue. But even experienced woodworkers might forget how long wood glue takes to dry.
In this post, I’ll answer the question “how long does wood glue take to dry”, the different types of wood glue, and much more. Let’s get started!
What is Wood Glue?
Wood glues are commonly used to join together pieces of wood.
For example, if you’re constructing a wooden frame, you might use wood glue to attach the pieces of wood together.
Wood glue is specifically designed to bond wood to itself and other porous materials, like paper and cloth.
There are many different types of wood glue you can use depending on your project.
What Are the Types of Wood Glue?
Before starting your project, you need to know the different wood glue options on the market. Each serves a varying purpose and has different dry times.
The main types of wood glue include:
- PVA Wood Glue
- Polyurethane Glue
- Hide Glue
- Epoxy Glue
- CA Glue
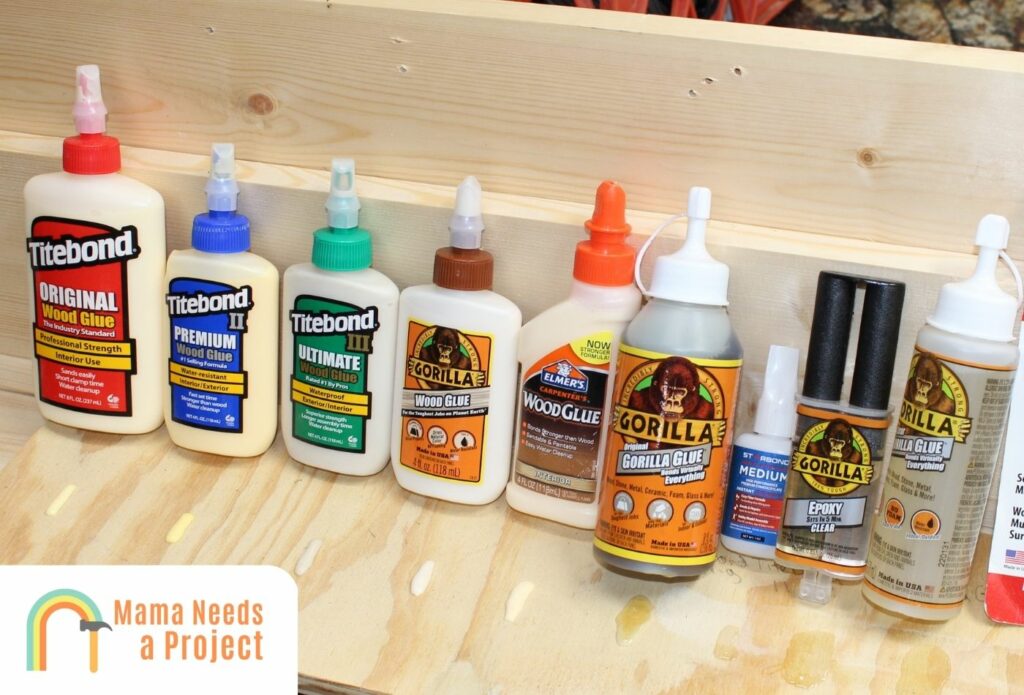
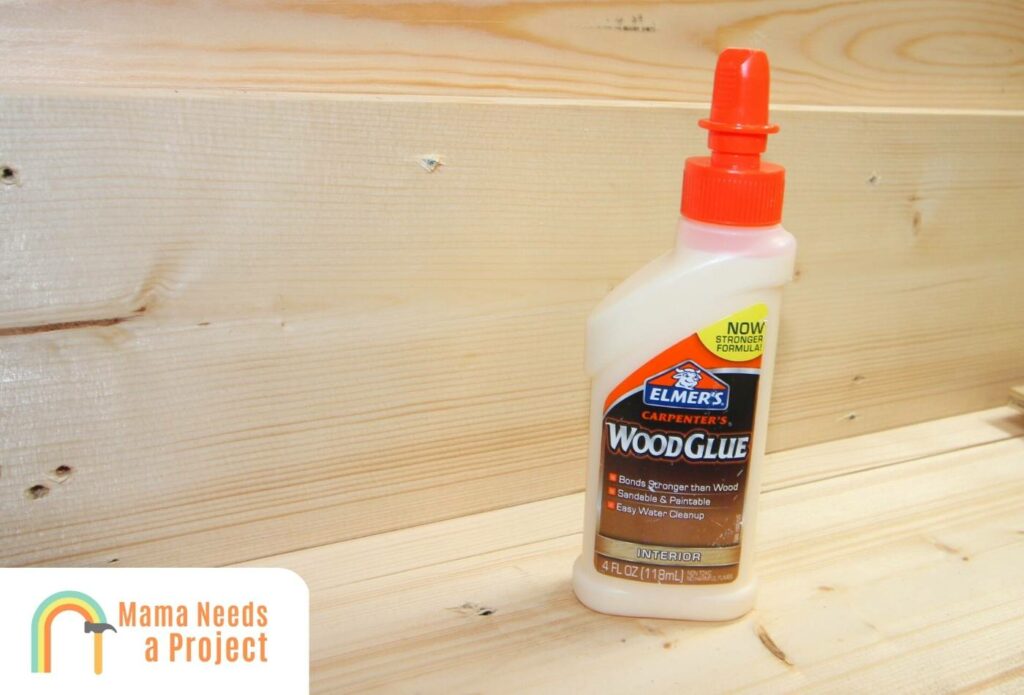
PVA Wood Glue
PVA wood glue, or polyvinyl acetate wood glue, is a modern adhesive. This product replaced hide glue, which we will talk about later. A few examples of PVA wood glue include Elmer’s Glue, Gorilla Glue, and Titebond Wood Glue.
Here are a few benefits that come with PVA wood glue:
- Easiest to find and purchase at stores
- Won’t yellow over time and stays somewhat flexible
- Non-harmful fumes
It’s one of the most popular wood glue choices that most individuals take advantage of for their projects.
PVA wood glues have several variants. Some are water-resistant, while others are dyed. It’s an excellent general product for woodworkers to have on hand while they glue.
Polyurethane Glue
Next up is polyurethane glue. When used right, this glue has extremely strong adhesion. It takes a little longer to adjust to using polyurethane glue, but it is the substance many expert woodworkers use for their work.
Here are a few benefits that come with polyurethane glue:
- It doesn’t have a high moisture content
- It cures from a chemical reaction to moisture
- You can utilize it to glue together finished pieces, rather than gluing wood and then finishing it
Polyurethane glue does have one of the longest cure times on this list but it’s still a tremendous option. Additionally, polyurethane glue can be used in slightly colder temperatures compared to other glues.
Hide Glue
Hide wood glue, or animal glue, is the original adhesive from long ago.
Hide adhesive exists on the market for traditional woodworking techniques. Synthetic versions exist, but you can also make your own if you’re crafty.
One of the best options for hide glue is Titebond Hide Glue. It’s a synthetic with a stronger bond than the natural glue type choice. Liquid hide glue is a little more controversial than other glue methods you can find on the market.
Epoxy Glue
Epoxy glues are also an ideal wood glue option for woodworkers. It’s a two-part mixture, so there is a necessary mixing process that results in a chemical reaction. Both parts involved are liquid.
Here are a few benefits that come with epoxy glues:
- Waterproof and excellent fillers
- Most epoxy glues can mix with sawdust for a wood texture to blend in
- The longer the cure, the stronger the bond
Gap filling and sealing are ideal uses for epoxy glue. It’s critical to note that this adhesive is more expansive and can be disrupted by moisture.
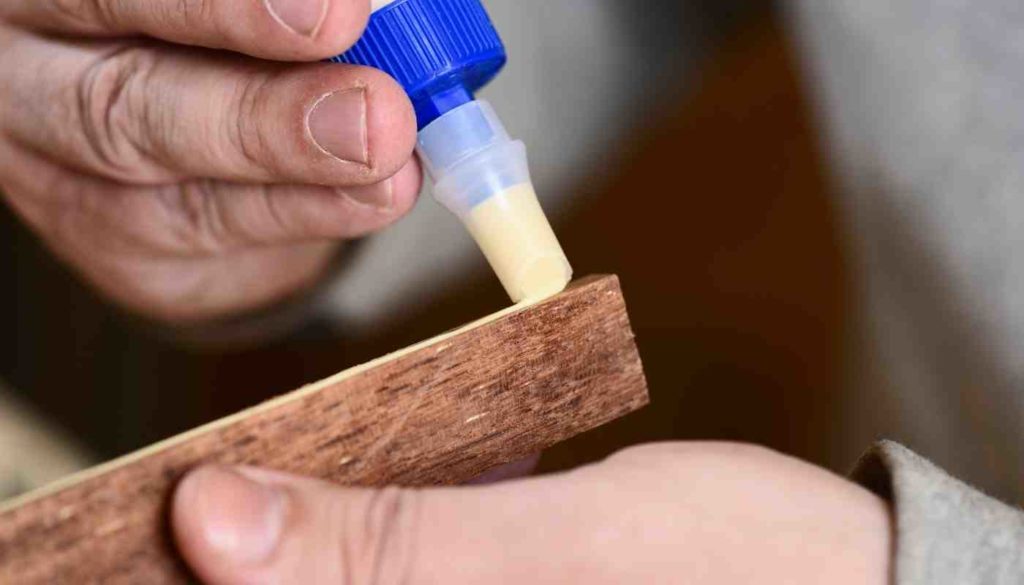
CA Glue
CA glues, or cyanoacrylate wood glues, are commonly utilized as super glue. Super Glue and Krazy Glue are two of the most common form of CA glue.
CA wood glues tend to be more expensive, but they are a great option.
Here are a few benefits that come with CA glue:
- Excellent holding properties
- Clear and cure time is quick
- Precision is simpler
Although CA glue has excellent holding properties, it’s not the strongest. Don’t expect it to hold like polyurethane wood glue or hot hide glue. It’s best for more precise repairs that might be necessary.
How Long Does Wood Glue Take to Dry?
Now that we’re familiar with all the types of wood glue, let’s go over the question – how long does wood glue take to dry? Each type of wood glue has a varying cure time.
Let’s dive into each cure time necessary for each type of wood glue. It might seem like a pain to wait for your glue to dry, but the time will give the seal a chance to bond for good.
PVA Wood Glue Drying Time
PVA wood glue takes a decent amount of time to dry at just under 24 hours for a full cure. In the first thirty minutes, keep the joints clamped together to ensure there is some adhesive to the connection. After that, you can remove the clamp. Let the glue cure for 18-24 hours before you attempt to work with it again.
As PVA glue dries, it will harden. Ensure you make any adjustments you need to before you are well into the drying process. After the cure time, it will be difficult to separate and refasten the joint together again. Choose wisely with PVA wood connection points.
Polyurethane Glue Drying Time
Polyurethane glue is next up on the list. This glue is a little different. To dry, you will need to clamp the pieces together for about two hours. After that happens, it will take about twenty-four hours for the glue to dry completely.
It’s vital to ensure you don’t stress the new joint out before twenty-four hours have passed. After this time, continue to be gentle to ensure you don’t create any new breaks in the newly-glued surfaces.
Hide Glue Drying Time
Hide glue is pretty similar in the drying process to other wood glues. It takes a little while for the glue to cool, but once it does, the drying process begins. Clamp the pieces together for at least half an hour, in the beginning, to ensure everything stays in place. After that, it will take 12-24 hours for the hide wood to cure.
This cure time is pretty standard for wood glues on the market today. Ensure you keep water away from the material to help the wood glue dry faster.
Epoxy Glue Drying Time
Epoxy glue has one of the longest drying times on this list. It’s an excellent way to fill in gaps in the wood and other spots, but the ease comes at a cost. It takes between 24-72 hours for the epoxy to cure. It’s always better to err on the side of caution and assume it will take a few days for the epoxy wood glue to solidify.
Once the epoxy solidifies, you will have a nice wood section you can work with and disguise. It’s a little more complicated, but an epoxy is an excellent tool that many can utilize to fill in gaps without trouble.
CA Glue Drying Time
Last up is CA glue. This adhesive is unique because it only takes a few seconds for it to dry enough for two items to stick together. However, it can take up to twenty-four hours for the glue to completely cure.
Some types of CA glue take a shorter time to cure than others. Ensure you do your research if you’re interested in an adhesive that will form attachments as soon as possible. There are plenty of CA glue options out there.
What Factors Can Impact the Drying Time of Wood Glue?
It’s always better to have more time when working on a project. Many woodworkers may want their glue to cure as fast as possible. To speed up the process, it’s vital to know the factors that can impact the drying time of wood glue.
These items can change the time it takes for wood glue to dry:
- Assembly
- Humidity
- Temperature
- Wood moisture content
- Type of wood
- Ventilation
Let’s dive into each of these factors. If you know what can change the drying time, you can change your surroundings to help them work better with the wood glue.
Assembly Factors
The assembly is a factor that can alter the drying time. There are two types of assembly times to consider when working with wood.
These include:
- Open assembly: This item is the time you have from when the glue comes out of the bottle to the point where you can’t use it anymore.
- Closed assembly: This item is the amount of time you have to reposition the bond until you can’t move it any longer.
These will speed up or slow down the process.
Some wood glues have more time before they dry, while others need to be applied in seconds before it becomes too late to work with them. Learn what you’re working with before you begin the assembly process for two pieces of wood with glue. Those with shorter times in this area often take less time to dry overall.
Humidity
Humidity is another item that can change how long it takes for the wood glue to dry.
The higher the humidity, the trickier it will be to get the wood glue to dry. The liquid in the air prevents moisture content from leaving the glue, a necessary step in the drying process.
Dry times on a bottle are often based on a humidity level of about 50%. Anything below that may decrease the dry time, while anything above will do the opposite.
A climate-controlled area, such as inside a home or shed, shouldn’t deviate too much from the specified dry time on the bottle. If you don’t want to deal with humidity factors, it’s best to find a station like this for yourself.
However, many work in places like their garage. This location isn’t temperature-controlled. If you’re working in an area with no regulation, you should allow for a little more drying time to stay on the safe side.
Temperature
The temperature can also make a difference in the dry time.
Most estimated times are based on a temperature range of 65 and 75 degrees. You can go a little above or below that range without much impact, but more drastic shifts will change the way the wood glue dries.
You can help with this change by checking the bottle of glue. Many manufacturers put the recommended application temperature range on the description of the bottle. You can look at this range and note the time of year and place when the wood glue should go on.
As a rule of thumb, try not to apply wood glue in the coldest times of the year or when it’s very hot outside. The more temperature-controlled the location, the better. Of course, you still need proper ventilation for your health.
If it’s really cold and you need to glue, there are options. Try a temperature gun for your needs or add a space heater to your setup. There are many choices to alter the temperature of the environment you work in when adhering wood together.
Wood Moisture Content
Moisture content changes everything. Wood is a porous material, which means there are many pockets inside each piece. When the tree is alive, these bring water up and down the trunk for nourishment. When chopped down, they serve as wood moisture pockets that can shift the time it takes for wood glue to dry.
If the wood you have is green milled wood or freshly cut, it will have a high moisture content. If the wood is kiln-dried, the water inside will be significantly less.
The drier the wood, the more it will seek to soak up the liquid in the glue. This separation allows the glue to dry up faster.
High moisture wood won’t soak up the glue, and it might even harm the makeup of the glue.
If you have wood with lots of water, utilize polyurethane glue. Or, swap out the wood with water for one that has been kiln-dried.
Type of Wood
The wood type doesn’t matter too much when considering drying time, but it’s still vital to note what you’re working with for your project. Some varieties of wood can affect the drying process, particularly rarer materials.
Tropical woods that come from humid clients are often oilier than other woods, which prevents the glue from adhering and even alters its properties. The dry time may be slower if you work with a tropical wood choice.
Avoid water-based glue if you can help it when utilizing oily wood.
Epoxy and polyurethane are excellent options, and you can sprinkle in a bit of cyanoacrylate in little sections. Sanding the wood can even get rid of some oil if you want a water-based product.
Dense wood also makes it difficult for the glue to dry.
Wood like maple and oak have fewer porous areas, so the liquid separates from the adhesive much slower. If you want glue to dry well, look for non-oily softwood for the best results. Otherwise, try your luck with a adhesive that’s not water-based.
Ventilation
With any type of glue, the circulation of air is a critical component of the drying process.
Without the movement of air, it will be difficult for the glue to lose its moisture content.
As dry air circulates, it collects water molecules from inside the glue. The more air on the move, the more water molecules swept up with it, resulting in a much faster drying period. It also keeps harmful chemicals on the move and away from your lungs which is a big win for everyone.
A lack of flow will slow down the drying. In some cases, it can even prevent it from happening which can ruin a project entirely.
Try to work in an open area, and if you can’t, keep windows and doors open wherever you can. A fan will also work if you want to add direct air movement to the adhesive process. Hold it right over the glue and move it around to provide an even flow of air as the glue dries up.
Thickness
It’s obvious – the thicker you apply the glue, the longer it will take to dry.
A thin layer on wood may only take a few hours, whereas a thick layer could take a full day to complete the process.
If you’re utilizing wood glue for adhesive purposes and clamping it, the glue will be spread thin and won’t take as long to dry. However, putting epoxy and other clues in cracks and crevasses as a filler is a different story. These will take much longer to dry.
Those who want to experience a fast drying process should keep this factor in mind. If you want to keep moving forward as soon as possible, keep the spread of the glue thin. Anything thicker could extend the waiting period by a lot.
Tips to Speed Up the Drying Process
Let’s say you start a wood project and need to use wood glue, but you don’t have a lot of time. Is it possible to speed up the drying process? Is there any way to make the moisture leave the wood glue faster?
Here are a few ways to speed up the drying process and make it go by faster:
- Utilize heat
- Try a hardener
- Take advantage of air
It’s always better to give wood glue a natural drying cycle rather than attempting to artificially speed up the process yourself. Still, if you can’t wait, one of these will suffice.
Let’s dive into each technique so you can better understand what resources you have to let the wood glue dry faster than anticipated.
Heat
It’s no secret that heat makes water evaporate.
The more heat added to a liquid, the more that will evaporate into the air. If you apply some heat to the glue it will dry faster than anticipated.
Try a moderate form of heat, such as a heat gun or a hairdryer set on low heat. Be gentle with the application and ensure you cover every part of the glue. In no time at all, the wood glue should be dry.
Hardener
If you are using epoxy, there is a unique strategy you can take to help the glue dry faster.
Add a little more hardener to the epoxy when mixing. When it comes time to add the glue, the additional hardener will help the epoxy solidify quicker.
Take care when mixing the two substances with this ratio. You will have less time to work with the epoxy after adding the hardener to it.
Air
We briefly discussed air circulation and how necessary it is for the proper drying process. Adding additional air can help the water leave the glue faster.
The more air, the quicker the wood glue will dry.
There are a couple of ways to distribute air over wood glue. You can utilize a hairdryer and set it on low heat and strength, then pass it over the wood glue. You can also invest in a fan to plug in by your workstation.
You might even open up additional windows and doors. Anything you can do to increase circulation will work well for the glue drying process.
Thickness of the Glue
The amount of glue you put on your project will affect the drying time.
For example, a thick glob of glue will take much longer to dry than a thin layer.
Aim for a small, well-dispersed drizzle of glue to ensure an even spread of glue that dries quickly with maximum strength.
You want to avoid large globs and an uneven layer of glue as much as possible.
Avoid Wet Wood
If you’re gluing two pieces of wood together and one of your pieces of wood is wet, it’s not only going to take much longer for the wood flue to dry – but also will yield a weaker bond.
Before gluing your wood, make sure it is dry. It might take some time for your wood to dry first, but this will give you the strongest bond possible.
Check out this post to learn how long it takes wood putty to dry on your next project!
What Happens If You Don’t Let the Wood Glue Dry?
It might seem easier to stick things together and move on with your project faster than the recommended time. The glue sticks pretty fast – why can’t you keep going with your project? What happens if you don’t let the wood glue dry?
If you don’t give the wood the proper time to dry, you risk destroying your entire project. You could have to start over from square one, regaling the pieces together and prepping everything all over again.
It might seem like a hassle, but ensure you let the wood glue dry. It’s better to be safe than sorry with the drying process.
How Long Should You Clamp Wood?

Clamping the wood after wood glue is a critical part of the drying process.
Some pieces might not need it, but joints need clamps to allow the wood to stick. How long should you fasten the wood pieces together before removing this support?
The length of the clamp depends on the joint. Some joints are stressed, while others are unstressed. A stressed joint should have the clamps for around twenty-four hours before removal. This pressure will give the glue time to dry to permit the joint to stay together after it is gone.
An unstressed joint doesn’t need as much support. You might be able to unclamp as soon as a few hours after the glue goes on the wood.
If you’re uncertain, keep the joint clamped as long as possible.
If you remove the clamps too early, it can destroy the project. If you leave them on for a long time, no hard will befall your wood pieces. It’s better to go too far with clamps than do too little.
Why Isn’t My Wood Glue Drying?
Despite everything we’ve talked about, it might be possible that the wood glue still isn’t drying. What’s the issue if this happens? Why isn’t your wood glue drying?
Ensure you are taking advantage of the proper glue for the job.
Water-based adhesives won’t work well on oily wood or thicker pieces. Some options aren’t as powerful, and they can’t hold wood together. Ensure you select the best adhesive for the project.
The temperature range also might be wrong. Is it too hot or too cold? How far out of the recommended numbers are you? Try to get back as soon as possible if this is the trouble.
Do you have circulation? Is there air flowing through the glue, permitting a proper drying process?
Finally, check that you have a new bottle of glue. The glue can expire, and it won’t be as effective as it once was. If your adhesive is far past its expiration date, toss it and invest in a new one for your project.
Final Thoughts on How Long Does Wood Glue Take to Dry
When working with wood, glue often becomes a necessary product to adhere various pieces together.
There are many different types of wood glue, from polyurethane wood glue to epoxy.
These have different drying times and curing rates. Each is beneficial for varying reasons, so it’s critical to research to select the adhesive that will work best for you.