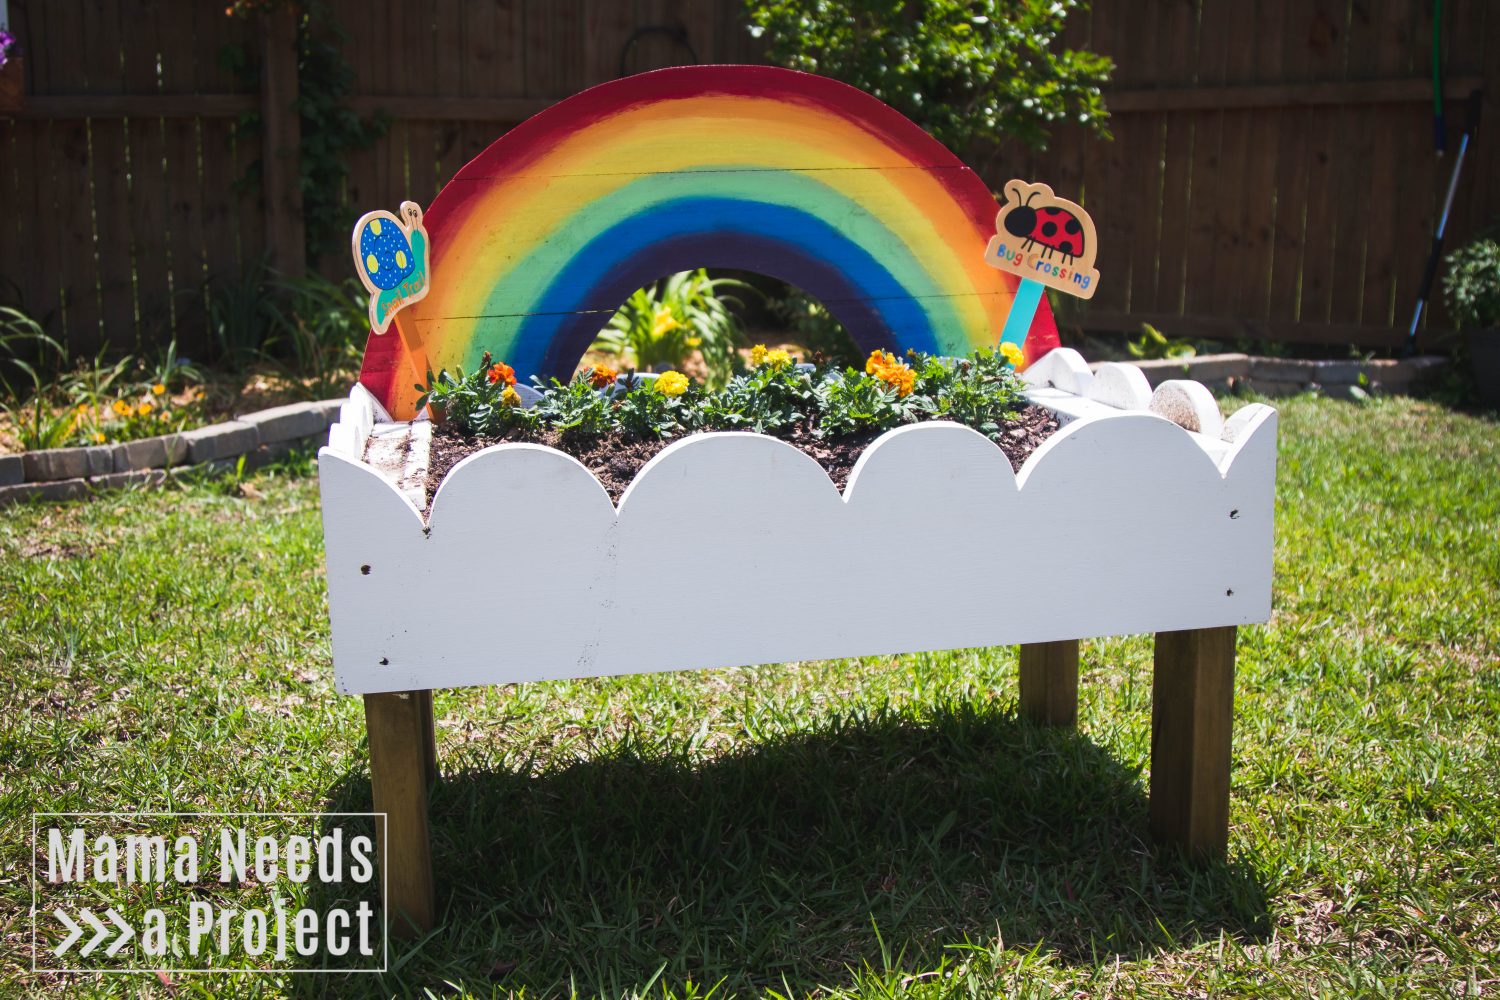
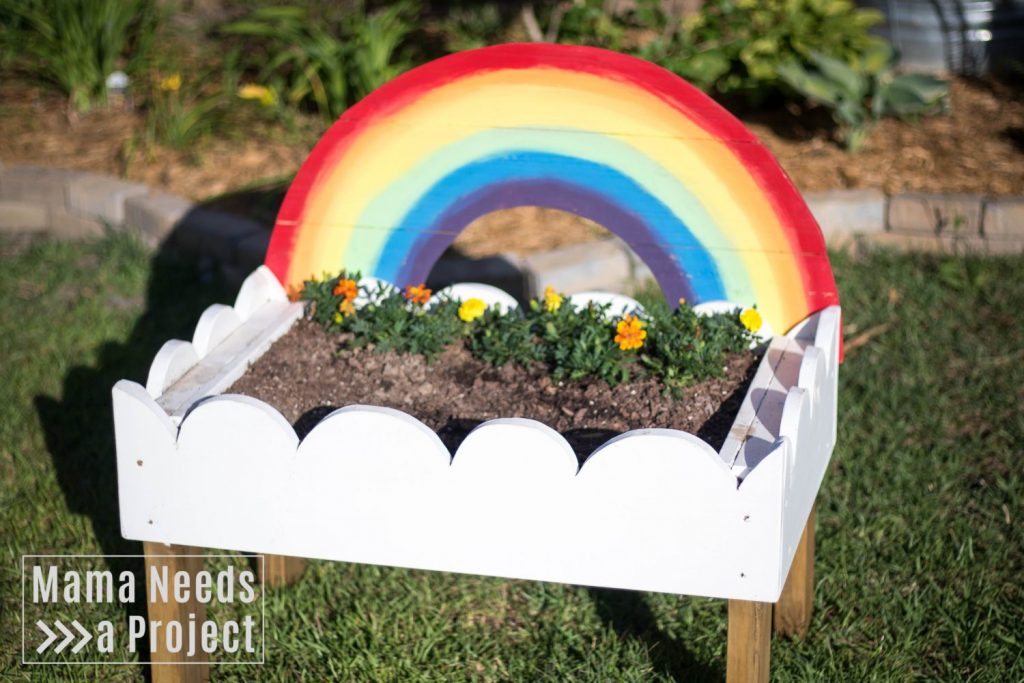
Rainbow Toddler Garden Tutorial
I am so in love with this Rainbow Toddler Garden! I finished building it about a week ago and am excited to share the plans with you. This post will show you how I built it.
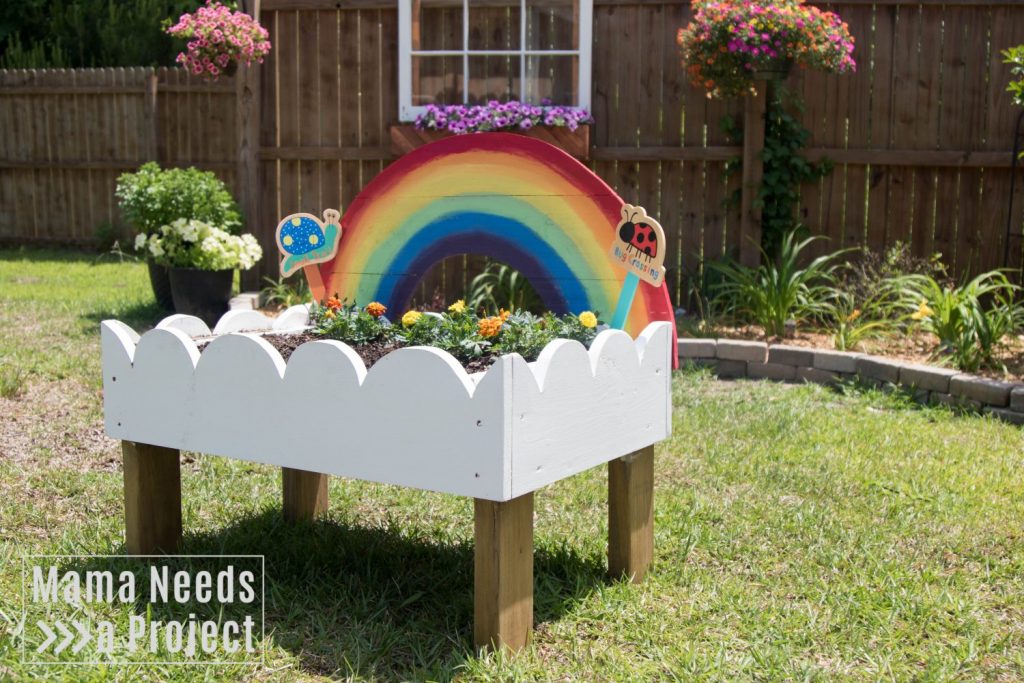
My son was so excited to plant his flowers that I didn’t get many pictures of this project where it’s not covered in dirt. But, that’s what it’s for! It seriously melts my heart watching him play in there and take care of his flowers.
I’m predicting about a 25% survival rate for these marigolds – he loves them a little too hard. We only planted flowers at the back of the garden so that the front can be used for digging and monster trucks. I love watching him explore outside and get his hands dirty. And, now he has a place to dig that isn’t my garden. (yes!)
This post contains affiliate links.
Rainbow Toddler Garden Woodworking Plans
I’ll go over this build in the tutorial below, but if you want more detail instructions you can grab the complete woodworking plans in my plan shop.
All of the woodworking plans in my shop include a lumber list, cut list and supply list. They also feature digitally rendered images and detailed instructions that walk you through each step of the build. I use easy-to-understand language that’s perfect for beginners.
What do you need to build a Toddler Rainbow Garden?
Tools & Supplies
- Toddler Rainbow Garden printable woodworking plans
- jig saw
- miter saw
- drill
- nail gun
- clamps
- speed square
Lumber
- 1x8x8 (1)
- 2x4x8 (1)
- 2x2x8 (1)
- 1x4x8 (1)
- 1x3x8 (2)
- 1x2x8 (1)
- cedar fence pickets (3)
Cut list
- 1×8 @ 30″ (2) – sides of flower box
- 1×8 @ 18″ (2) – sides of flower box
- 2×4 @ 14 1/2″ (4) – legs
- 2×2 @ 25 1/4″ (2) -bottom supports
- 1×4 @ 18″ (2) – leg covers
- 1×2 @ 18″ (3) – bottom slats & leg covers
- 1×3 @18″ (9) – bottom slats
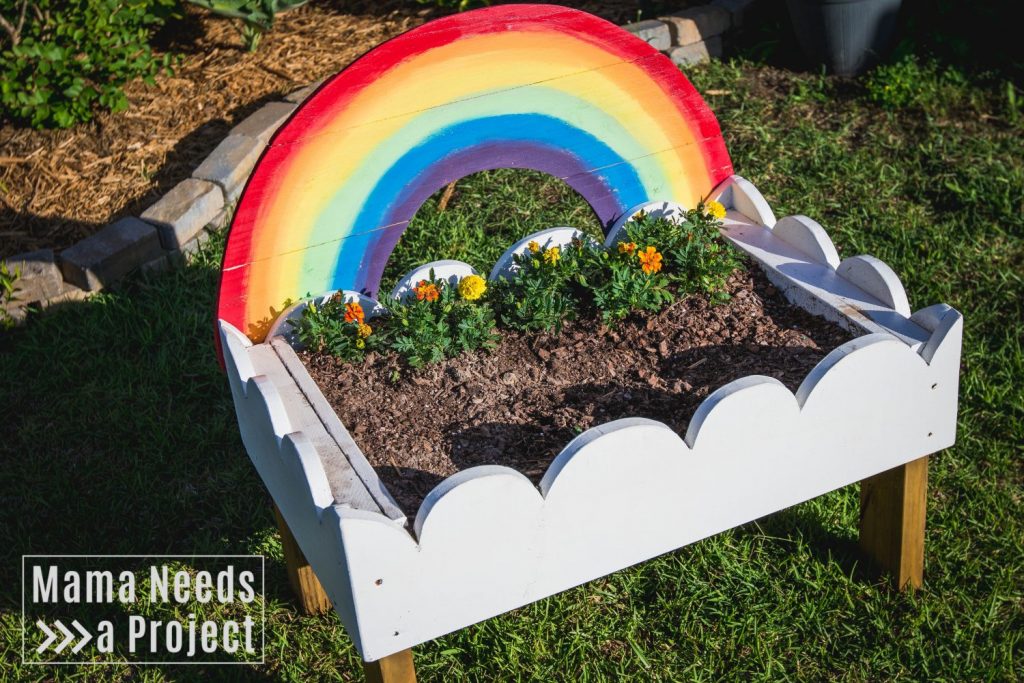
Build Your Rainbow Toddler Garden
1. Cut the cloud design
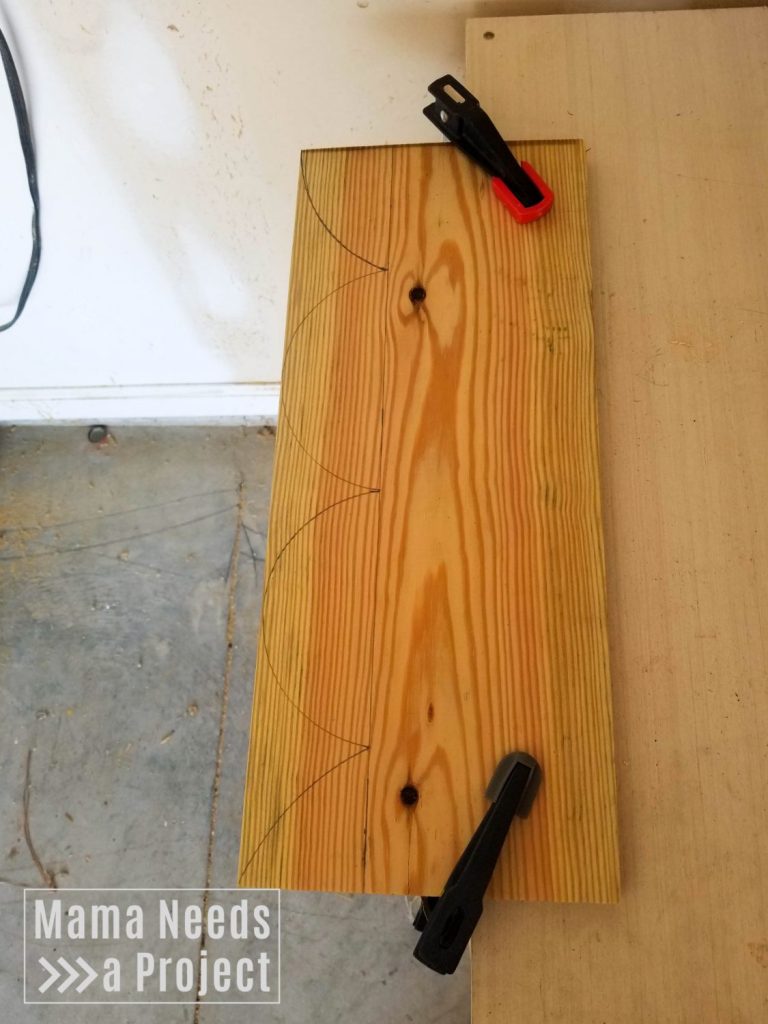
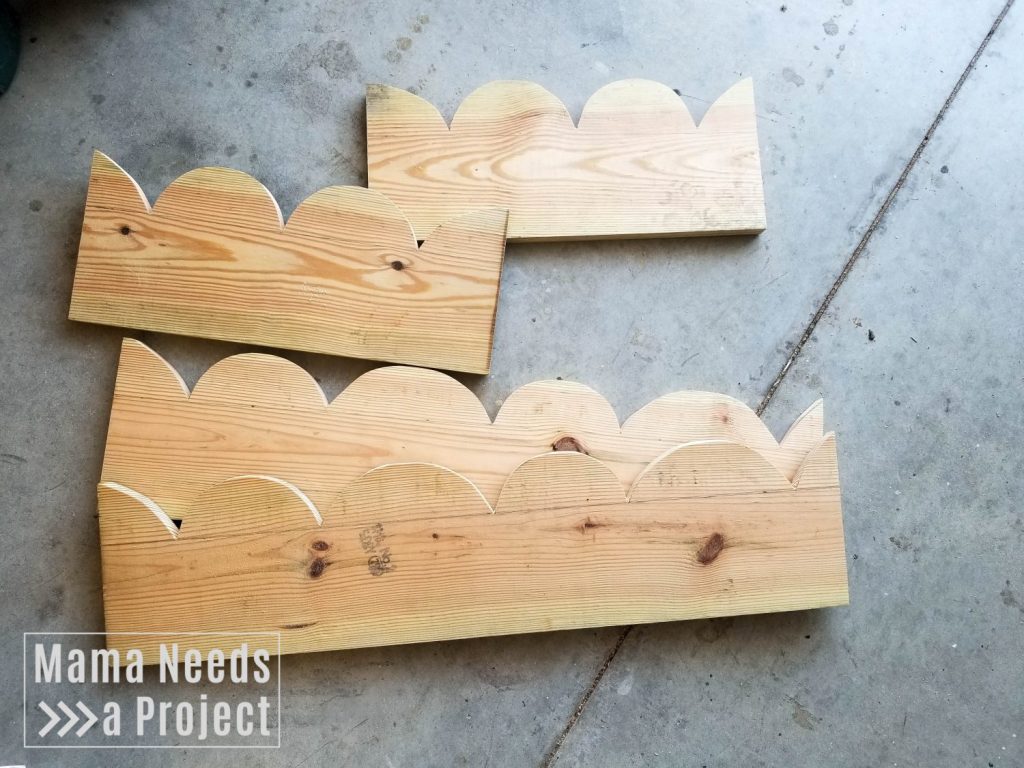
The cloud shaped sides of the flower box are made using a 1×8. Cut 2 pieces of your 1×8 to 30″ long and 2 pieces to 18″ long.
After you have your pieces cut, draw a line across the long edge of each board 2 3/4″ from the top. This line will the stopping point for cutting out the curved lines of the cloud.
Next, use a bowl or other rounded edge to trace the curved lines of a cloud shape. Each half circle you trace will start at the horizontal line you drew and the peak should be very close the edge of the board.
I used a couple different sizes of bowls to give my cloud some variety, but it would look great all the same size, too.
I recommend using a larger curve when you get close to the corners because it will look nicer after assembly. I didn’t do this and had to do a lot of sanding on my corners to get them even.
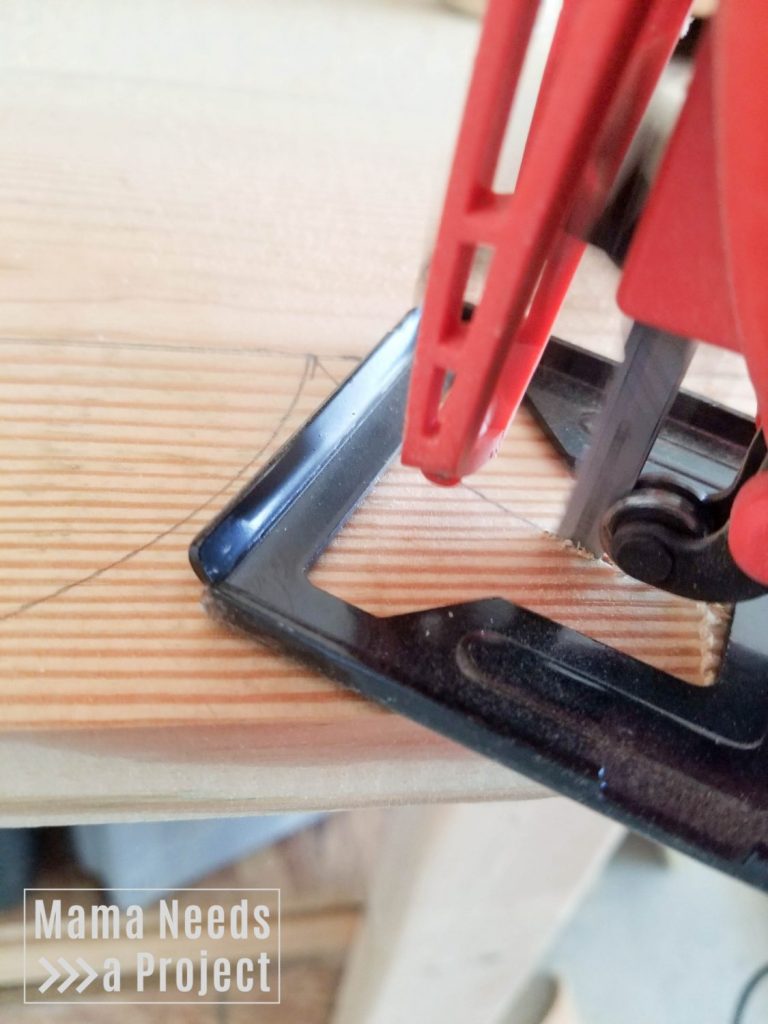
Cut along your cloud shape with a jig saw. To do this, clamp the board down to a flat surface with the area you want to cut hanging off the surface. Make sure that your cut lines are far enough away from your surface that you don’t accidentally cut through whatever you it have clamped to.
Once your board is securely clamped, cutting with the jig saw goes pretty quickly. Try to keep your jig saw flat on the board while you are cutting. This will help you to get a straight line.
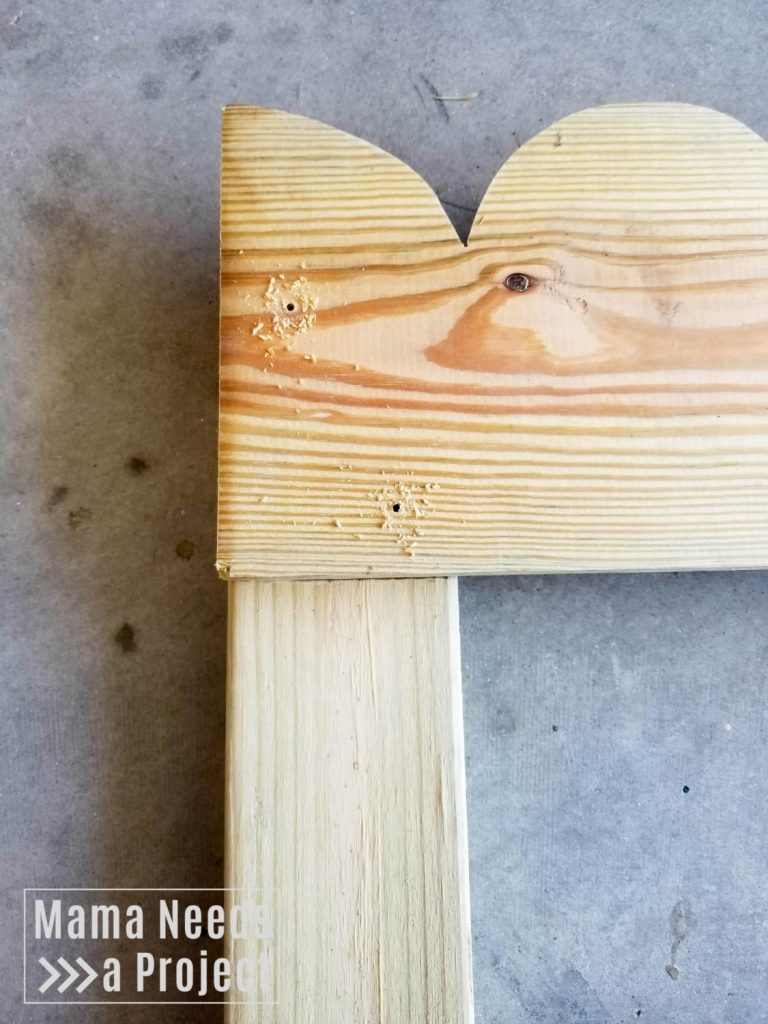
2. Add legs
Cut 4 legs from your 2×4 at 14 1/2″ each.
Add the legs to the shorter 1×8 cloud pieces. Line the top of the legs up the horizontal line you drew. Attach the legs using wood glue and screws. Pre-drill your holes to prevent your boards from splitting. I used 2 screws per leg.

4. Assemble the box
To build the box, attach the longer cloud pieces to the legs that you attached to the shorter cloud pieces. Again, line the top of the legs up with the horizontal line you drew. Attach the board with wood glue and clamps. Pre-drill your holes to prevent your boards from splitting.
Check that your box is square with a speed square.
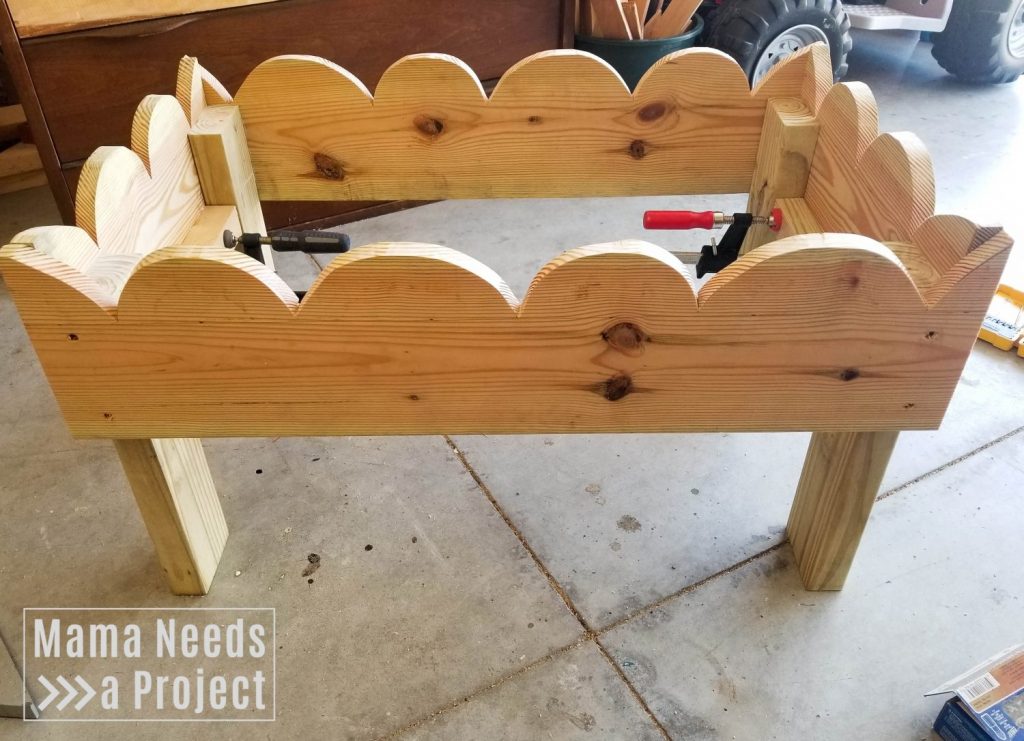
(In the picture above I added 2×2 supports to the shorter sides of the flower box. I made a few modifications to my original plans while building and these supports are not necessary. They are not included in these building plans.)
3. Add 2×2 supports
Cut your 2×2 into (2) 25-1/4″ pieces. These pieces will support the slats for the flower box.
Attach the 25-1/4″ supports to the longer cloud pieces. Line the support up at the bottom edge of the cloud piece between the two legs. Attach with wood glue and a nail gun. For a super secure bond, clamp them until the glue dries.
I clamped the supports for several hours so the glue could dry before moving onto the next step. The slats for the flower box will sit on these supports so I really wanted to make sure they were secure. I have an adventurous toddler, and I know it’s only a matter of time before I find him inside the flower box. I want to make sure it holds up!
Updated 6/29/2019: I have updated the following section of the building plans. I realized that the scrap boards I used for the bottom slats of my flower box were not standard sizes. The following instructions will not be an exact reflection of the photos of my flower box.
To provide a better visual, I’ve included one of the pages from the pdf version of these plans available in my woodworking plan shop.
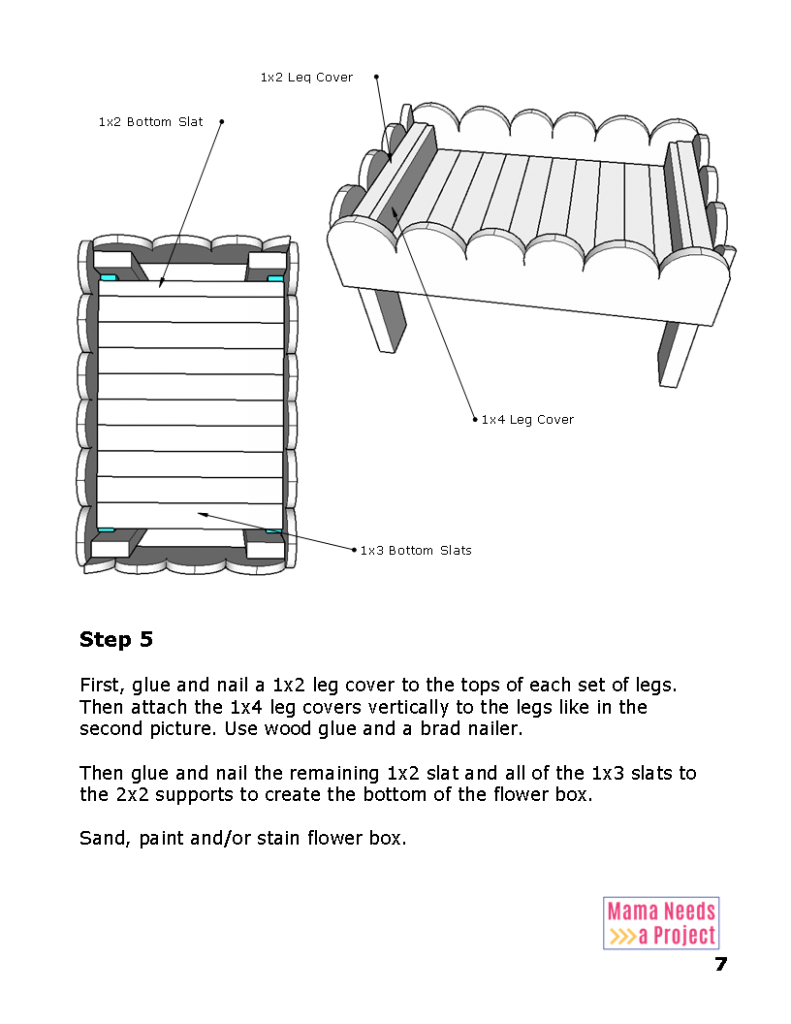
5. Add Leg Covers
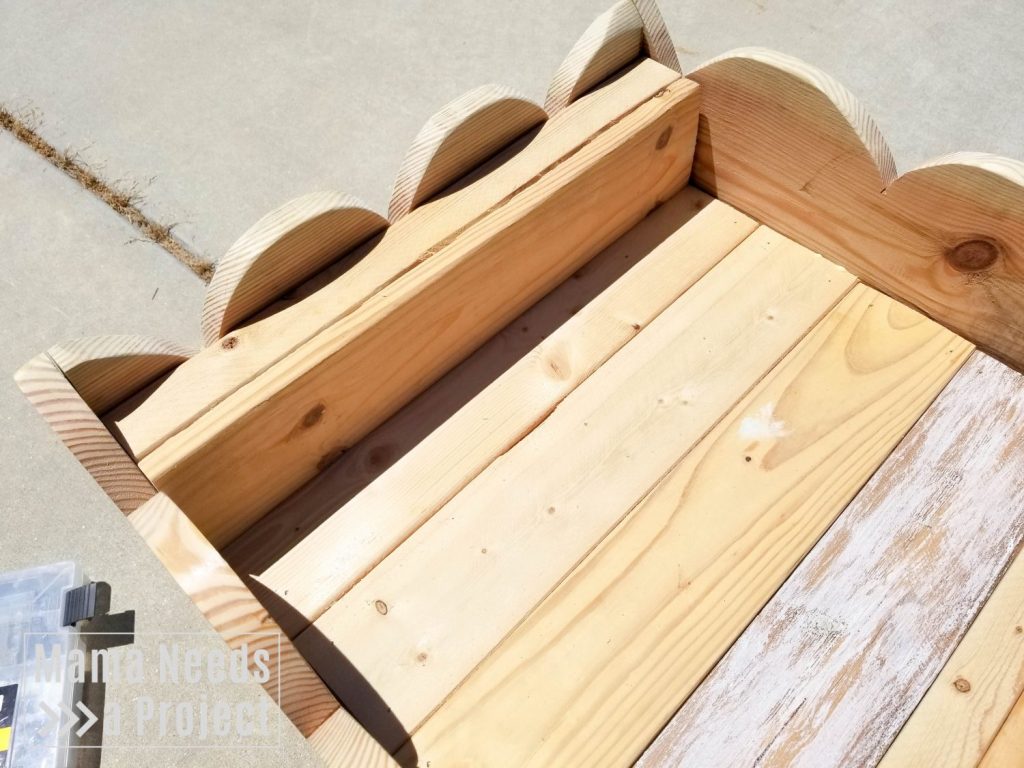
First, glue and nail an 18″ 1×2 leg cover to the tops of each set of legs. Then attach the 1×4 leg covers vertically to the legs. The 1×4 leg covers will line up with the 2×2 supports and the 1×2 leg covers. Use wood glue and a brad nailer.
6. Nail down slats
Then, glue and nail the remaining 1×2 slat and all of the 1×3 slats to the 2×2 supports to create the bottom of the flower box.
7. Sand, paint & stain
You’re so close to done!
At this point I started doing the finishing for the flower box. I sanded all the surfaces enough to make sure my little guy wouldn’t get splinters while he was playing with his garden. I also did a lot of sanding on the corners to dull down the edges.
The tops corners of my cloud required a lot of sanding to get them even. I recommend making those curves near the edges bigger/longer so that you don’t have to do all that sanding.
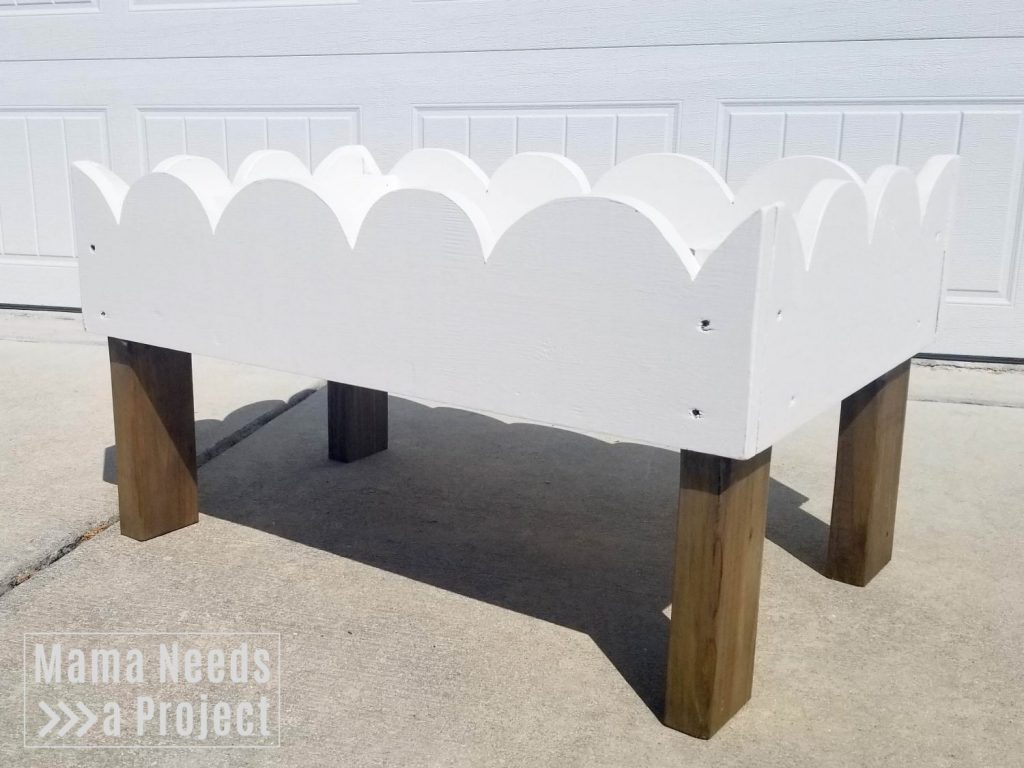
After I finished up sanding, I painted the cloud with a couple coats of white paint. The legs got a couple coats of medium brown wood stain. I love the contrast of the white with wood grain!
8. Make the rainbow
I thought my flower box would be complete at this point, but I just kept feeling like it was missing something. That something was obviously a rainbow.
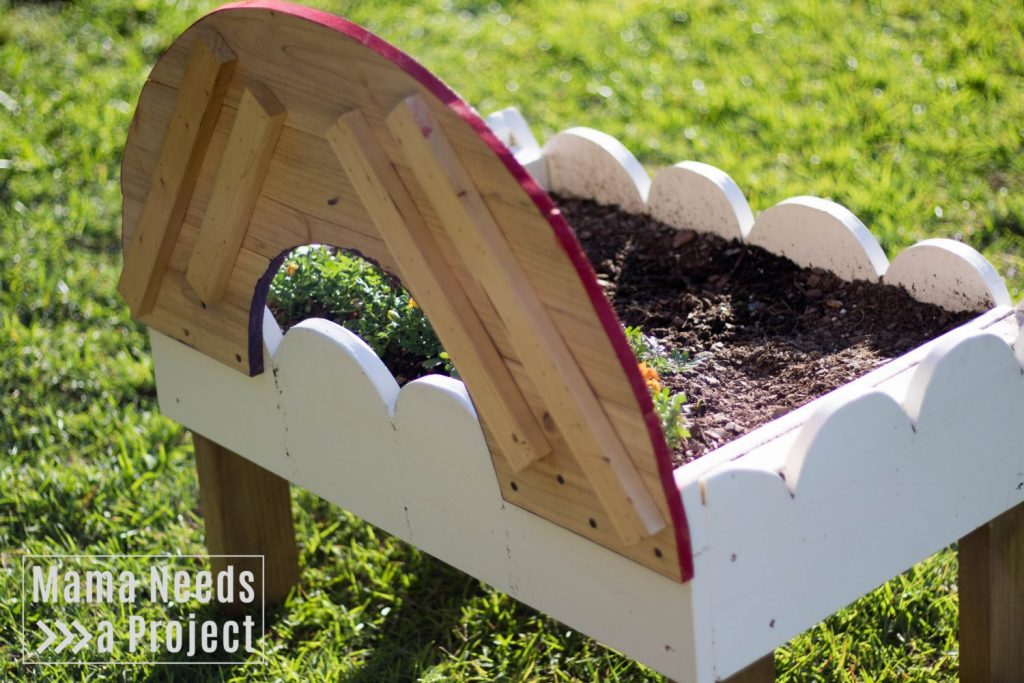
You could really use any type of boards for the rainbow. I used 3 cedar fence pickets, because they are inexpensive and I already had them in my garage.
DIY Compass
To make the curve for the rainbow I had to get creative, because I didn’t have a curved surface to trace that was big enough. So, instead, I made a DIY compass using a nail, string and a pencil.
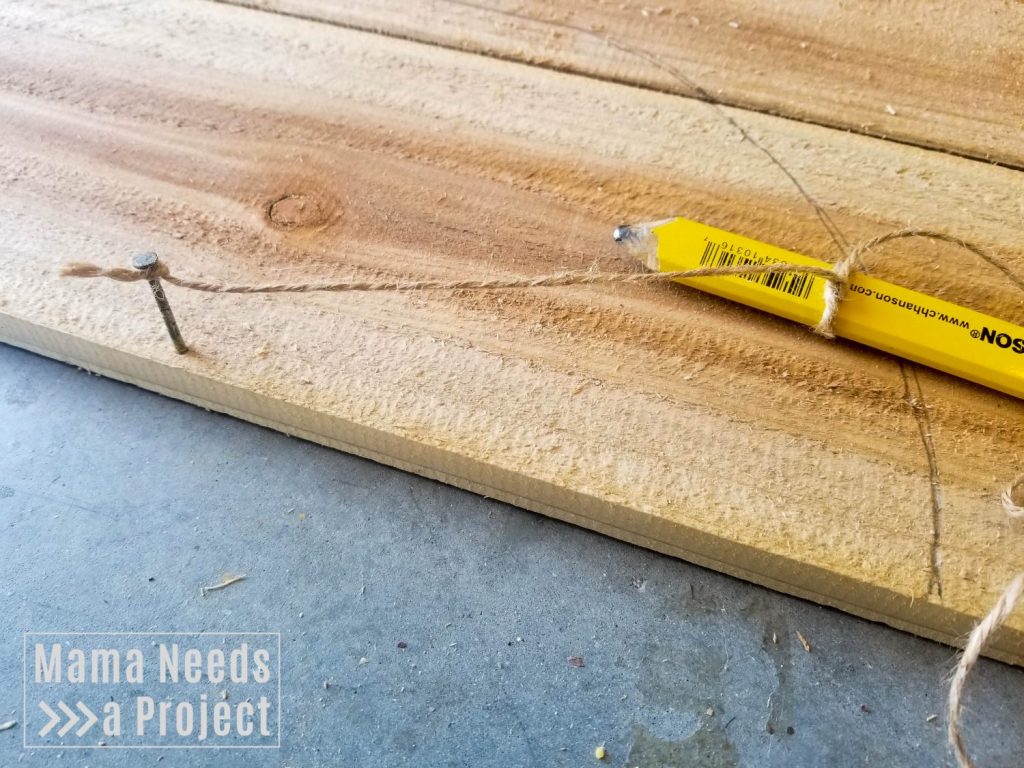
Hammer a nail into the center of a cedar picket and tie a string to it. The other end of the string will be tied to a pencil. The nail is the center of the circle you’re drawing so the length of string from the nail to your pencil will be half of the distance across your circle. Try to make the length of the string between the nail and pencil less than 15″. Any longer than this and the sides of your rainbow will peek out from the sides of your flower box when you attach it.
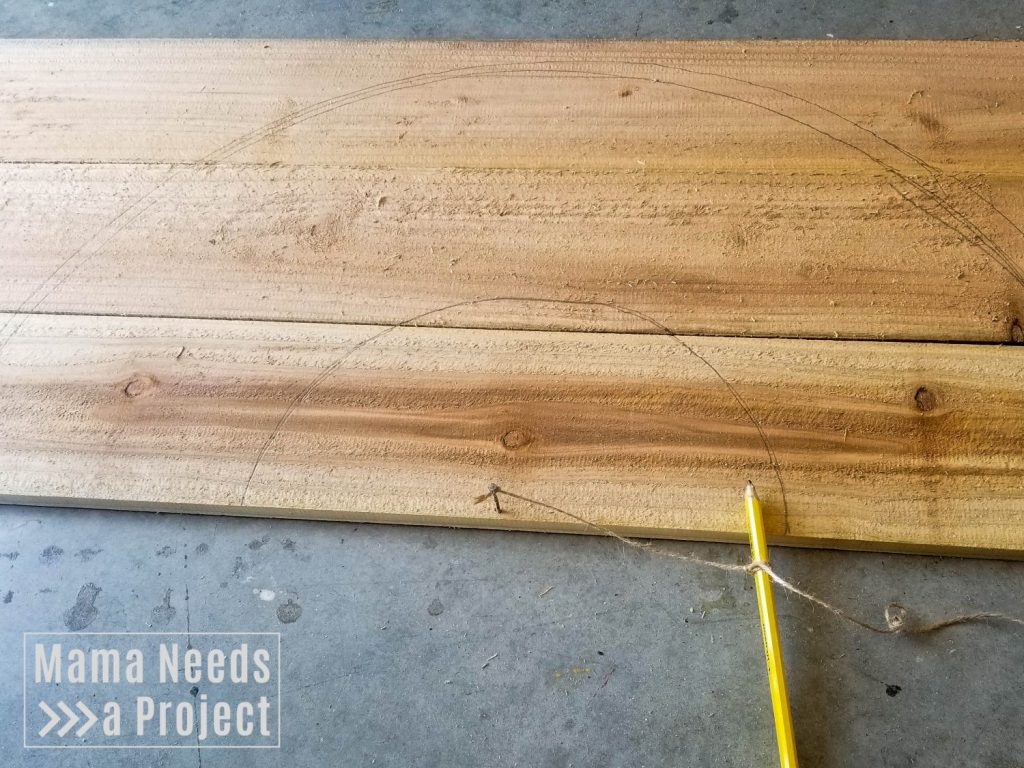
After you’ve tied on your pencil you’re ready to draw your half circle. Hold the pencil so that string stays tight as you make your way around. This turned out to be harder than I thought! It took me a couple tries to get it right.
Do the same thing for the inside half circle of your rainbow. I didn’t do a specific measurement for this. I just picked a length that looked good and went with it.
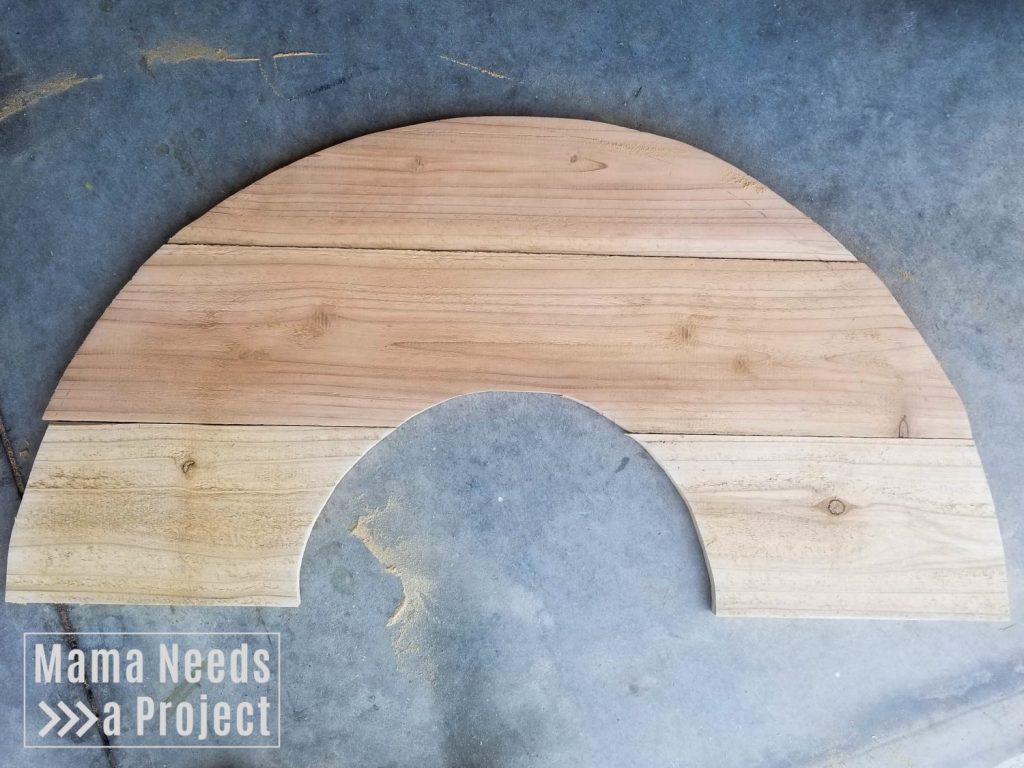
Cut out your rainbow
After drawing my rainbow shape, I cut the cedar boards using my jigsaw. Once I had pieces cut, I lined them up and saw that my inner circle was totally wonky. I reworked that curve a few times before I was finally happy with it.
When I was happy with the shape of my rainbow, I sanded the boards down so they would be easier to paint.
Use scrap pieces for backing
To make the rainbow super simple, I just used scrap 1×2 pieces to attach the cedar boards together.
Lay out your rainbow and then cut your leftover 1×2 into a few pieces that will fit on the back.
Attach these pieces with wood glue and a nail gun. Make sure that all 3 pieces on each side of the rainbow are attached to the 1×2 strips.
Paint
Here’s the extra fun part! I am not a painter at all so I wasn’t sure my rainbow would turn out, but I actually really love it! I knew I wouldn’t be able to get crisp lines (because I just don’t have that skill) so I painted each color and then just tried to blend and layer the colors where they met up.
You need very little paint for this. If you’re not a paint hoarder like me, just buy sample size paints and you’ll have plenty of paint for this.
9. Attach rainbow to flower box
To attach the rainbow to the flower box I just used wood screws to screw it into the back. Pre-drill your holes to prevent the boards from splitting.
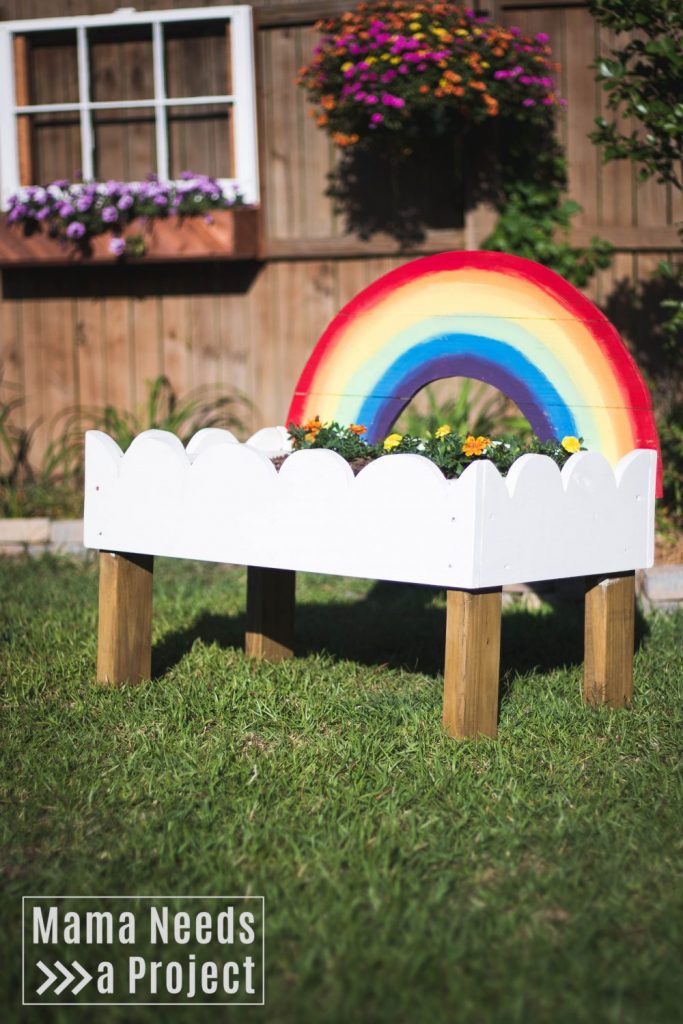
You’re done!
Isn’t it so cute?! This might be my favorite project to date!
The bright colors, my son’s happy little face when he saw it This is the first project I’ve built specially for my son, and I have all the feels about seeing him play in his garden and take care of his flowers. It totally melts my heart!
Want more outdoor woodworking projects? Check out this tutorial for a fence mounted flower box & window or this big letter board!
I want to hear from you!
If you make a Rainbow Toddler Garden, please show me! I’d love to see your projects! You can share pictures on the Mama Needs a Project Facebook page or tag Mama Needs a Project on Instagram.