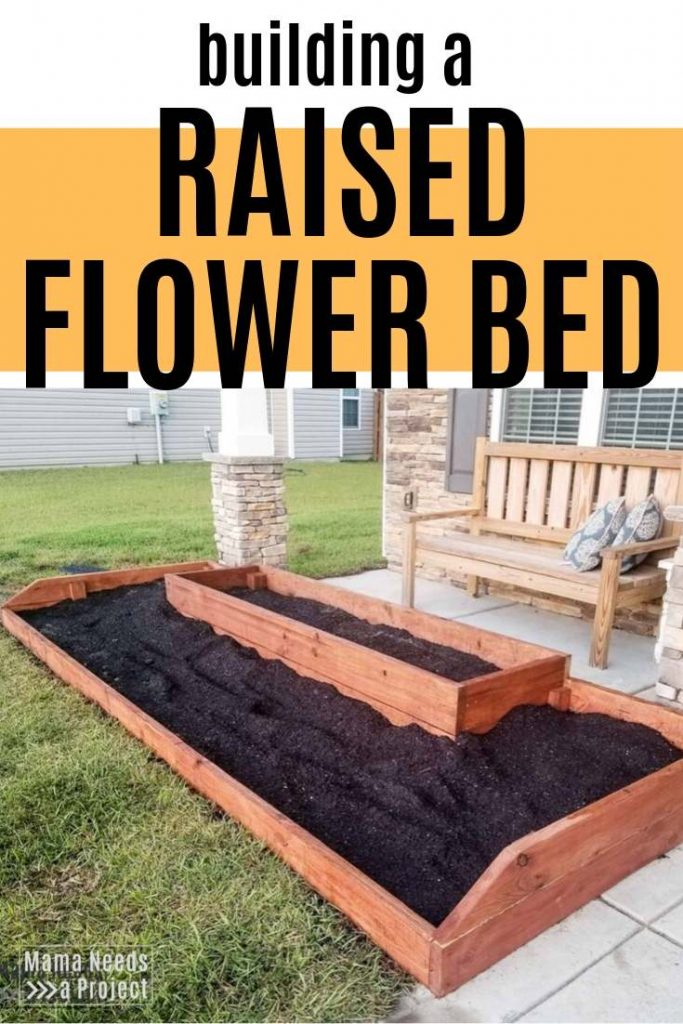
Raised Flower Bed for the Front of the House
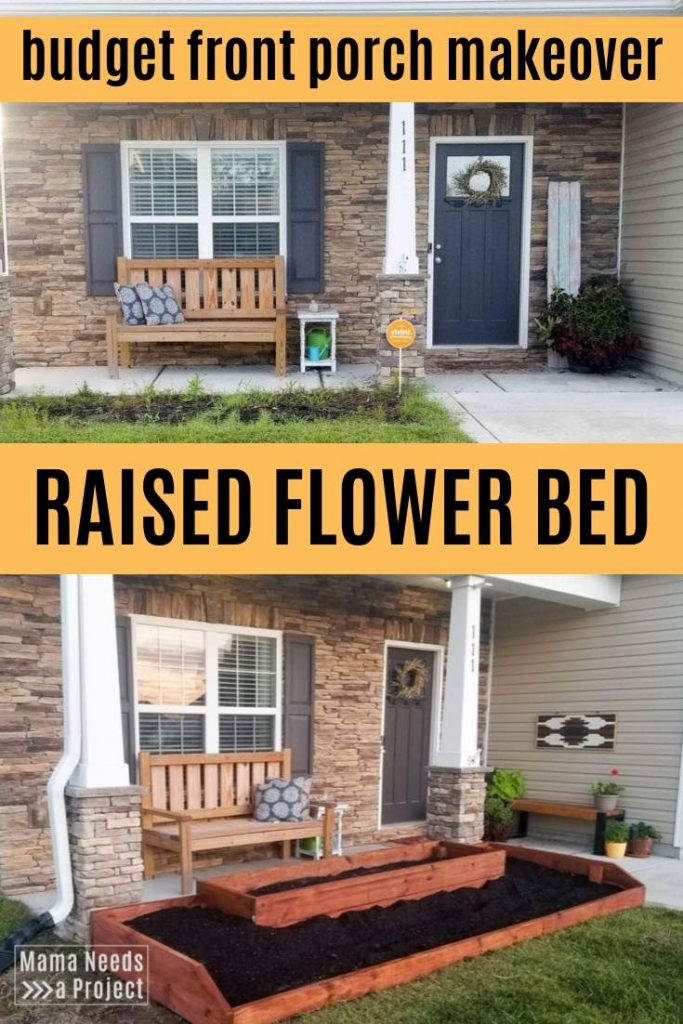
I tackled my biggest project so far in my Budget Front Porch Makeover with this raised flower bed for the front of the house! Other projects for this month long focus on the front porch include DIY Geometric Wall Art and a Simple 2×4 Bench and a DIY Outdoor Plant Shelf.
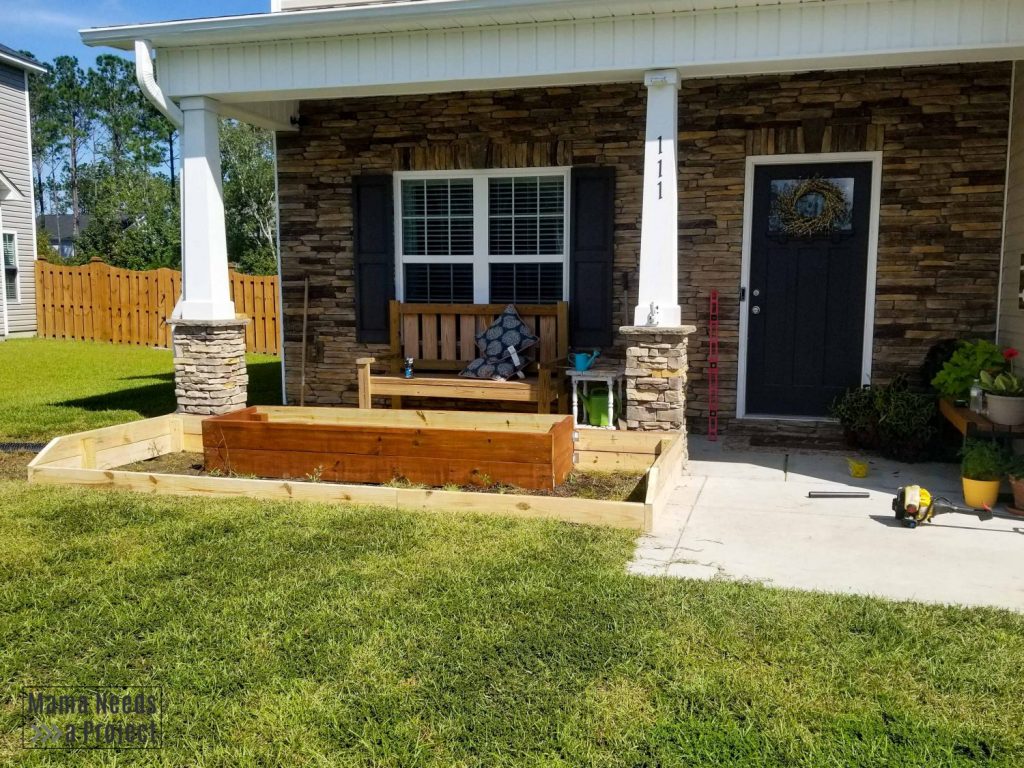
The front of my home has been in need of a makeover for quite a while. Actually, the front of my home is just fine, it’s the landscaping that has needed some serious attention. And, more specifically, the terrible mud pit sitting front and center is really bringing down the curb appeal.
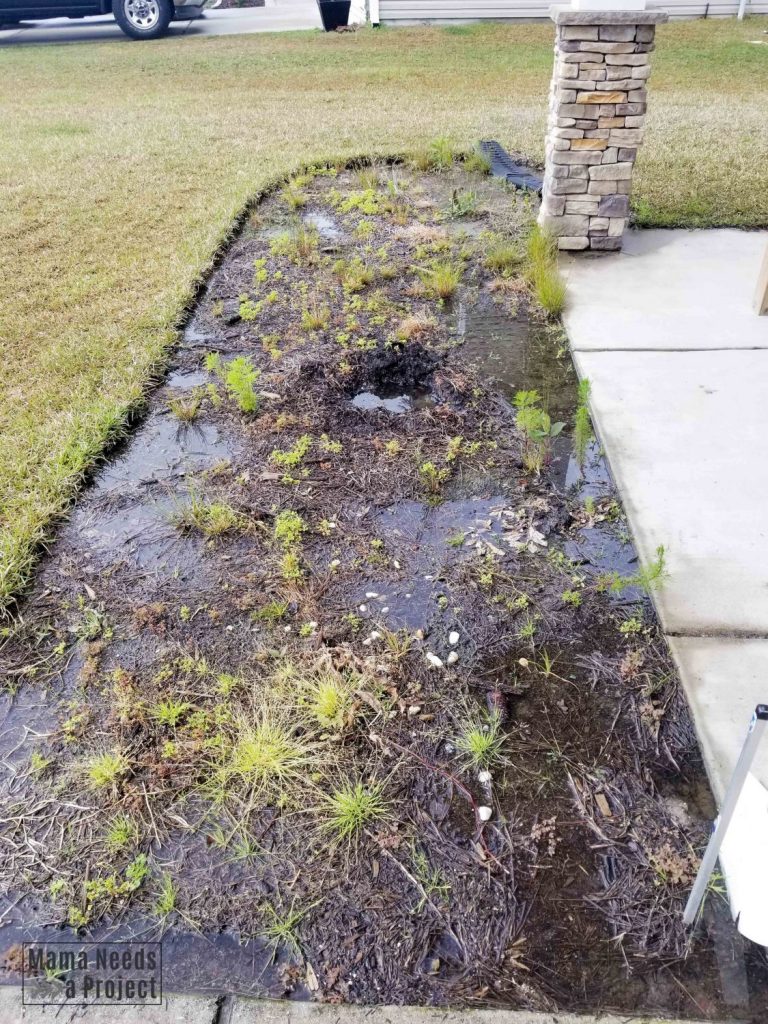
The Problem
The flower bed in the front of the house (aka mud pit) has been such a frustrating spot for me. Over the last 5 years I have tried so many times to turn it into a beautiful, flourishing flower garden only to have my plants drown due to the terrible drainage.
The soil in this area of my yard isn’t really soil at all. It’s a mixture of compacted sand and hard red clay. This combination is a disaster for water drainage. It just holds water right on top. Add in the slight downward slope of my yard and we have a big flooded mess every time it rains (which is a lot in Eastern North Carolina).
In the past I have tried to amend the sand/clay by mixing in garden soil when planting. But, after a couple days of rain the new soil would be washed away into my driveway and sidewalk while the heavy sand and clay stayed in the flower bed.
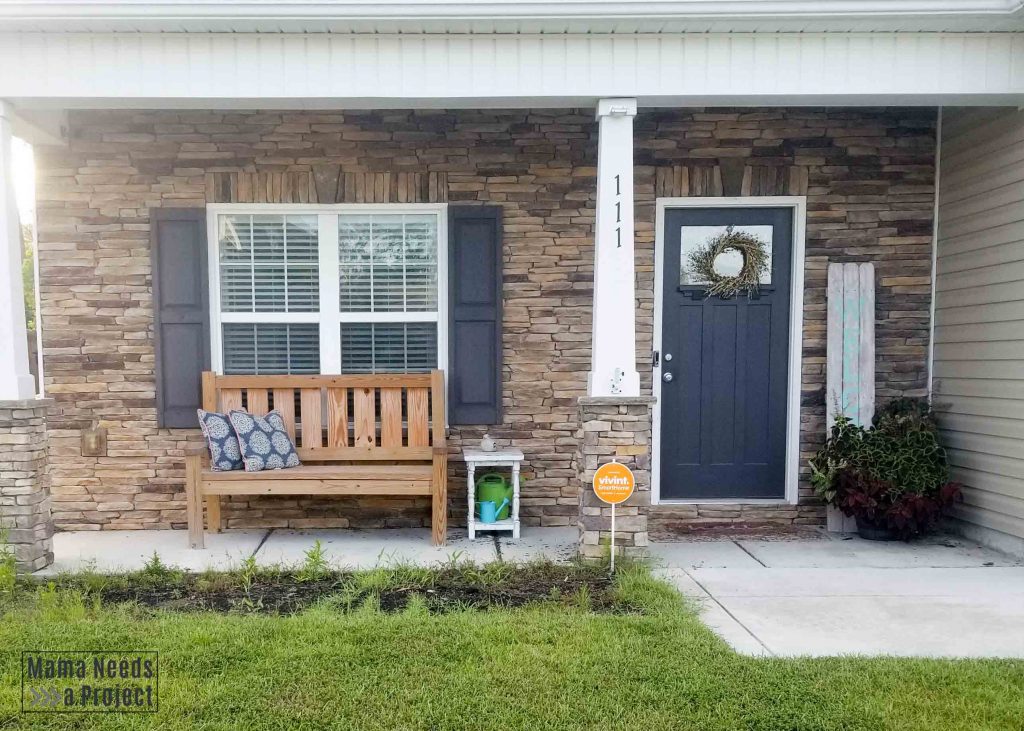
After dumping money into this area year after year only to see my hard work go to waste, I finally gave up and focused on other areas of my home. So, for the last year the flower bed in front of my house has sat empty. It looks terrible, but I needed a break and some time to think of a new solution.
The Solution
After lots of research, thinking and planning I finally came up with an idea that I think will take this flower bed from sloppy mud pit to a pretty little spot that flowers will actually grow.
My two part solution is:
Build a Raised Flower Bed
Amend the Soil

I chose to do all of the work on my flower bed in the fall so I won’t really know if this solution works until I start planting in the spring. But, I am feeling pretty confident that this solution is the final solution!
Building a Raised Flower Bed for the Front of the House
Today I’m sharing my process of building a raised flower bed for the front of my house. Next week I’ll be sharing the steps I’m taking to try to amend the hard clay/sand.
Pin for later!


Estimated Cost
I spent about $70 on lumber for my raised on the front of my house. I purchased all pressure treated pine and used some scrap 4x4s and 2x4s that I already had on hand.
Project Time
This was an all day project for me. I started working a little before 8:00 AM and finished up around 4:00 PM. It can definitely be done in a day, but it would go much faster with a second person. And, splitting it up over a weekend would be even better – especially if you’re working alone.
Dimensions
My flower bed measures just under 13 feet wide and about 4.5 feet deep. Yep, she’s a doozy.
Materials and Lumber
- (6) 2x6x8 pressure treated pine (you can also use these woods for raised garden beds)
- (4) 2x8x8 pressure treated pine
- Scrap pressure treated 4x4s (4 13” pieces)
- Scrap pressure treated 2x4s (9-10 10” pieces)
- Exterior screws
- Wood stain
Pin for later!
Building a Raised Flower Bed for the Front of the House
Build the Tall Box
I first built the taller box that I have centered in the back of the raised flower bed. The construction is very basic, but it was a bit difficult for me to assemble because the 2x8s are so stinkin’ heavy. This is where having another person to help you build would come in helpful.
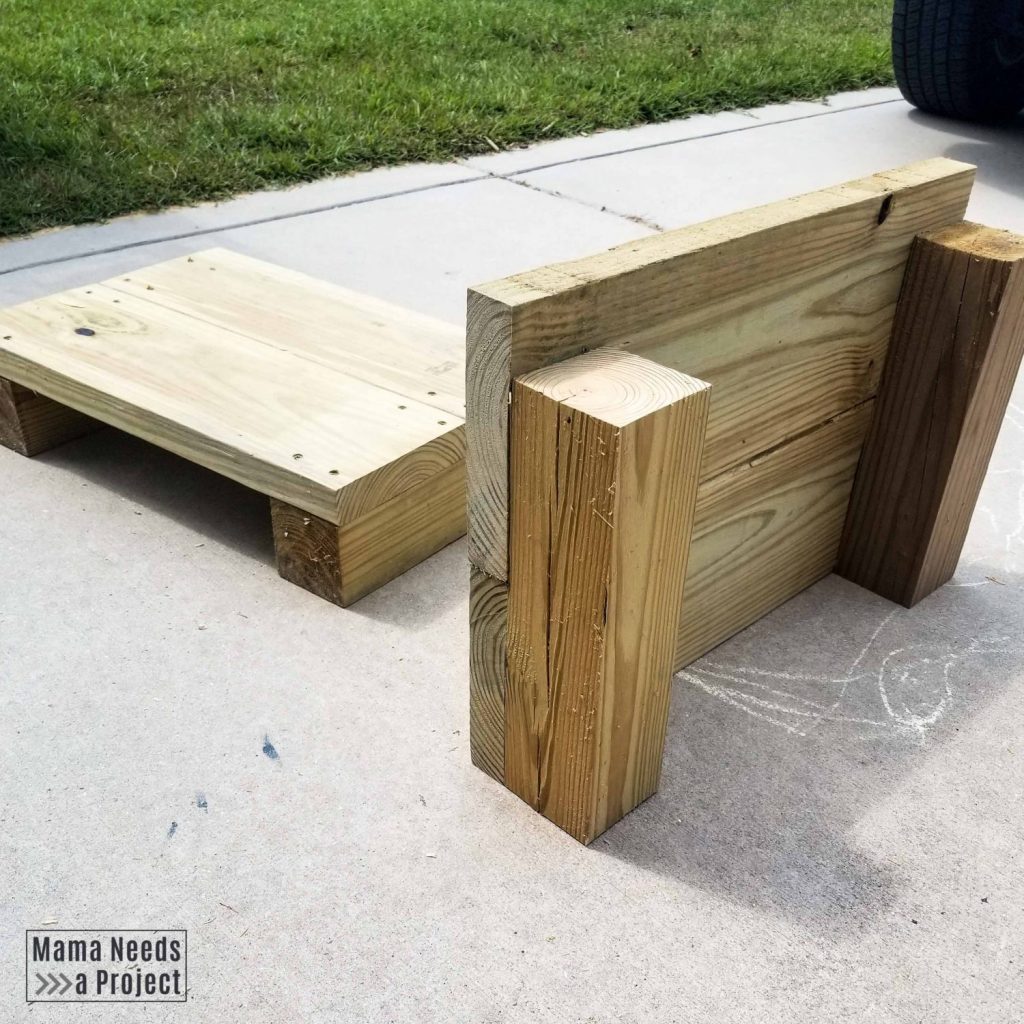
I first cut all my pieces, sanded and stained the outside of them. It’s not really necessary to stain first, it’s just a bit easier for me.
Then, I built the two shorter sides of the flower box by attaching the cut 2×8 pieces to 4x4s with 2 1/2” wood screws.
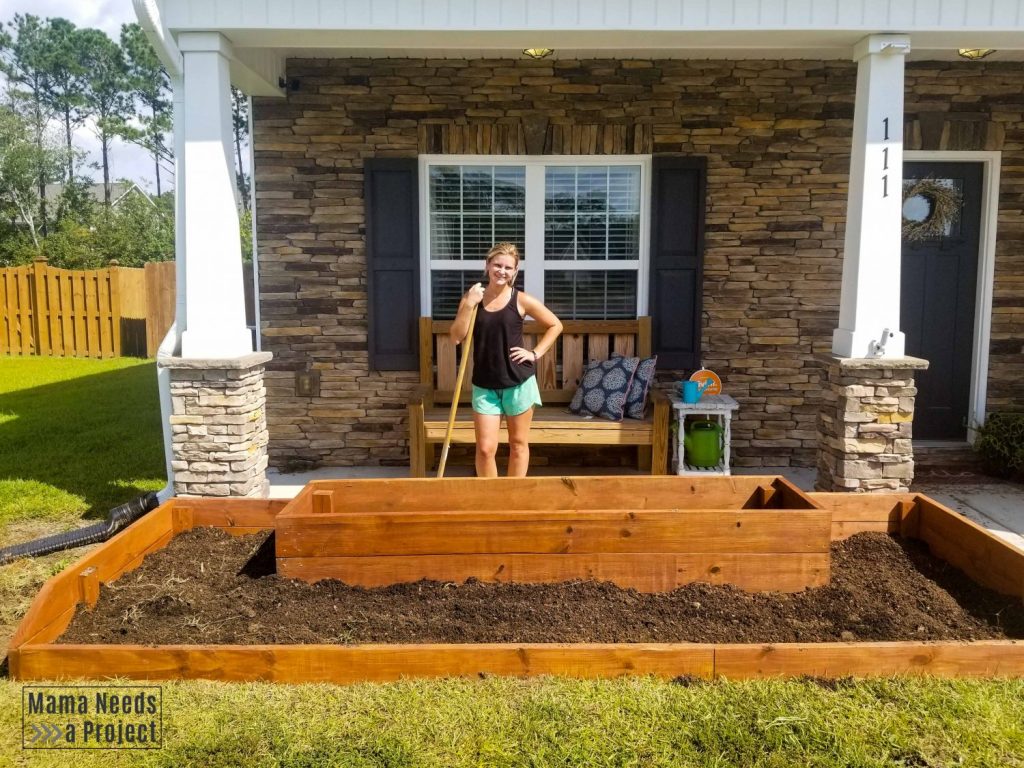
After building the two shorter sides, I attached the longer sides to create a box. I did this in flower bed so that I wouldn’t have to try to move the heavy completed box. It was difficult to get the box square while assembling on the uneven surface of the flower bed, but after a few tries I got it right.
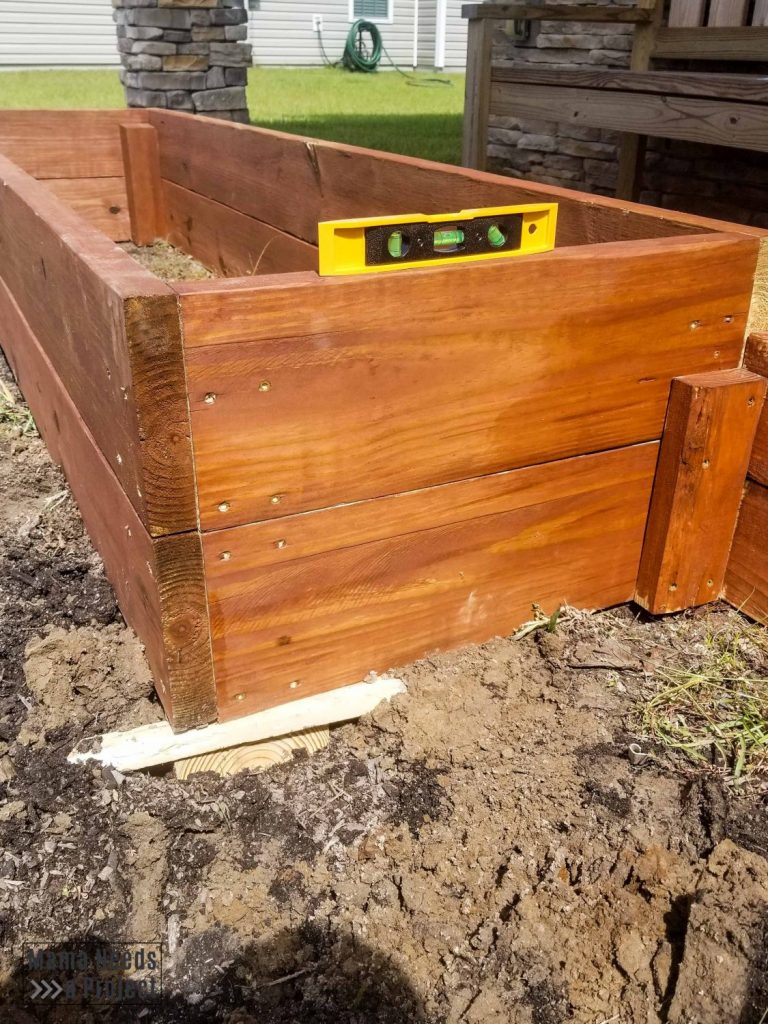
Once the box was built and in its final location, I wedged some scrap pieces of treated wood underneath the front corners to make it level. This box is seriously heavy and I cannot pick it up on my own. So, I maneuvered my shovel underneath the corner and used it as a lever to lift the box while I slide pieces of wood underneath until it was level. There’s probably a more professional way to do this, but it worked for me!
Build the Outer Box
After completing the tall box, I started on the outer box. I used pressure treated 2x6s for the construction of the outer box. I first attached the back pieces of the outer box directly to the sides of the tall box. To connect them, I used a 2×4 in the corner and secured it with 2 1/2” wood screws. This is how I connected all of the corners for the big box.
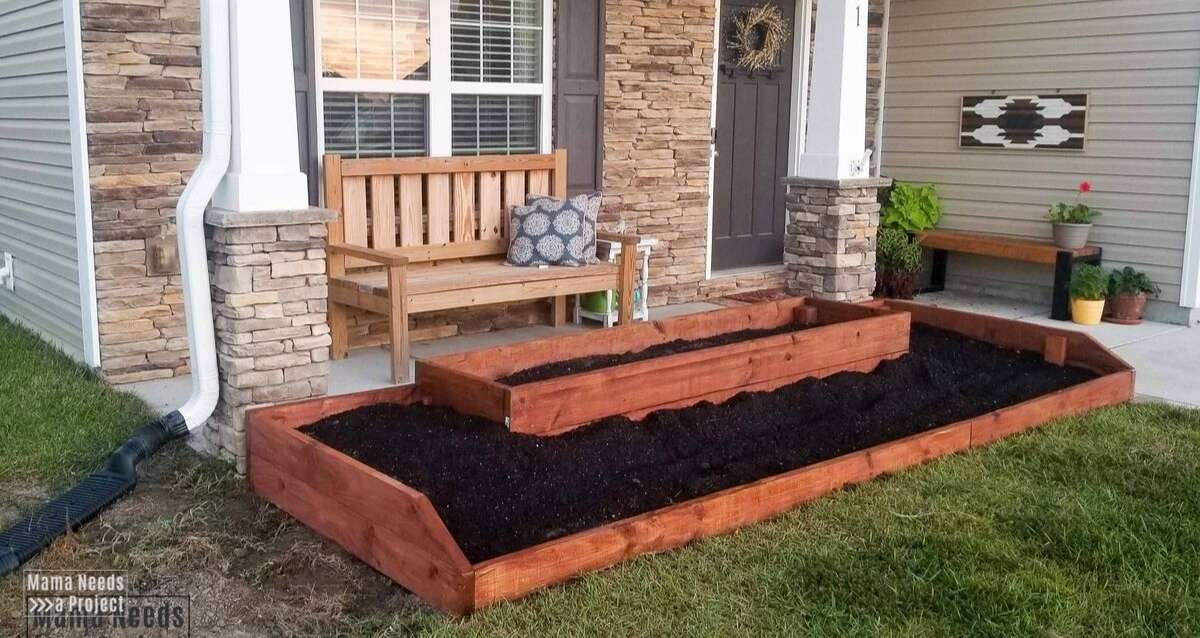
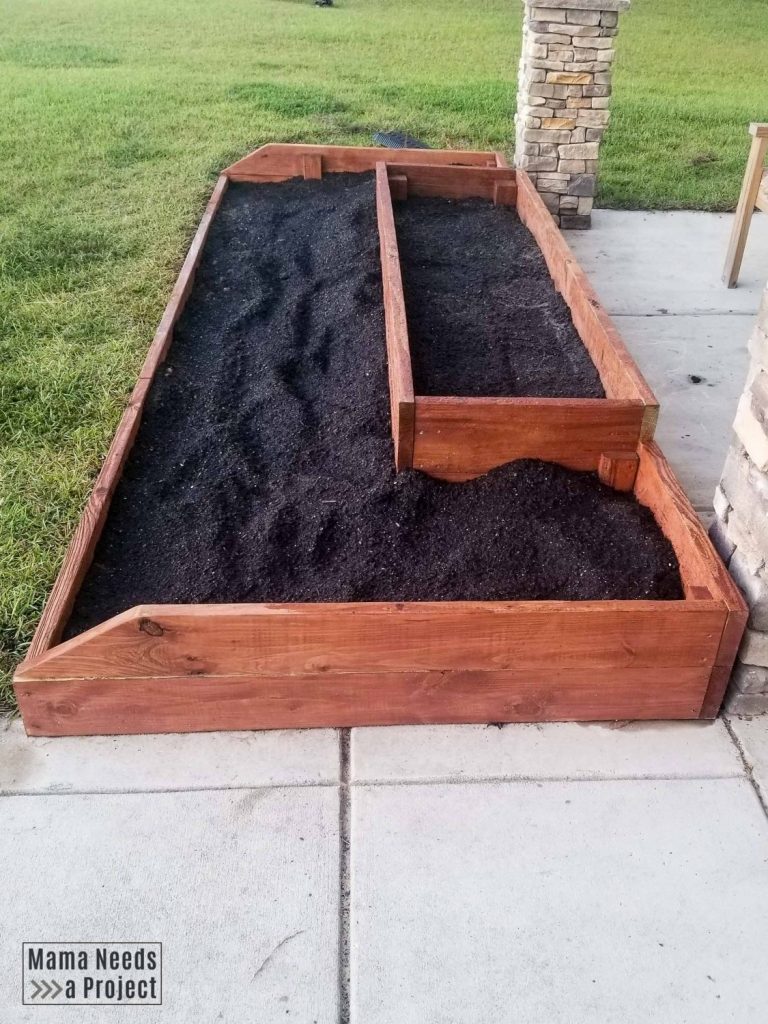
Next, I added the sides and front. I initially planned for the sides and front of the outer box to be the same height, (2) 2x6s tall. But, after building it this way I just didn’t like it. So, I removed one of the 2x6s from the front, making it shorter. Then, I cut the top 2×6 on the sides at a 60 degree angle to make it flow a little better between the height difference.
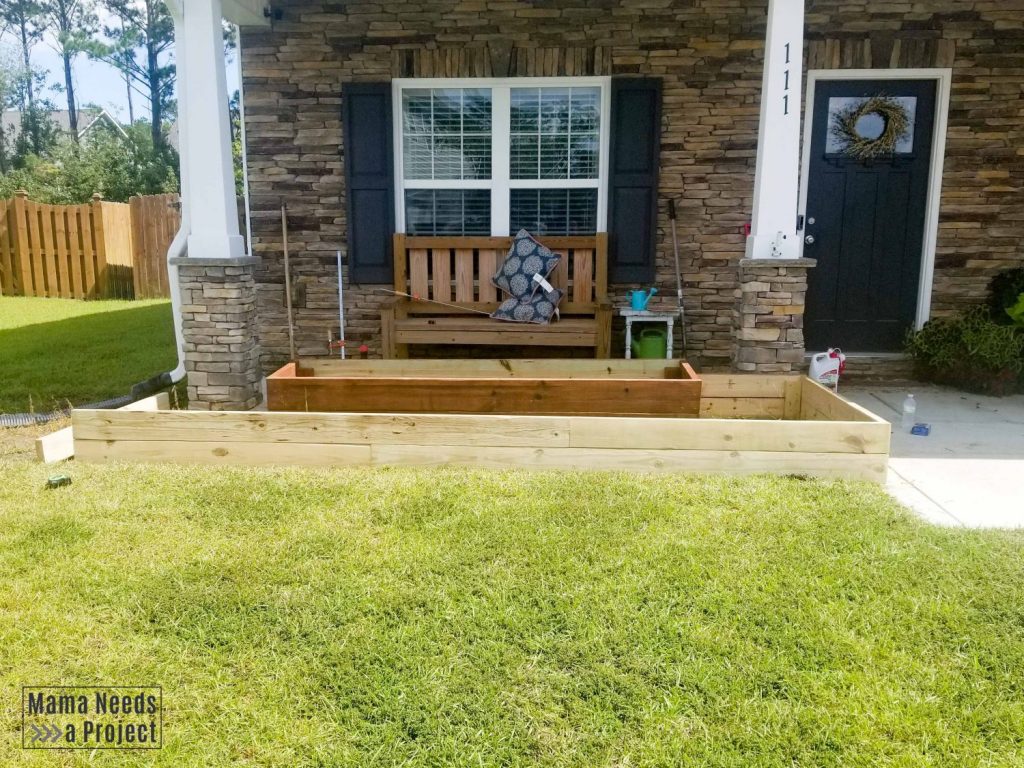
I actually love this change! It will allow me to build the back of the flower bed taller than the front to promote better downward drainage.
Sanding and Staining
I sanded the outside of all my boards before I started building. Sanding the boards helps them to absorb stain more evenly for a more uniform color. I used 60 grit and 120 grit sandpaper. I didn’t sand the inside of the boards because I didn’t realize how visible they would be when my raised flower bed was complete. You can still see some of the labeling on the boards it the back – oops!
I stained most of the raised flower bed after construction was complete. I used a mistint stain that I picked up from Lowe’s a while ago. If you’re looking for cheap stain or paint I recommend checking the mistint table at your home improvement store – I always find goodies there!
I still have some spots to touch up the stain, but man this flower bed is looking good!!
Up Next – Amending the Soil
The next step in my plan is to work some organic matter into the clay to loosen it up and add layers of fresh soil and organic matter on top. I’ve already started this process and will share how I’m tackling this tough soil next week!
A Raised Flower Bed for the Front of the House
This project has been a doozy already! I’m sore and sunburnt and could definitely use a nap, but the impact is huge!

I was so nervous to put a wood raised bed in front of my home because it’s a style I haven’t seen before. But, in this case, going with my gut and trying something new was totally worth it! Let me know what you think in the comments!