
Can You Paint Over Stain? (Here’s What You Should Know!)
When you want to add a little bit of color to your deck, kitchen cabinets, or furniture, you’ll have two options: either paint or stain. And if you don’t like your initial choice later on, you can choose the other option to see if it’s a better fit.
But can you paint over stain? And if so, how do you do it?
In this post, I’ll explore if you can paint over stain, how to get the job done, and much more. Let’s get started!
Reasons to Paint Over Stained Wood
While changing wood color is usually the main objective of those who paint over stain, it’s also true that painting over stain can actually strengthen the wood in numerous ways.
Plus, painting will save you from having to frequently re-stain the wood, which can damage the wood in the long run.
Here are some reasons you may want to paint over stained wood.
Check out this guide to learn how long to let stain dry before polyurethane to ensure maximum protection!
Color Change
Design trends naturally change over time. Therefore, one moment you may like your deck or cabinets to be colored white white, and later on you may want a different color.
Adding paint to stained wood allows you to change the color of the wood, and if done properly there will be no remnant of the previous coat. And since there are more paint colors than stain colors, you’ll have a strong chance at reaching your desired color if you choose paint over stain.
Added Protection
Since stain provides minimal protection to wood, adding paint—which provides much more protection—is an effective and efficient way to strengthen the wood.
Applying a coat of latex paint, for example, would make a stained board more UV-resistant, whereas applying a coat of oil-based paint would make it more moisture-resistant.
Generally, paints are more moisture and UV-resistant than stains, largely because paints tend to have more pigments than stains. And when compared to something like a transparent stain, which delivers little in terms of moisture and UV resistance, it’s clear why poeple often choose paint over stain when wood strength is a main concern.
Avoid Frequent Restaining
Restaining is necessary about every six to eight years if you wish to keep the stain vibrant.
But if you apply paint instead of restaining, it could be more than a decade before you need to repaint the wood.
For this reason, painting over stain is the more affordable and least time-consuming option when looking to add color to any wood surface.
Frequent restaining can also damage the wood, especially if restaining is not executed properly each time. You could oversaturate the wood with stain, which might compromise its integrity and weaken it to the point where it’s prone to splitting and cracking.
Tools and Equipment Needed to Paint Over Stained Wood
Below is a list of basic tools and equipment you’ll need to properly paint stained wood.
You may find that items not listed below are useful as well. In the end, what you need to complete this task largely boils down to what kind of wood you’re painting, where it’s located, how old the paint is, and how long you have to complete the task.
- Tarps
- Safety goggles
- Wood filler
- Respirator mask
- Gloves
- Painter’s smock or apron
- Desk or floor fan
- Screwdriver
- Tack cloth
- 150-grit sand paper
- Spackle
- Putty knife
- Paint brushes (Multiple sizes)
- Primer
- Paint
Type of Paint Needed
Though there are many kinds of paint out there, the kinds of paint that are best for staining are spray paint, latex paint, and oil-based paints.
Spray Paint
Using spray paint on stained wood is a great option for those who don’t want painting to be an all-day process.
Spray paint dries quicker than latex and oil-based paint, but it isn’t as long-lasting – which might be important to some.
It’s often argued that spray paint provides a more even coat than brushed-on paint, which is relevant when it comes to painting over stained wood, as ensuring evenness during application is critical.
Latex Paint
If you’re concerned about the paint cracking and chipping after it’s applied, then choosing latex paint may be the best option for you, as latex paint is flexible, long-lasting, UV-resistant, safer, and easier to clean than other options.
Almost every paint yellows to some degree as a result of frequent sunlight exposure, but latex paint resists yellowing more than other paints.
Additionally, you don’t have to worry about flammability when using latex paint, nor do you have to worry about the paint being overwhelmingly odorous.
Oil-Based Paint
Oil-based paint can be applied to stained wood as well, but you should only use this kind of paint if you don’t intend to change the color much afterward, as oil-based paint is harder to cover up.
If applied properly, this paint is durable, long-lasting, and does an excellent job of withstanding sunlight and moisture.
That being said, it has a distinct, sometimes overwhelming odor and it’s flammable.
These downsides should be considered before you use oil-based paint on stained kitchen cabinets, as applying this paint in a hot kitchen and around food can be especially harmful.
How to Paint Over Stained Wood
Here’s how you can paint a stained surface!
1. Prep the Area Where You’ll Be Painting
Prepping the area where you’ll be painting is important. If you prep this area properly, you won’t have to worry about paint getting on surfaces where it shouldn’t be. Here’s what you should do during this step:
- Move any nearby furniture away from the painting area.
- Lay a wide tarp in the painting area; if you’re painting a deck, put tarps under and around the deck.
- Assemble all the tools and equipment you’ll need to complete the job so you don’t waste any time.
- Put on your protective gear (safety goggles, mask, smock & gloves) and don’t take it off until the job is 100% complete.
Note: If you’re painting stained furniture, it’s wise to remove any knobs, hinges, and handles that are present; you’ll need a screwdriver and possibly other tools to accomplish this.
2. Prep the Stained Wood
Properly prepping the wood before you begin painting is essential for a good paint job. Here’s what you need to do to get the stained wood ready for painting:
- Clean the wood with a tack cloth or another kind of soft cloth to remove any dirt and dust that’s accumulated on the wood.
- Use wood filler to fill gaps, cracks, and holes.
- Once the wood has been thoroughly cleaned, it’s time to grab the 150-grit sandpaper and begin sanding; the stain’s age will largely determine how much sanding is needed.
- The goal of sanding is to roughen up the finish so the paint can easily adhere to the wood.
- Use spackle and a putty knife to plug any further cracks and holes, as doing so will make the wood’s surface smoother and easier to paint.
Note: If no-gloss stain was applied to the wood, you’ll only have to sand areas that are especially rough.
3. Apply Primer to the Wood
Adding primer before applying paint is necessary, especially if the stained wood you’re painting is a dark color.
- Apply the primer using one of your brushes, and focus on the edges of the surface before you tackle the much larger inner section.
- If you’re applying primer to a deck, use small brushes in combination with a paint roller to apply the primer quickly, effectively, and efficiently. It’s also important to paint in between deck boards.
Once primer has been applied, it needs to dry before you can apply paint; how long it takes primer to dry depends on several factors, such as temperature and humidity.
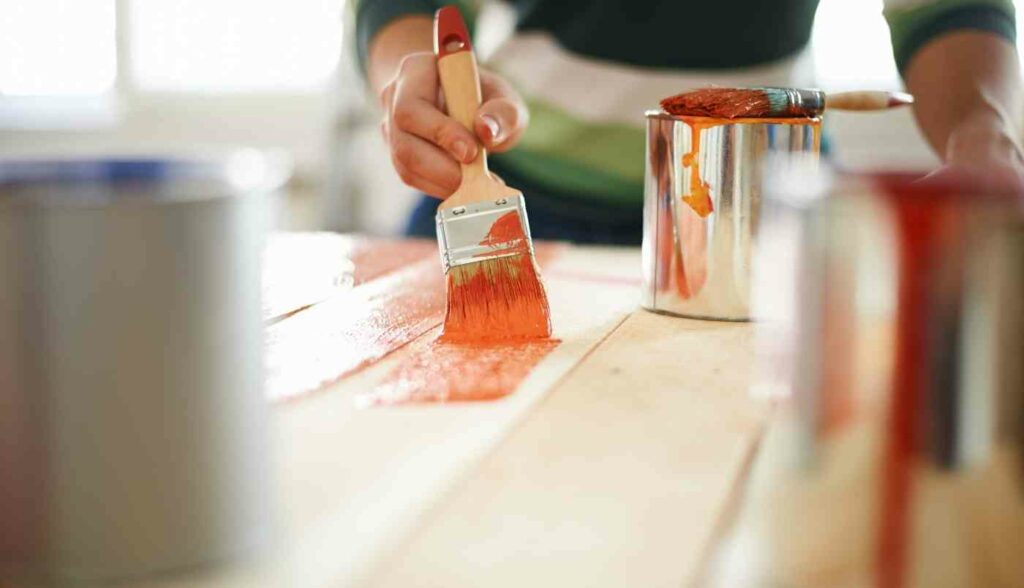
4. Apply Paint to the Wood
Once the primer is dry, it’s time to apply paint. Here’s how:
- Use angled paint brushes so paint can reach crevices and corners.
- Whether you’re painting with spray paint, latex paint, or oil-based paint, you should use multiple coats to ensure complete coverage, smoothness, and rich color.
- Be sure to allow the paint to dry before applying a new coat.
- You should not reattached components until the paint has had adequate time to dry; usually it takes three hours or more for paint to dry completely.
Note: If you’re painting outside, you have to keep sunlight, temperature, and tree debris in mind, for all these factors can cause the drying process to take longer than usual.
Need more help? Check out the video below!
Tips for Painting Over Stain
If it’s your first time applying paint to stained wood, keep the tips below in mind to ensure a superior paint job.
Latex Primer and Paint Should Be Applied Over Water-Based Stain
Latex primer and paint adhere to wood that’s been treated with a water-based stain.
Once the primer is dry, apply two layers of latex paint. You should let the first coat dry for 24 hours before applying the second coat.
If you’re in a rush, you may be able to get away with just letting the paint dry for six hours, especially if it’s outside and there’s plenty of sunlight.
Painting Over Oil-Based Wood Stain Requires More Preparation
To paint over oil-based stain, you need to follow the process below to ensure high-quality results:
- Put on your safety gear and turn on a fan in the work area so there’s proper air circulation.
- Next, get some trisodium phosphate (TSP) and dissolve a quarter-cup of it in a gallon of warm water.
- Now grab a sponge and soak it in the mixture.
- Take the sponge out, wring it, and begin wiping the wood’s surface to eliminate built-up dirt and grime.
- After a thorough cleaning, let the air dry the surface.
- Now begin sanding.
- Once all rough areas have been addressed, wipe the surface with a clean cloth.
- Now apply a water-based primer and let it dry.
- Finally, apply two coats of paint and you’re finished.
More Is Not Always Better
When it comes to applying wood stain, there’s such a thing as overdoing it.
Some think that applying more stain ensures more protection, but this isn’t true.
Once the wood has had all it can absorb and retain, stop. If you try to apply more stain after this, it won’t penetrate into the pores but instead coagulate on the surface before peeling/chipping.
How to Achieve a Matte Finish Using Chalk Paint
Use a water-based paint known as “chalk paint” when your goal is achieving a matte finish, as this paint can stick to pretty much anything and it’s great for creating a unique matte finish. Before you go all out with painting, test the paint out to see if it’ll work for your project.
Start by putting a small dab on an inconspicuous spot and let it dry. If it doesn’t bleed through the wood, this means you can use the paint; if you see streaks, you may just need stain-blocker primer to prevent these from appearing.
It can be helpful to use a chalk paint brush when applying this paint because of its unique consistency.
Be aware that chalk paint can scratch easily, which is why after the top coat of paint you should apply a polyurethane coat as well.
The polyurethane coat should only be applied after the top coat of paint has had at least seven days to dry. If one coat of polyurethane isn’t enough, you can add another for extra protection and a durable finish. Be sure to allow your polyurethane to dry before applying another coat.
Make Sure There’s Proper Ventilation When Painting Inside
If you’re painting over stain and you’re indoors, there needs to be proper ventilation while you paint, not only to ensure your safety but to ensure both primer and paint are applied properly as well.
Without proper ventilation, it’ll be harder for the primer and paint to dry, and the absence of good ventilation can also lead to unintended adverse consequences, such as bubbles and uneven texture
You don’t necessarily need an industrial-grade fan to properly ventilate, but having a desk or floor fan can be a big help and opening as many doors and windows as possible is smart.
Having a well ventilated space will make your job that much easier, and safer.
Paint When Conditions Outside Are Ideal
Just as you have to wait for a multi-day stretch of good weather to effectively stain a deck, you’ll have to wait for a stretch of good weather before you begin painting over stain outdoors.
The temperature should always be between 50°F and 80°F when the paint is drying, and there should be plenty of sunlight.
Precipitation should be absent from the forecast, as rain can prevent paint from drying properly.
Lastly, you should take steps—like setting up a barrier—to prevent yard debris from blowing on the paint while it dries.
Frequently Asked Questions
“Can you paint over stain?” is a question frequently asked by homeowners, and usually it’s followed by additional questions.
Can you paint directly on stained wood?
Yes, you can apply paint directly to stained wood. However, you cannot apply paint until the stain is completely dry.
The three kinds of paint that effectively cover stained wood—spray paint, latex paint, and oil-based paint—can all be applied directly to the surface of wood. That being said, it’s wise to have a coat of primer in between the wood’s surface and the paint so the paint adheres better.
What is the best paint for painting over stained wood?
Because of its high pigment concentration and other attractive properties, latex paint is arguably the best paint for covering up stain. It’s more effective than spray paint and easier to use than oil-based paint.
Final Thoughts on Can You Paint Over Stained Wood
Whether you’re painting over interior wood surfaces like kitchen cabinets or you’re painting stained furniture, giving your project a new look with fresh paint can be rewarding.
When it comes to painting stained wood, it’s often easier than you think. With a little elbow grease and the right supplies, you can achieve great results when painting over stained wood.