Lumber Storage for a Small Space | Lumber Organization
Have a small workspace or garage? 🙋♀️
Need an easy way to store lumber that doesn’t take up much floor space? 🙋♀️
Or, maybe you live in a rental and need lumber storage that has little impact on your garage and is easy to remove when you leave? 🙋♀️
Those were all of my requirements when looking for a way to store lumber at the rental home we just moved into. Plus, I wanted lumber storage that was easy to install and would leave all my boards easy to see and easy to access.
I ended up finding a lumber storage system that fit all of those requirements and I just had to share it with you!
Save to Pinterest!
This post contains affiliate links.
I know many of you are hobby woodworkers and DIYers working out of a garage like me. And if you’re also a lumber hoarder like me you’re probably looking for a better way to store all of your extra boards and scraps.
There are lots of tutorials out there for building your own lumber racks or carts, but this quick-install vertical lumber storage rack was exactly what I was looking for. I hope it’s helpful for you, too!
My Lumber Storage Solution
You can find the lumber storage rack here.
In our previous home we built a similar rack using 2x4s and galvanized pipes. But since we currently live in a rental and don’t know how long we’ll stay I didn’t want to invest the time to build my own custom lumber storage rack again.
I ended up finding exactly what I needed on Amazon. The lumber storage rack I purchased cost about the same as building my own so it was an easy choice for me to buy premade rather than DIY one again.
Lumber Storage Rack Assembly
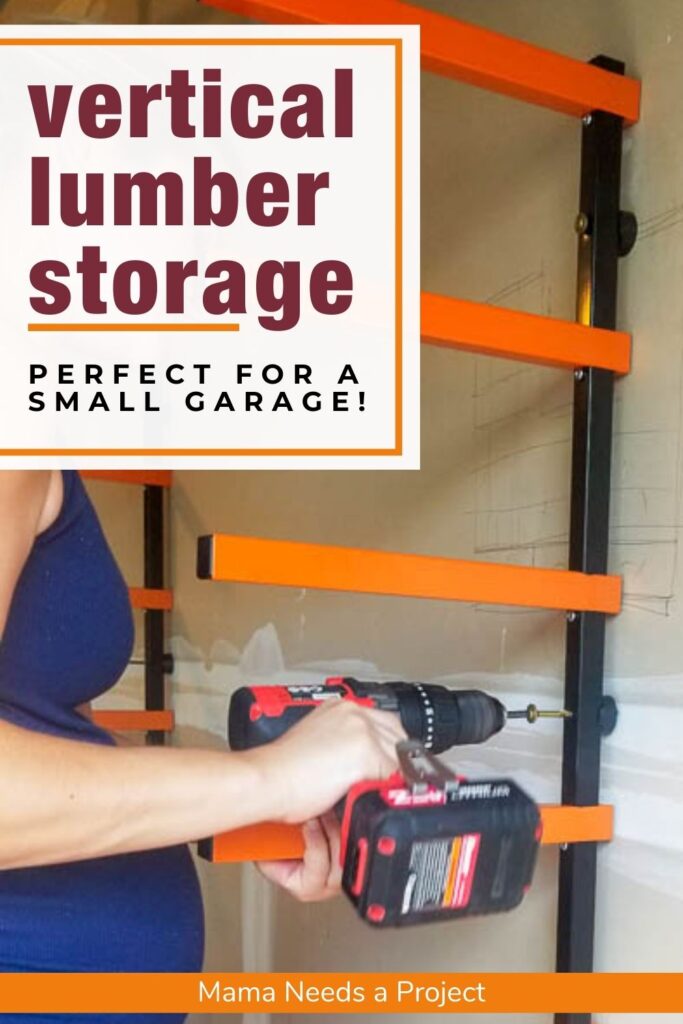
Once the lumber storage rack arrived I was able to assemble and install the whole thing in about 20 minutes. I put it together on a super hot and humid day in July while 7 months pregnant. Fast installation was a top priority! haha
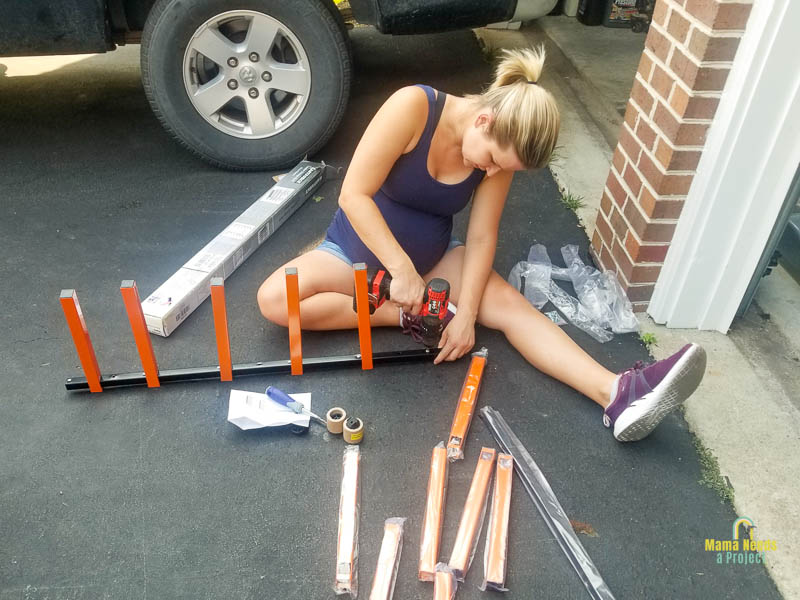
All you need for assembly is a drill. The storage rack I purchased included the screws needed to put it together.
First insert a screw into the bottom hole of one of the black metal rack pieces. Then, slide a shorter orange shelf piece down the long metal piece until it is resting on the screw. Continue all the way up the long metal piece. Then, repeat with the second rack.
Lumber Storage Rack Installation
To install the lumber storage rack on the wall I used some longer bolts and secured the rack into the studs of the garage wall.
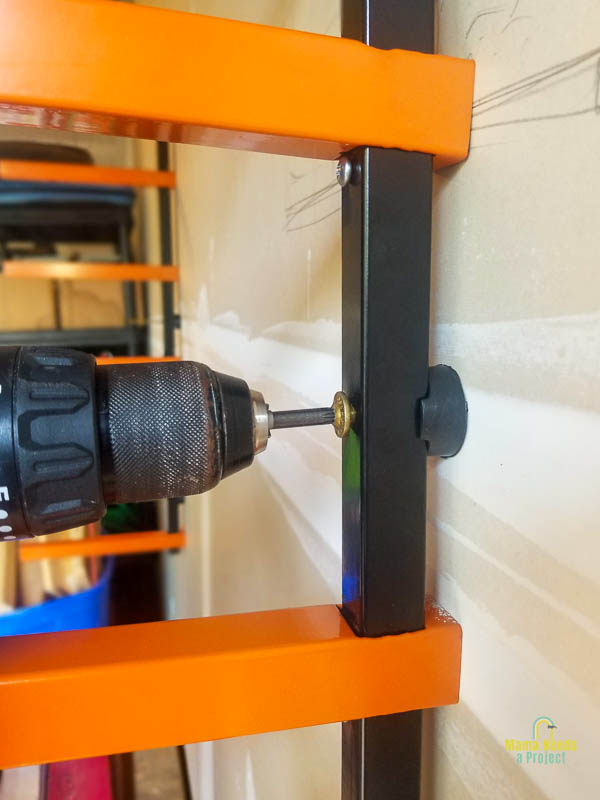
The lumber rack includes spacers to put between the rack and the wall, but didn’t include bolts to attach it to the wall. The spacers were definitely necessary to get a secure hold against the wall.
A few things to consider for installation:
There are a few things to consider when choosing where to install your lumber storage rack.
Spacing
I ended up installing the two pieces of my storage rack about 48″ apart. This allowed me to secure both pieces into the studs and it is a long enough distance to support both 6 and 8 foot boards, which are most of what I purchase.
When determining your spacing I recommend only attaching the rack into the studs. Studs are normally 16″ apart (in the US) so this will limit your spacing to 16″ increments.
Think about the length of boards you normally purchase or need to store and use that as guidance. If you regularly buy 4 foot boards it may be more beneficial to space your racks at 32″ apart instead of 48″.
Area around lumber racks
Also consider the area around where you are installing the lumber racks. Make sure that when you actually place lumber onto the racks there is enough wall space to account for the length of the boards.
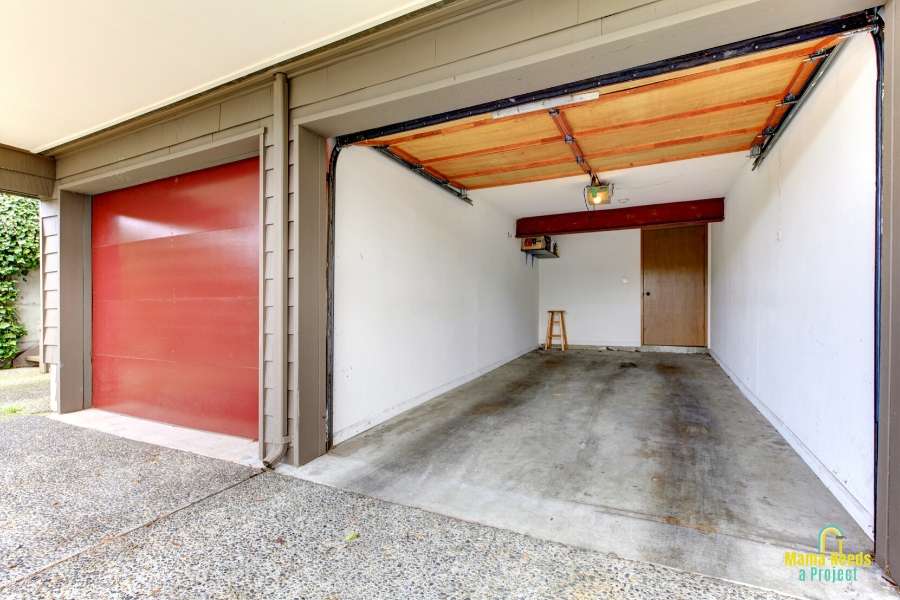
If you’re working out of a garage like I am, don’t forget to account for the garage door opening and closing.
Height
Lastly, since I’m not very tall the height of the lumber rack was important to me. I made sure to install the lumber racks at a height were I could store things underneath the bottom shelf and still reach the top shelf without a ladder.
Again, I had to be careful to not to install the racks too high so they wouldn’t interfere with the garage door.
Lumber Organization
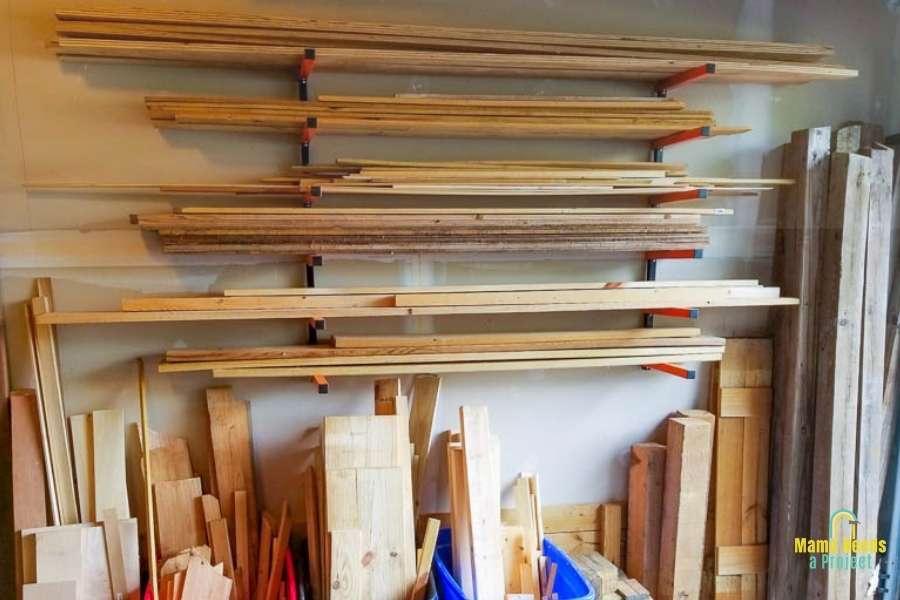
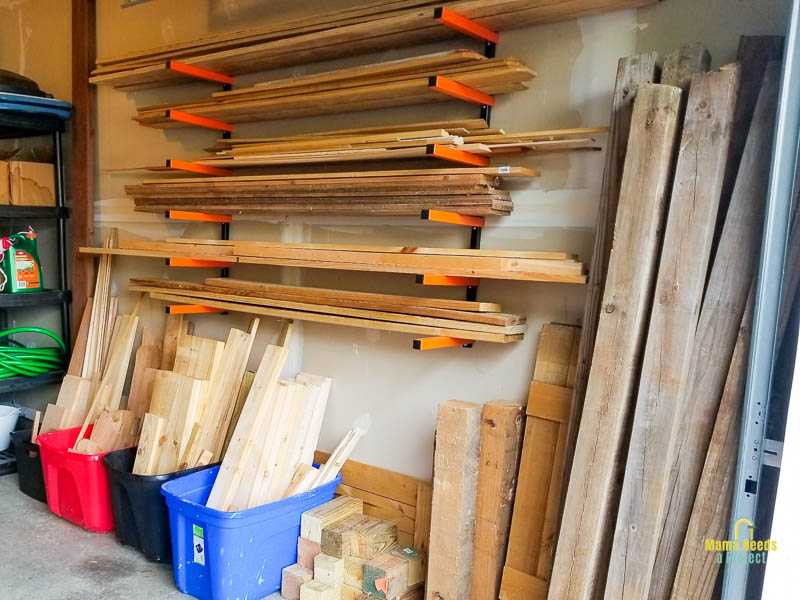
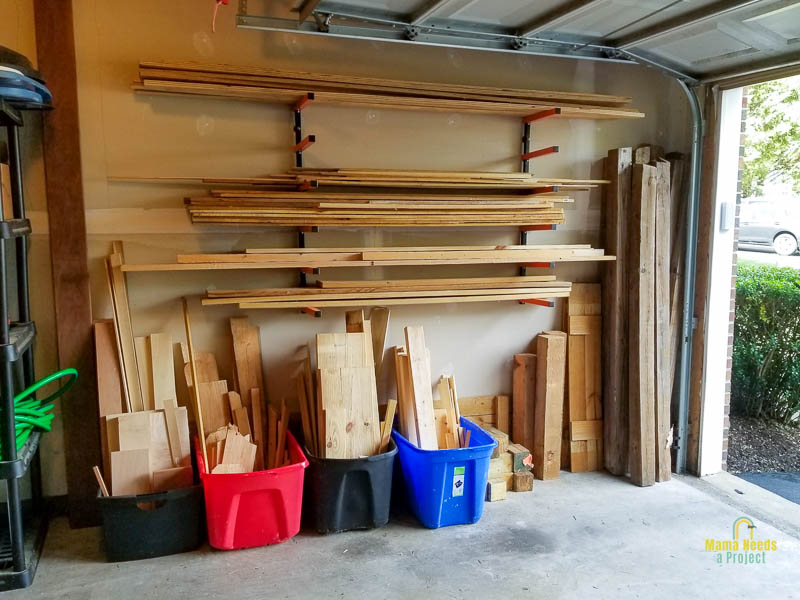
After the racks were installed, I took a morning to organize all of my lumber onto the racks and into storage bins.
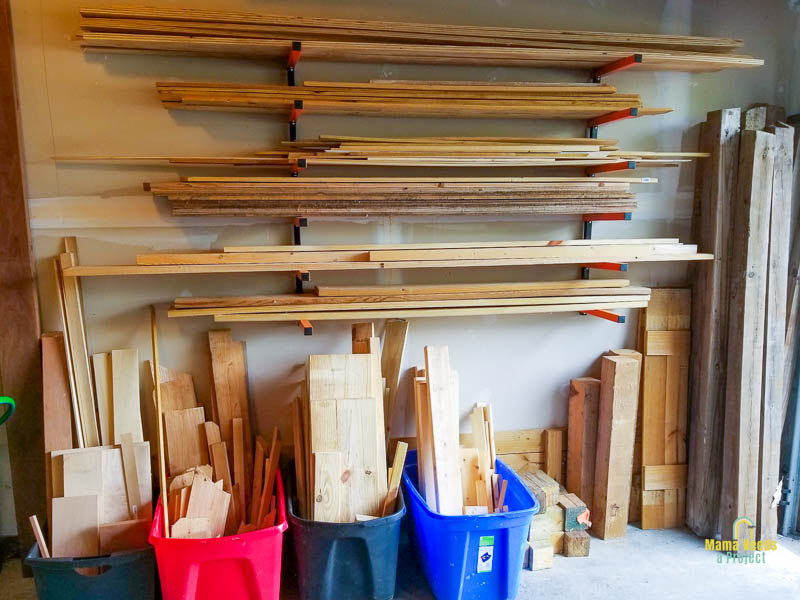
Each shelf of the lumber storage rack holds a different type of wood. I separated the racks into pressure treated pine, untreated pine, cedar and pine cut offs. It’s so nice to actually be able to see what I have on hand!
One thing to note is that the shelves aren’t very tall so if you use a lot of thicker lumber it might be a better idea to grab some storage racks like these. You will be able to arrange them so that you can stack your boards higher than you can with the storage racks I’m using.
After arranging all of the full length boards onto the storage racks, I organized all of my small scrap wood into bins underneath the shelf. Turns out I have A LOT of small scrap wood!
Eventually I would like to build a rolling storage rack for the small stuff, but for now the bins work just fine to organize what I have on hand.
Quick Lumber Storage Solution
I am so happy to have the lumber off of the floor and organized in a way that I can actually see what I have on hand and find what I’m looking for.
I totally recommend these storage racks if you’re looking for a way to organize lumber in your small woodworking shop. They are inexpensive, super easy to install and will be super easy to remove once our time in this home is done.