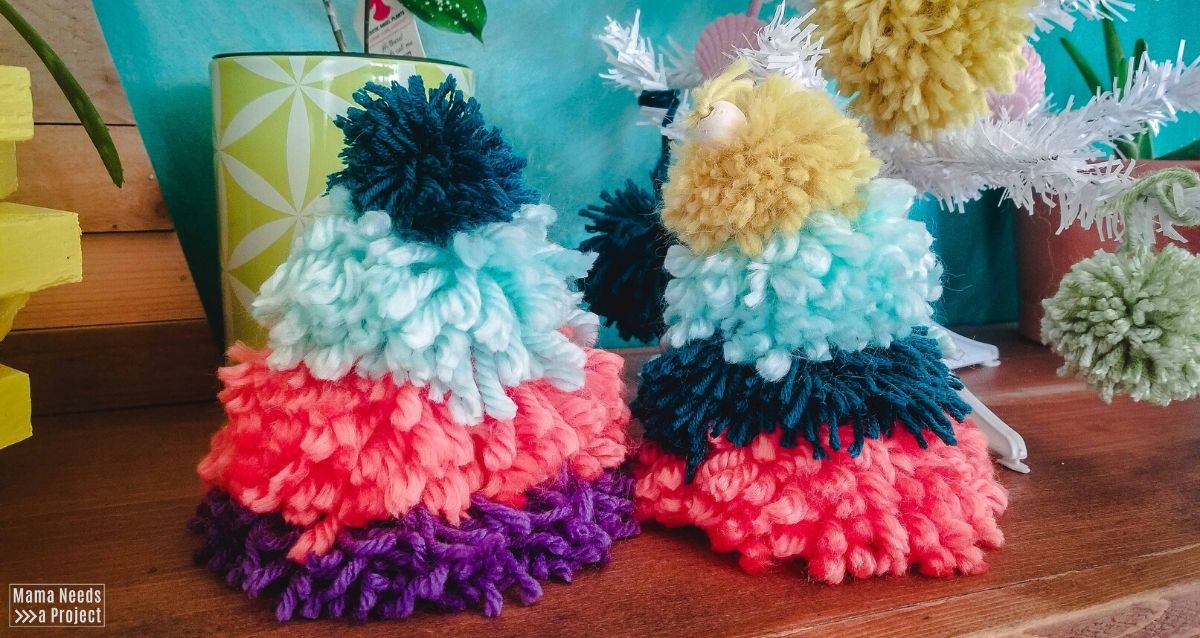
Pom Pom Christmas Tree
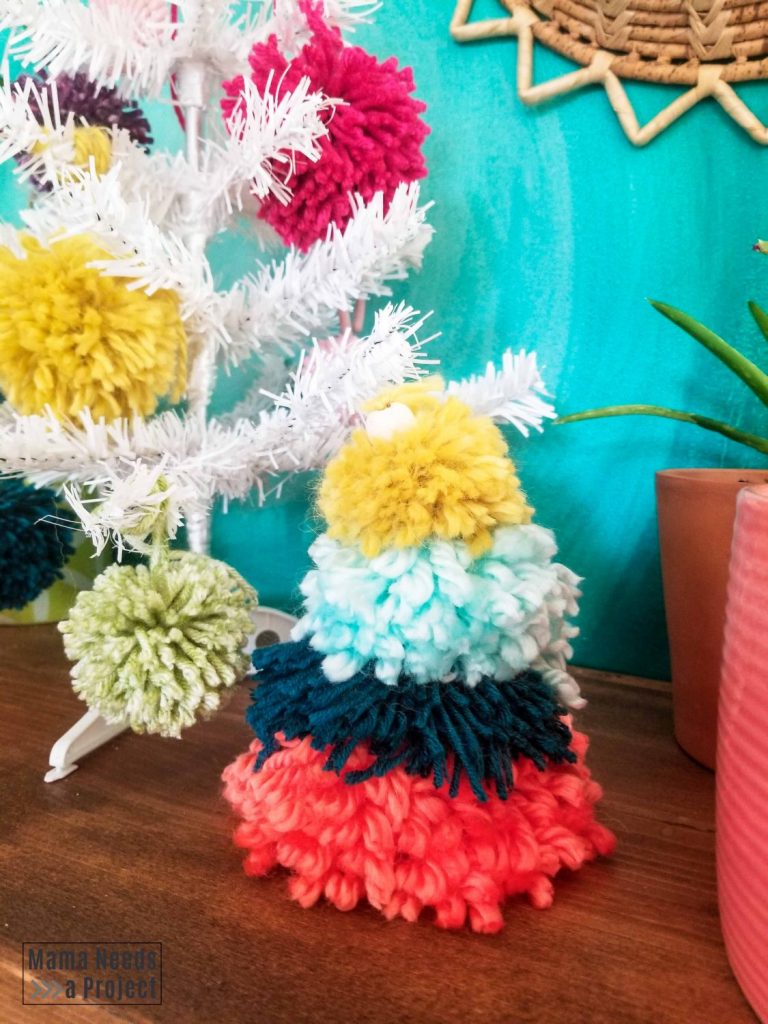
Next up for DIY Colorful Christmas are these goofy, adorable pom pom Christmas trees. They are colorful, floppy and just so cute!
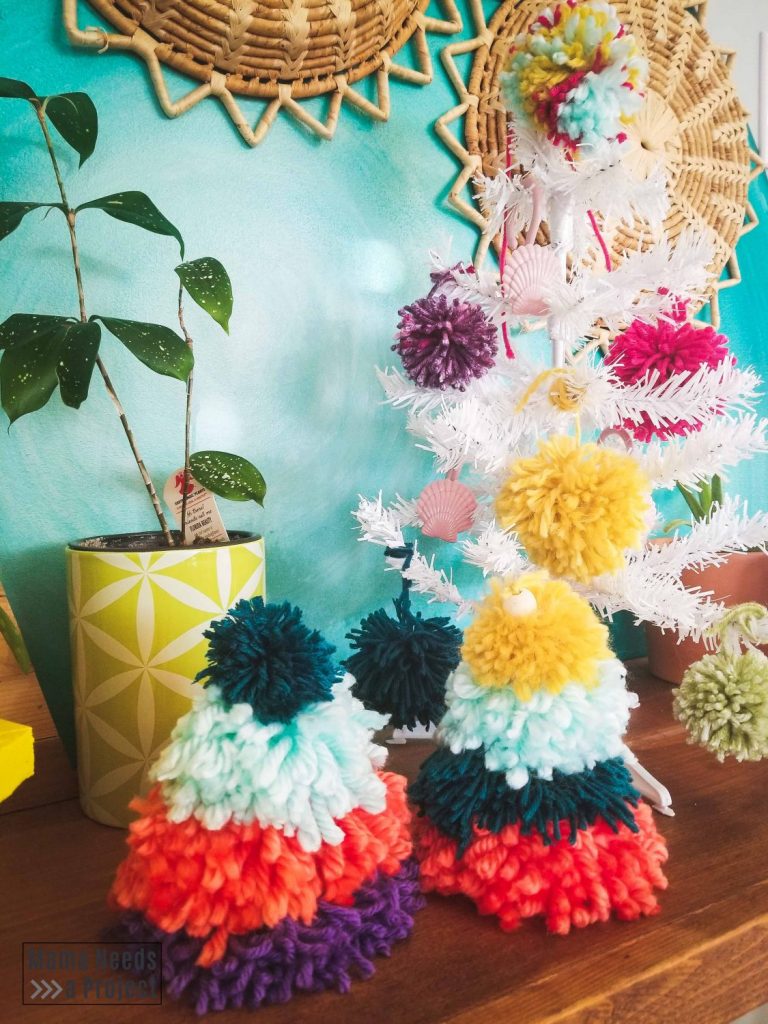
(Plus with the watercolor inspired wall circle as the backdrop, this bright little Christmas display looks AMAZING!)
I warned you all that I’m on a bit of a pom pom kick when I shared my DIY Pom Pom Christmas Tree Ornaments a couple days ago and these silly little Christmas trees are not the last pom pom craft that will show up on the blog this month. I just can’t stop!
Download the Templates
For this craft you will need to download the free pom pom templates in my resource library. I keep all of my printable craft tutorials, woodworking plans and other goodies locked away in a password-protected resource library just for email subscribers. It’s a pretty amazing benefit of getting on the list! You can unlock your free access by filling out your information below.
This post contains affiliate links.
Supplies
- DIY Pom Pom Templates
- Cardboard
- Yarn
- Regular scissors
- Small fabric scissors
- Wood beads
- Plastic straw (if you want to add beads)
- Pencil or chopstick (I used a hard plastic crazy straw)
Pin for later!
Make your Pom Pom Maker
First, you’ll need to make your pom pom maker. The DIY Pom Pom Template in the free resource library has all 4 sizes of pom poms that I used for these Pom Pom Christmas Trees.
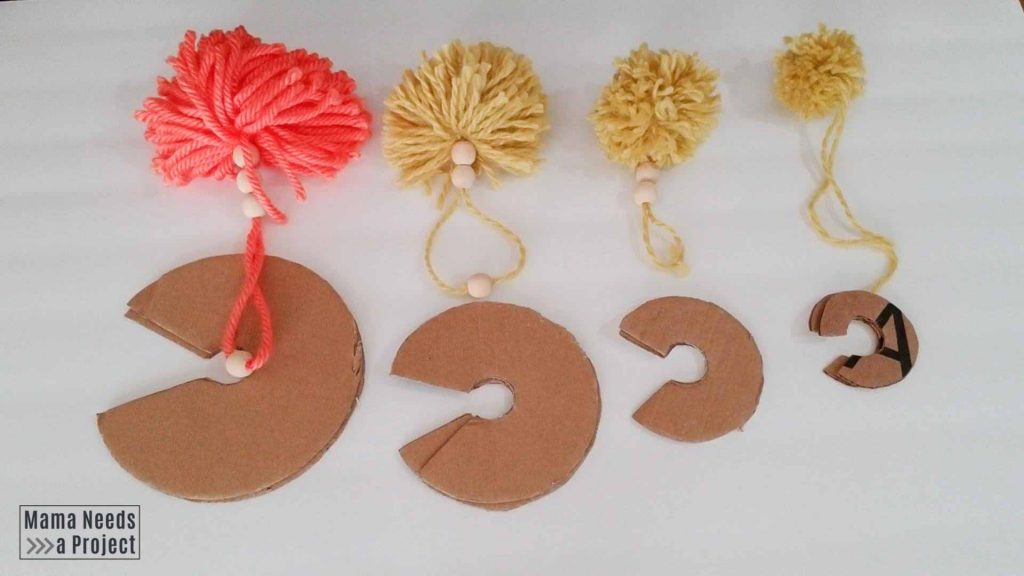
To use the template, print it out on regular paper. Then, cut out each size pom pom maker. Trace the template onto cardboard and cut out two copies of the same size out of cardboard. You can use any type of cardboard, but stiffer cardboard works best. The two pieces of cardboard will serve as your pom pom maker.
Wrap the yarn
Place the two pieces of your cardboard template on top of each other so that the openings line up. Then, start wrapping your yarn around the template from the inner circle to the outer circle.
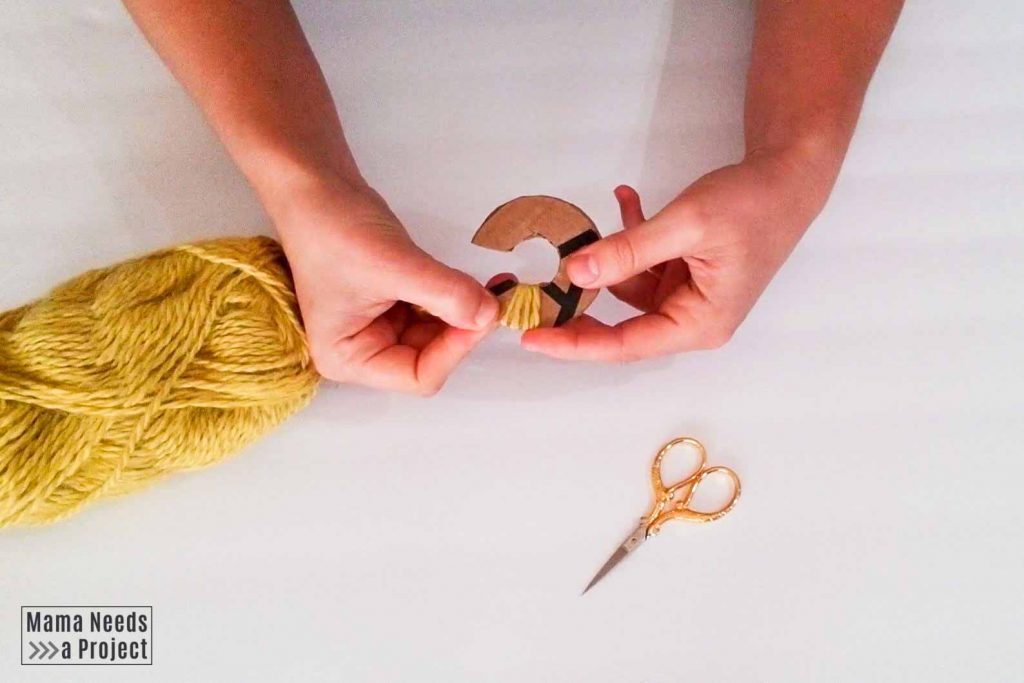
Wrap the yarn tight enough that it will not come off of the pom pom maker, but not so tight that it bends your cardboard.
Cover the entire template with yarn. The more yarn that you use, the fluffier your pom pom will be.
Once you have covered all of the cardboard with yarn, cut the end of piece of yarn so the pom pom maker is no longer attached to the yarn bundle/skein.
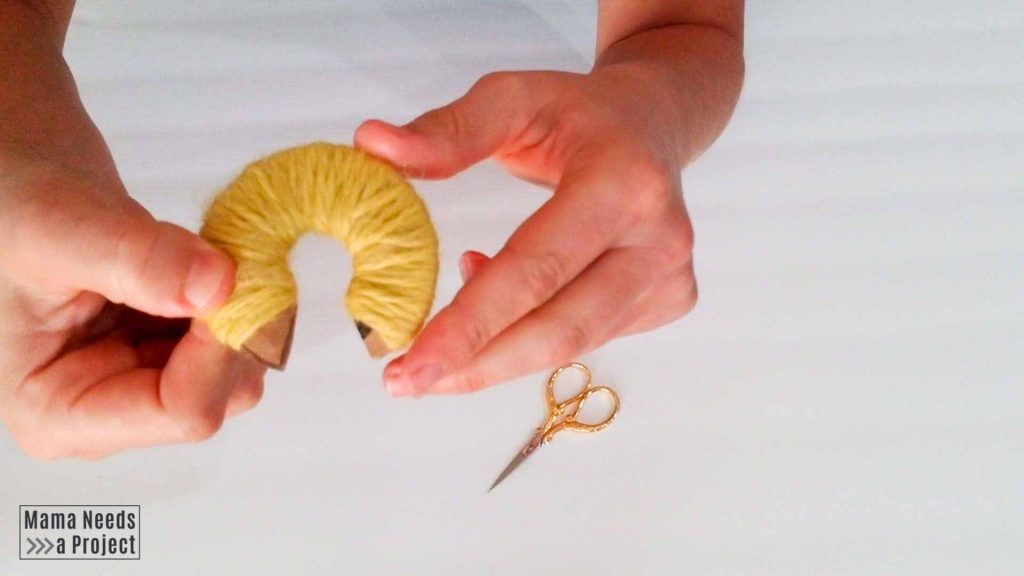
Cut around the outer edge
After the yarn is wrapped completely around the cardboard pom pom maker use fabric scissors to cut it.
Place your scissors on the outer edge of the pom pom maker between the two pieces of cardboard. Cut around the pom pom maker right in between the two pieces of cardboard.
As you’re cutting, use your thumb to keep the cut pieces of yarn in the center of the pom pom maker. This is a little more difficult with the smaller size pom poms because the yarn is so short, but it is much easier with the larger pom poms.
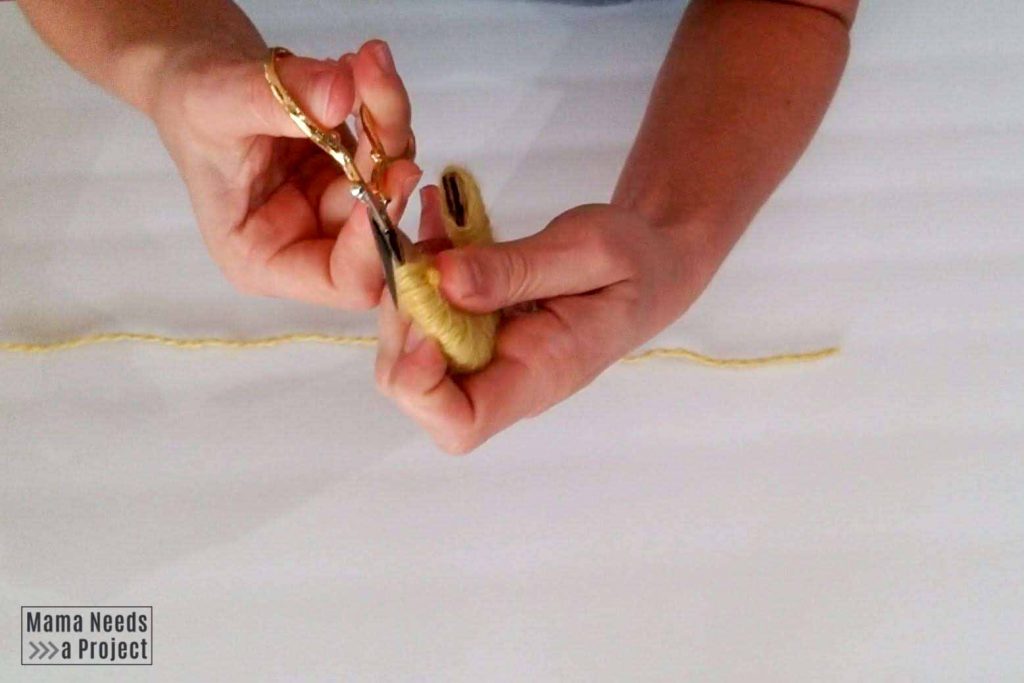
Tie it together
Next, grab some more yarn and wedge it in between the two pieces of cardboard. Wrap it around the pom pom a couple times and then pull it tight. You’ll start to see the cute little pom pom shape now!
When you’re pulling the yarn tight, be sure to hold on to the cardboard template with your other hand. If you don’t, the yarn will all go flying – I found this out the hard way.
Once you have your string tight, tie it in a knot right between the two pieces of cardboard. Then, you can remove your pom pom from the cardboard pom pom maker.
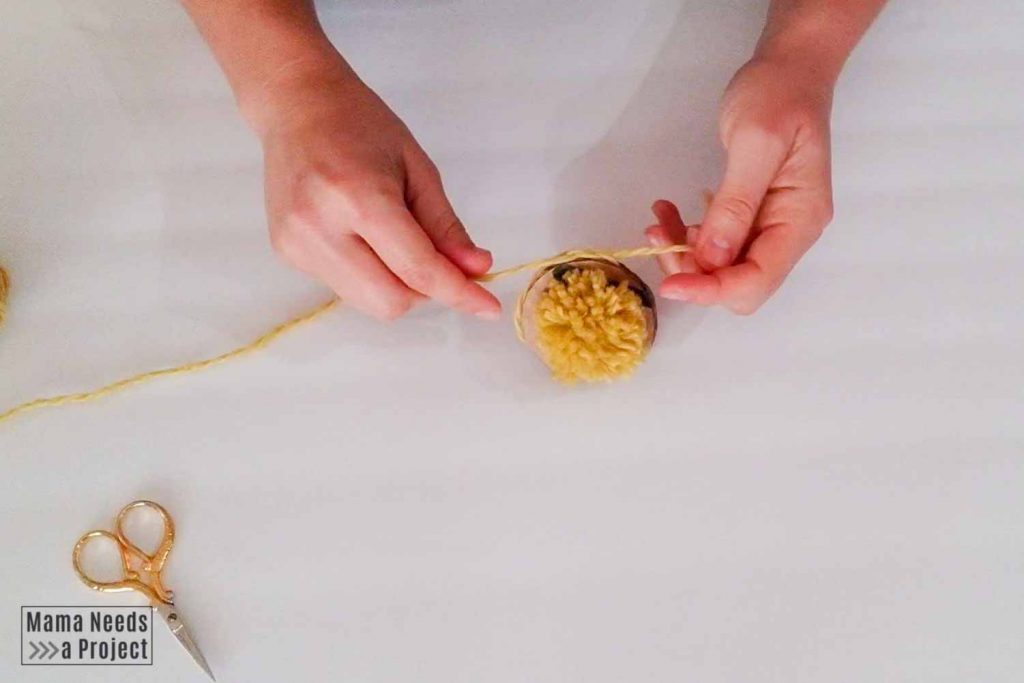
Leave the yarn from tying your pom poms together long. You will use this string to connect the pom poms to each other.
Make the Pom Pom Christmas Tree
After you have made one of each size pom pom, it’s time to connect them all together to create a little Pom Pom Christmas Tree.
Start with the largest pom pom. Take something small and sturdy, like a pencil or chopstick (or crazy straw in my case) and wrap one of the long pieces of yarn from the pom pom around the end of it. (For the rest of the instructions I’ll call it a pencil, but you can use anything.)
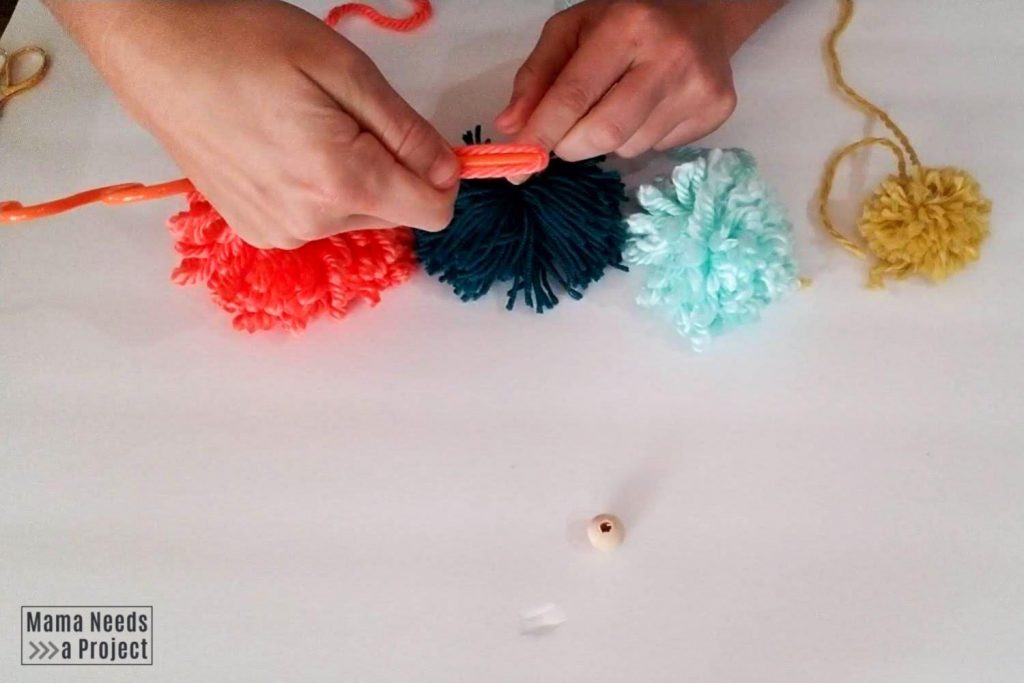
Then, use the pencil to push the yarn through the middle of the next size pom pom so that it goes under the piece of yarn holding that pom pom together.
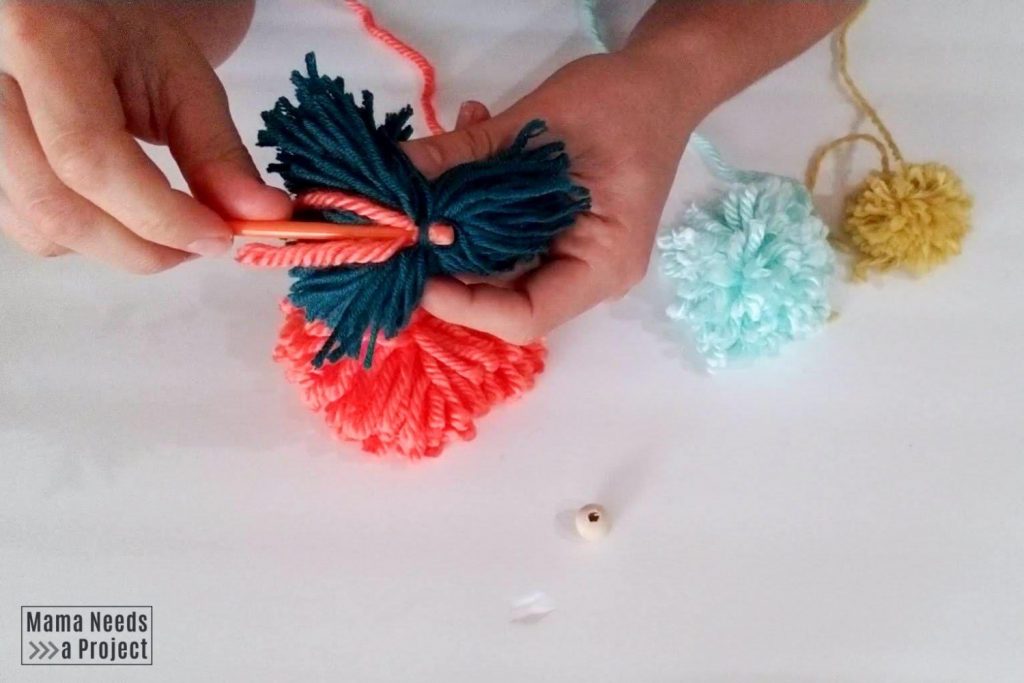
Pull the piece of yarn through and then tie it so that the two pom poms are connected.
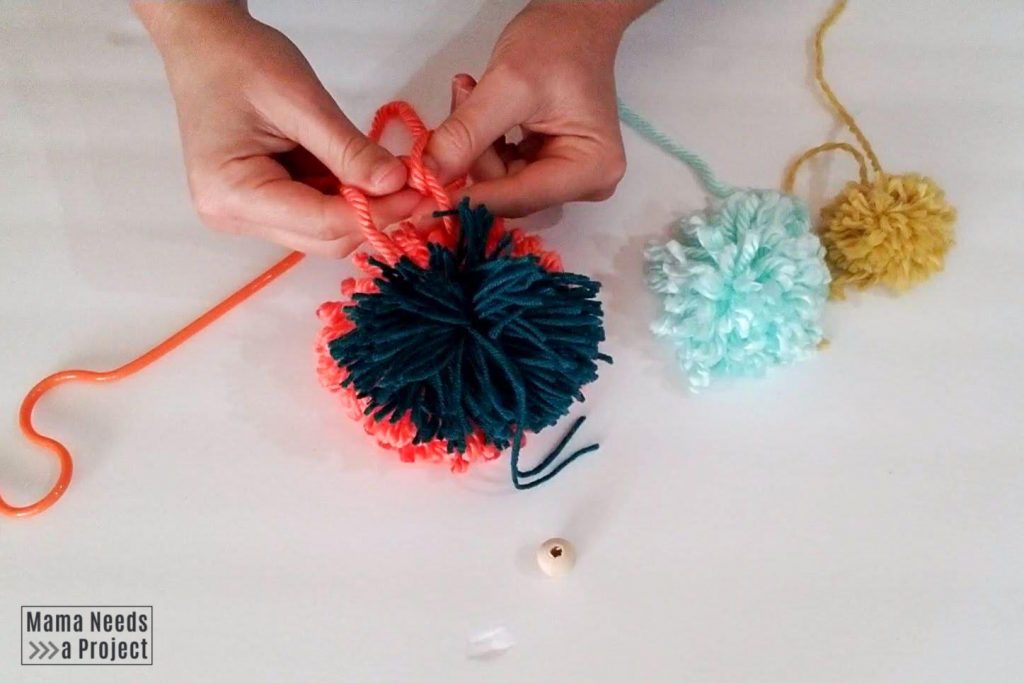
Repeat this with the next two pom poms to create your Pom Pom Christmas Tree.
Add Beads (optional)
After you attach your smallest pom pom to the top, you can add a little wooden bead on top of it to finish off your Pom Pom Christmas Tree.
In the DIY Pom Pom Christmas Tree Ornament tutorial I explained two ways to attach beads to yarn using a plastic straw. If you’re having trouble getting your beads onto the yarn, check out the end of that post for a full description on how to use a straw to make threading the beads super easy.
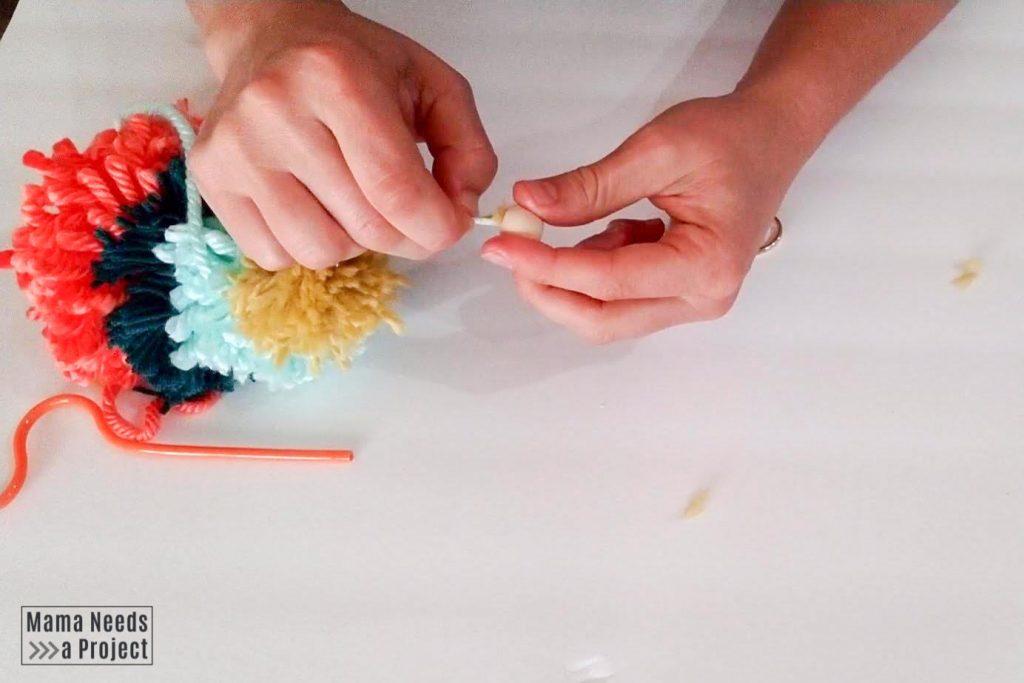
After you thread your bead onto the top of your Pom Pom Christmas Tree, tie a few knots to keep it in place. Then, trim all of the long pieces of yarn on the little tree and you’re done!
DIY Pom Pom Christmas Tree
These Pom Pom Christmas Trees are so silly and cute. I love the texture and I love the bit of humor in them. One of mine keeps flopping to the side like a Dr. Seuss tree and my son thinks it’s so funny! I hope you love these bright and happy Pom Pom Christmas Trees as much as I do!
I want to hear from you!
If you make some Pom Pom Christmas Trees, will you share them with me? I’d love to see! You can find me on Instagram and Facebook as @MamaNeedsaProject. Share your creations with me and you may just get featured!