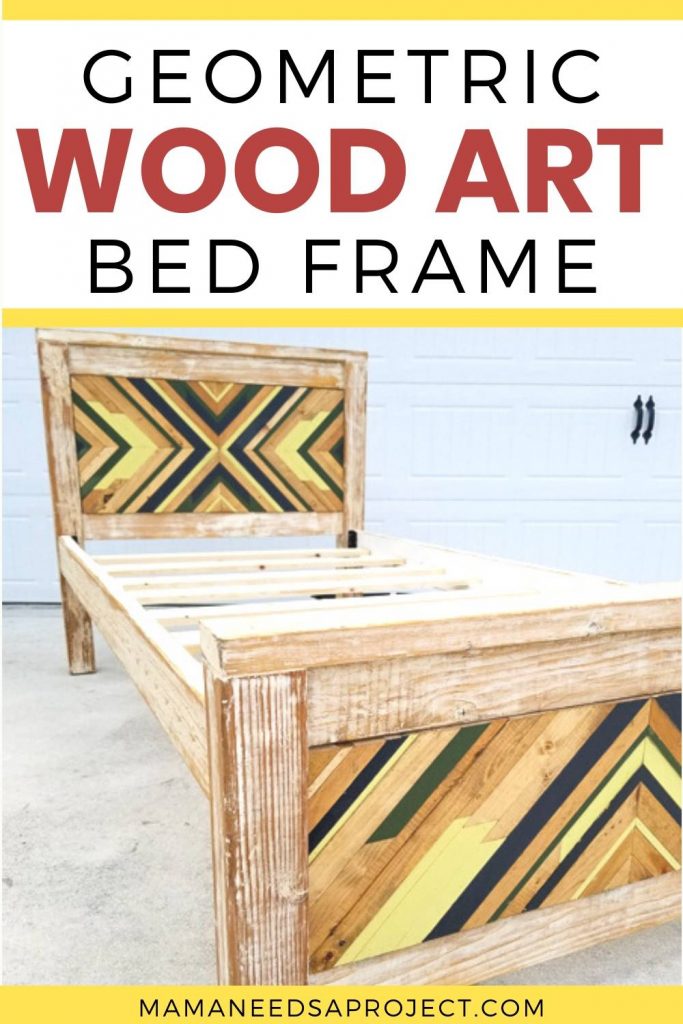
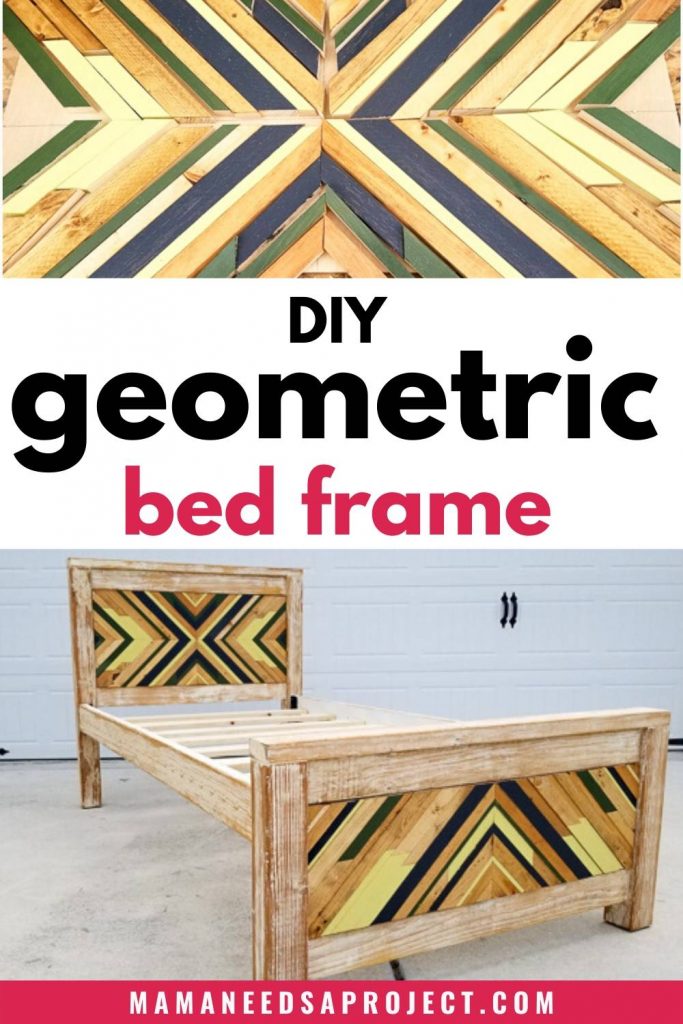
DIY Twin Bed Frame with Geometric Wood Art
Today I’m sharing with you a DIY Twin Bed Frame that I refinished for my son. He’s long past due for an upgrade from his toddler bed and the geometric wood design on this bed frame is going to be perfect in his new ‘big boy room’!
This project is actually only semi-homemade by me. The bed frame was gifted to me by some neighbors whose children had owngrown it. (Thank you again!) After doing a little Googling, I’m pretty sure it was built from these plans by Ana White.
Updating this sweet little bed was so fun for me! I very rarely work with pre-made furniture – honestly, I find it a lot more challenging than building from scratch.
Save to Pinterest!
DIY Twin Bed Frame
Since I didn’t build the frame myself I don’t have a tutorial for you on the construction of the frame, but you can find plans and lots of details here.
I love the drawers under the bed in the tutorial linked above and that might be something I add on later.
Remove Original Finish
The first thing I did to refinish this DIY twin bed frame was to remove the original finish.
I started by sanding. And sanding. And sanding. Have I ever mentioned how much I do not enjoy sanding??
The topcoat on the bed was super thick and it was taking FOREVER to sand through, so I started looking for another option.
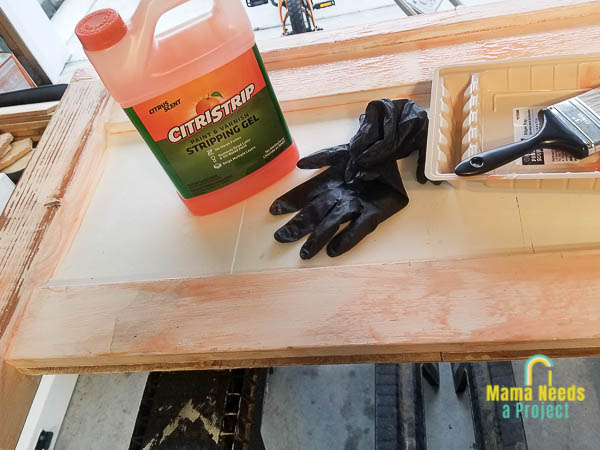
I decided to use Citistrip to help make the process a little faster. This was my first time using Citistrip and WOW I LOVE IT!
In the past I have used traditional paint stripper to remove finishes and it so hard to work with. From the intense chemical smell to the chemical burns it can leave on your skin – I absolutely hated using it and have been avoiding any kind of paint stripper for years.
I was pleasantly surprised (aka shocked) that I didn’t have any of these issues with Citistrip. No chemical smell, no headache, no burning skin and super easy to clean up. Plus, it actually works really well.
I used a paint brush to apply Citistrip to the frame, waited a couple hours and then came back with a metal scraper to remove the paint. It was so much better than sanding.
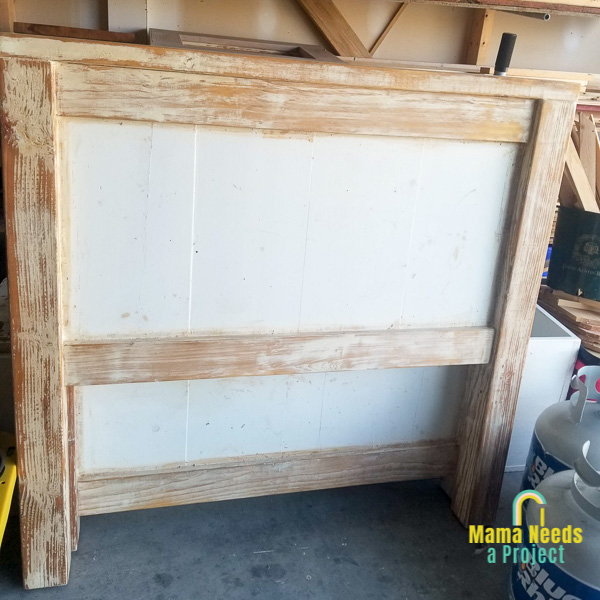
I decided to leave some of the white paint on the frame to give a chippy, rustic look. That’s not usually my style, but I actually love how it turned out. I think it’s perfect for a little boy’s room!
Stain Frame
After removing the finish and most of the paint from the bed frame I quickly sanded all the surfaces to smooth it out. Then I applied a coat of Minwax Golden Oak Stain. This is my favorite stain color right now.
And the bed frame was done and ready for the next step!
Geometric Wood Art
My original plan for this DIY twin bed frame was to add a quick coat of paint and call it a day. But, everytime I start a project I seem to find a way to add about a million extra steps.
So instead of just simple paint, I decided to add an inset geometric wood art piece to the headboard and the footboard. This part of the project is similar to the geometric wall art I made for my front porch and the Big X Wood Quilt I built a while back.
Supplies
- Scrap 1″ thick boards
- (2) sheets of 2’x4′ thin plywood
- wood glue
- brad nailer or pin nailer
- table saw
- miter saw
- circular saw
- wood stain
- paint
Cut Plywood to Size
Instead of creating the geometric pieces directly on the bed frame, I opted to make them on a piece of plywood backing and then attach them to the DIY twin bed frame.
I decided to do it this way so I didn’t have to measure each strip of wood to fit into the bedframe. It gave me more room for error and required less time spent cutting strips of wood to get an exact fit.
I purchased a couple thin (and super cheap) small sheets of plywood at a home improvement store. Then, I used my table saw to cut the plywood down to fit inside the frames of the headboard and the footboard.
Cut Scrap Wood into Strips
Next, I gathered all of the 1″ thick scrap wood in my garage and started cutting it down to 3/4″ – 1-1/2″ widths with my table saw. You can also try these best woods for bed frames.
I was trying to make this project as inexpensive as possible so I really didn’t want to have to buy lumber. With some serious digging through my scrap wood pile I was able to find enough cut off boards to complete the geometric wood art for the headboard and the footboard.
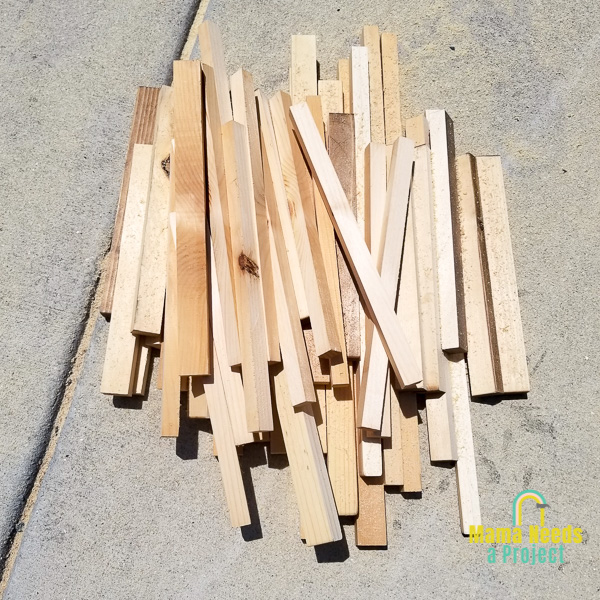
I used literally every single piece of 1″ thick scrap wood in the garage!
(We’re prepping for a move in about 1 month from now so I’m also counting this project as cleaning out the garage – hah!)
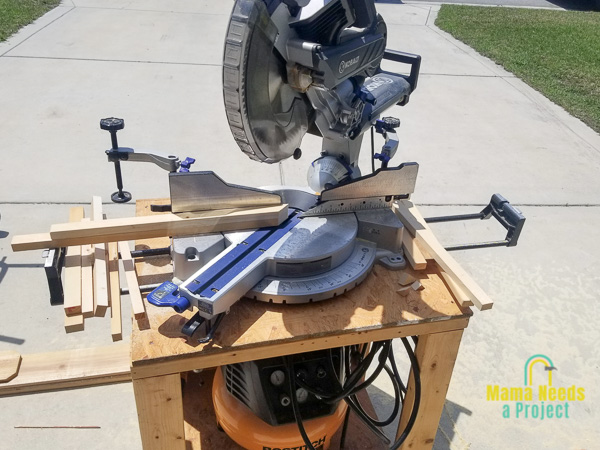
Cut Strips at 45 degree angle
Once I had a my big pile of wood strips, I started cutting the ends to a 45 degree angle using my miter saw.
For most of the pieces I just cut one end of the board. I left the boards at their original length instead of cutting them down.
Start Playing with Design
And after all of that prep, it was time for the fun part – creating the geometric design for the DIY twin bed frame.
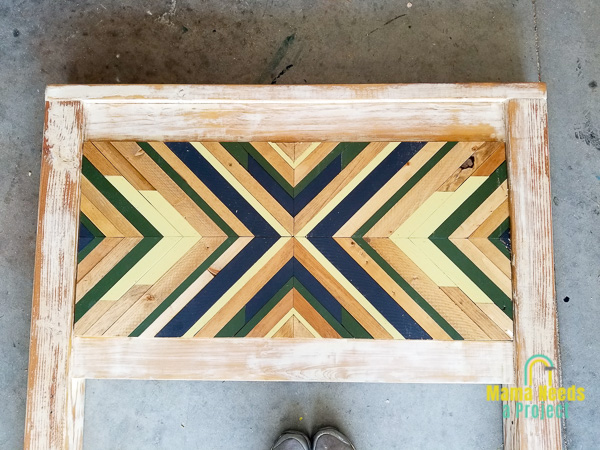
To start, I marked a line across the center of the heaboard plywood both vertically and horizontally.
Then, I started adding strips of wood along the lines with the mitered edges in the center. I didn’t have a real strategy here. I just moved pieces around until I liked the layout and tried to keep it symmetrical.
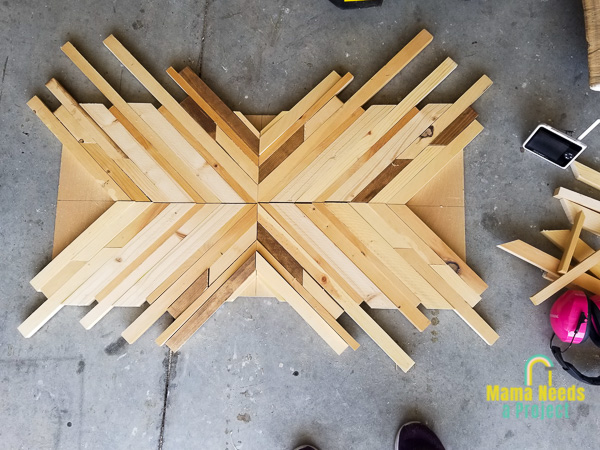
I didn’t secure any of the pieces down at this point, but just tried to get a visual for the final product.

I decided to do the headboard in an “X” design and the footboard in an up arrow design. I like how they are different designs, but still compliment each other.
Paint and Stain
Once I had a design I liked I started painting the wood strips for the geometric design.
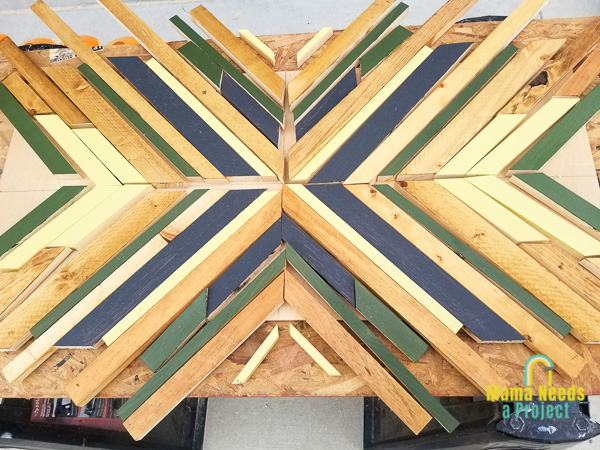
The dark gray and forest green paints I already had on hand. (The green is from my Basic Storage Shelf build.)
For the yellow I decided to get real adventurous and mix up my own color. I really wanted a mustard yellow, but all I had on hand was a super bright, sunshine yellow.
I learned that mixing paint colors is an art that I am far from mastering. I like the color I ended up with, but it is pretty far from what I was going for.
The only stain color I used was Minwax Golden Oak – the same as the bed frame. Because I used so many different pieces of wood I ended up with a lot of color variety even though I only used one stain color. Each piece of wood took the stain a little differently.
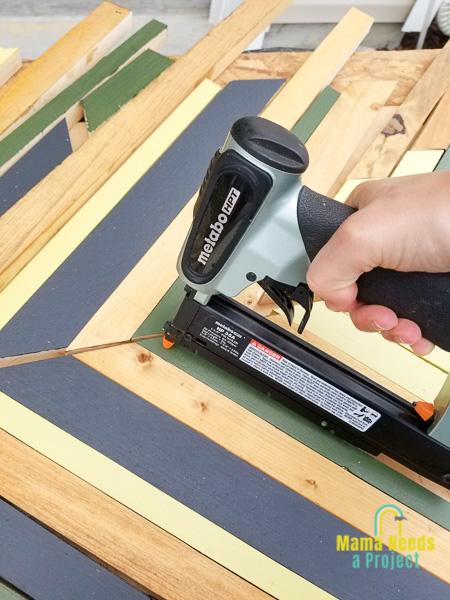
Nail Down Design
With the paint dry, I could really see how this design was coming together. Yay!
Next I started attaching the strips of wood to the plywood backing.
For this step I used wood glue and my pin nailer.
Trim the Edges
After attaching the wood strips to the plywood I trimmed off the overhanging strips with a circular saw.
Once I had all of the edges trimmed I put the geometric designs in the DIY twin bed frame to check for fit. Then I trimmed a little more where needed.
Put it All Together
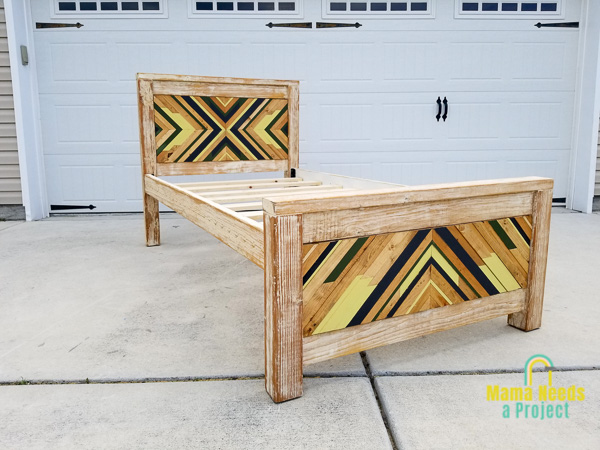
The very last step for this DIY twin bed frame update was to attach the geometric design to the headboard and footboard.
I used wood glue and wood screws to secure the geometric wood art to the bed frame. I decided to screw from the back of the headboard and footboard so that the screws wouldn’t be visible in the geometric design.
The back of the headboard will be against a wall so I’m not worried about covering up the screws there. I plan to attach some scrap plywood or other boards to the back of the footboard to hide the screws there.
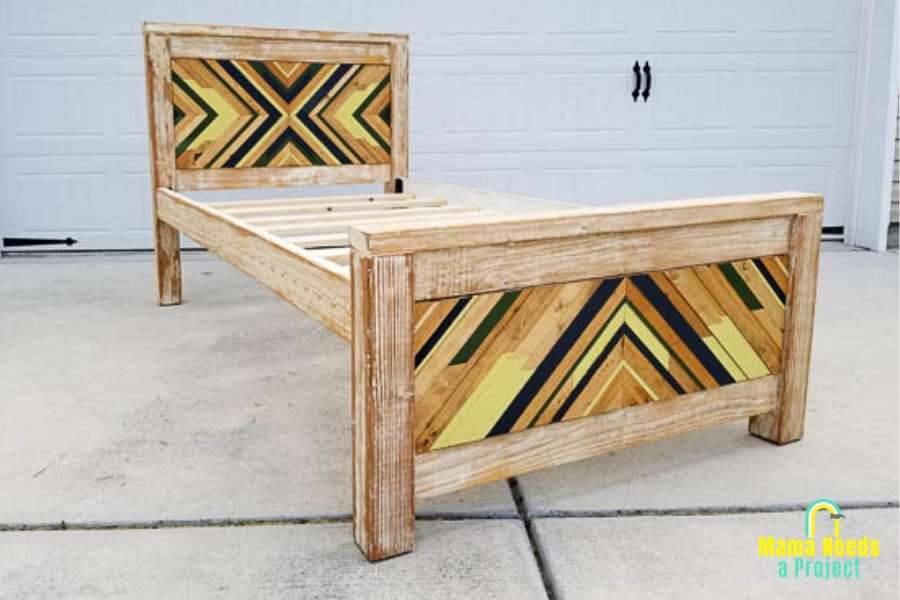
DIY Twin Bed Frame with Geometric Wood Art
This quick update turned into a long project, but I absolutely LOVE how it turned out! I’m so grateful to our neighbors for giving me the twin bed frame. With the gifted frame and use of scrap wood I was able to finish this whole project with only spending about $40!
I can’t wait to get this DIY twin bed frame into Charlie’s ‘big boy’ room!
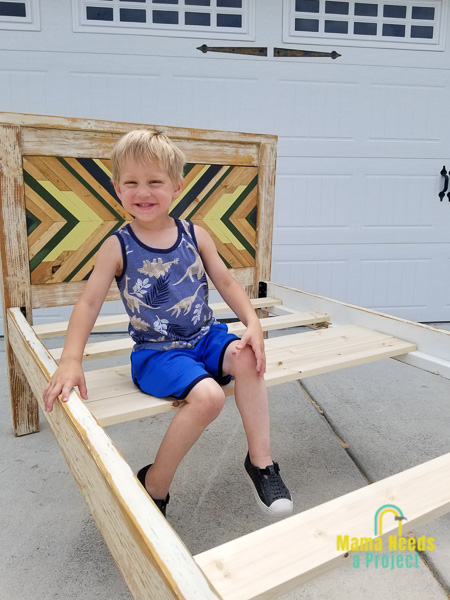
We’re moving in about a month so the plan has been to change out his bed once we get to the new house and he has a new room. But, he’s so excited we might just go ahead and move it into his room here.
I mean, why not carry a super heavy bed frame up a flight of stairs and assemble it only to take it all apart in a couple weeks?
This boy’s excitement completely melts my heart so it’s not going to take much more asking for that to happen.